Brand-Spanking New SNESp coming soon! Edit: Now with pics!
Moderator: Moderators


-
Turbo Tax 1.0
- Portablizer Extraordinaire
- Posts: 4773
- Joined: Wed Mar 30, 2005 6:19 pm
- Location: Delaware, no sales tax
- Contact:

-
atari2600a
- Posts: 1330
- Joined: Fri Jul 28, 2006 12:42 am
- Location: Schwarzeneggerville, CA
- Contact:
Damn, those NES buttons must be comfortable! I've always like NES buttons too much...
<a href="http://pokerapizzle.ytmnd.com/">YTMND: The Pokerap!</a>
<a href="http://mtac.profusehost.net/">http://mt ... st.net/</a>
<a href="http://mtac.profusehost.net/forum/index.php">MTAC Forums!</a>
<a href="http://mtac.profusehost.net/">http://mt ... st.net/</a>
<a href="http://mtac.profusehost.net/forum/index.php">MTAC Forums!</a>
-
Life of Brian
- Moderator
- Posts: 2867
- Joined: Wed Aug 03, 2005 5:55 pm
- Location: Oklahoma
- Contact:
What's an omi hug? Anyhoo, thank you very much for the compliments, guys. Yes, all I did was cut holes for the nintendo controller parts and hot glue/epoxy them in place from the back. I then bondo-ed the front very carefully (scraping away excess bondo) and sanded it as flush to the case as I could when it was dry. I used a fine grit sandpaper, but nothing too spectacular - I think it was like 216 or something like that. I've also found that NES controllers sand very easily - soft plasticShockSlayer wrote:You deserve a big Omi hug!!!!! *Gives omi hug*
Also, a note for ANYONE using engraving plastic for their portable - buy a soldering iron with an exacto knife attachment. Back when I first tried making an SNES, using an exacto knife by itself took forever and risked cracking the whole darned thing every time I broke a piece out. Now, it's just trace down the line with the soldering iron/exacto knife combo and then pop the piece out. It's a breeze - I made the front and back plates in under a half hour, from printing out the template to cutting to sanding.
However, DO NOT use it on a controller - the melting plastic smells HORRIBLE and is probably not good to be inhaling. However, engraving plastic gives off very little fumes or smell, so go for it.
The aluminum was quite easy to bend and then hot glue in place as I went along. You just got to use your manly hands to bend it in place! I used Ben's design for the NES case instead of the SNES case because A) it gave me the room I needed for little extras I'm putting in like video in and headphones and B) it's a hell of a lot easier to bend the metal to that shape.
Right now I'm working on the controls and the back plate, so nothing so dramatic as to warrant another picture right now.
More pictures to come when I get further along! I promise I'll keep you guys posted. Also, I seriously want to know what you guys think is better - the Nintendo SuperBoy or the Super Nintendo Stupendo!
dragonhead wrote:sweet. ive spent a third of my life on benheck!

Do they actually sell soldering iron exacto knife attatchments? Or do you mean that you just heated it up with the soldering iron and then sliced away the engraving plastic in the spots neeeded? Anywho, awesome Snesp!! I can't wait to see that baby donejoedog86 wrote:
Also, a note for ANYONE using engraving plastic for their portable - buy a soldering iron with an exacto knife attachment.
Minktendo-Dead
Next portable: who knows
Next portable: who knows


-
Life of Brian
- Moderator
- Posts: 2867
- Joined: Wed Aug 03, 2005 5:55 pm
- Location: Oklahoma
- Contact:
Minkster - I found a soldering iron at a local hardware store (Westlake Ace Hardware, to be exact) that had an exacto knife attachment that came with it that just screws in where the tip goes. It was a cool find and I knew that it would be handy so I picked it up. It works absolutely fantastic for slicing up engraving plastic.
dragonhead wrote:sweet. ive spent a third of my life on benheck!

-
Life of Brian
- Moderator
- Posts: 2867
- Joined: Wed Aug 03, 2005 5:55 pm
- Location: Oklahoma
- Contact:
-
Life of Brian
- Moderator
- Posts: 2867
- Joined: Wed Aug 03, 2005 5:55 pm
- Location: Oklahoma
- Contact:
Update! Time for some delicious new pictures!
Before adding battery compartments...
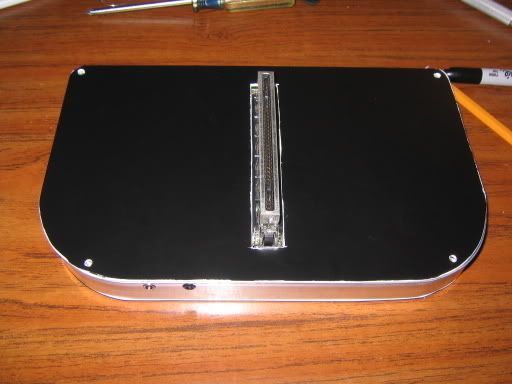
Testing to see if it's still working
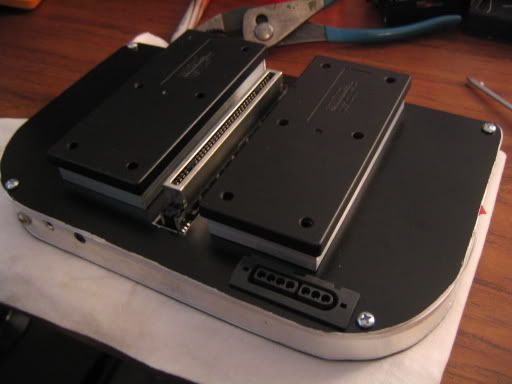
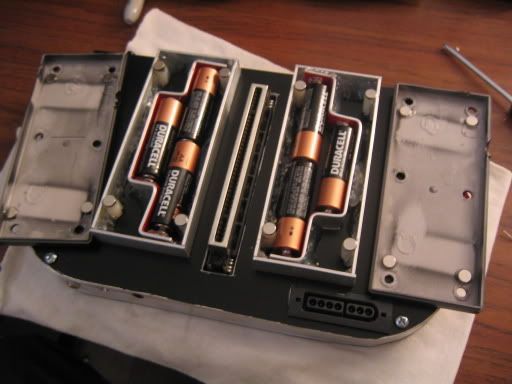
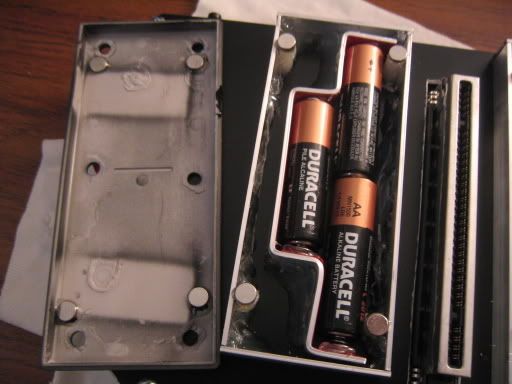
The new battery compartments! Yes, it's the back of the NES controllers. I'm like an Indian of the Great Plains - I use every part of the buffalo
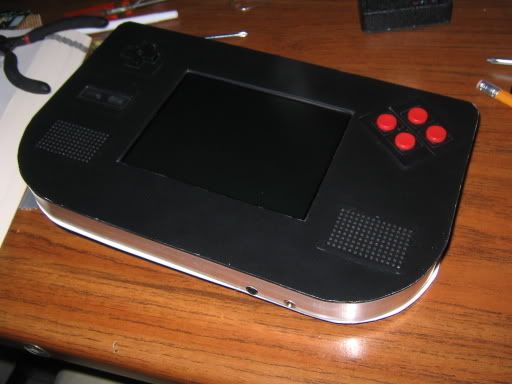
A pic with the screen in. The back actually lines up better than it looks like in this picture. I don't think the back's even screwed in place here... When I'm done I'll sand all the edges flush with the aluminum sides.
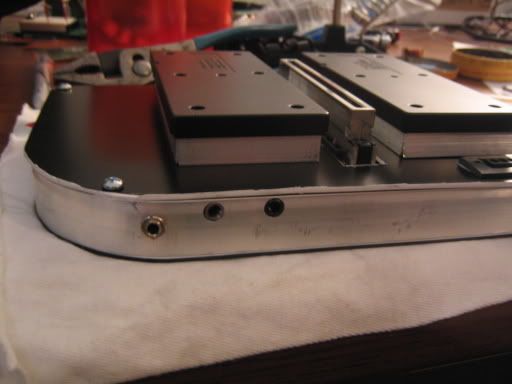
From left to right, it's the power, headphone, and A/V jacks.
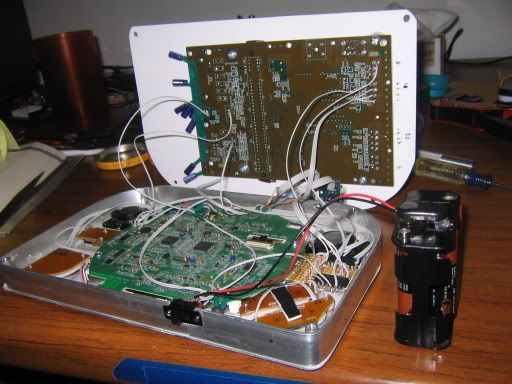
A look under the hood. Isn't hot glue great? I used epoxy to hold in the Rare Earth magnets - they hold on really really tight. Notice the player 2 port... couldn't fit THAT into Ben's SNES design, now could we?
Ha ha, I used two pieces of scrap wood to hold the controllers up off the ground when I was spray painting.
The only things you can't see in these pics are the shoulder buttons, which I guess you'll just have to wait until I produce the "finished" pics in the News section to see.
Ah, one last thing - I LED modded the screen with four 10,000 mcd LEDs and I used the brightness mod. The only problem I'm facing now is screen distortion with bass from the audio. It's driving me nuts and I don't understand how to copy what segasonicfan did in isolating the grounds of the audio circuit. Any help would be appreciated.
Before adding battery compartments...
Testing to see if it's still working
The new battery compartments! Yes, it's the back of the NES controllers. I'm like an Indian of the Great Plains - I use every part of the buffalo
A pic with the screen in. The back actually lines up better than it looks like in this picture. I don't think the back's even screwed in place here... When I'm done I'll sand all the edges flush with the aluminum sides.
From left to right, it's the power, headphone, and A/V jacks.
A look under the hood. Isn't hot glue great? I used epoxy to hold in the Rare Earth magnets - they hold on really really tight. Notice the player 2 port... couldn't fit THAT into Ben's SNES design, now could we?
Ha ha, I used two pieces of scrap wood to hold the controllers up off the ground when I was spray painting.
The only things you can't see in these pics are the shoulder buttons, which I guess you'll just have to wait until I produce the "finished" pics in the News section to see.
Ah, one last thing - I LED modded the screen with four 10,000 mcd LEDs and I used the brightness mod. The only problem I'm facing now is screen distortion with bass from the audio. It's driving me nuts and I don't understand how to copy what segasonicfan did in isolating the grounds of the audio circuit. Any help would be appreciated.
Last edited by Life of Brian on Fri Aug 11, 2006 10:36 pm, edited 1 time in total.
dragonhead wrote:sweet. ive spent a third of my life on benheck!

-
Life of Brian
- Moderator
- Posts: 2867
- Joined: Wed Aug 03, 2005 5:55 pm
- Location: Oklahoma
- Contact:
Actually, I am going to paint the sides. I just haven't finished everything else yet, so I haven't sanded the edges flush with the sides, and I can't paint before that. So I guess that means I get your approval! I'm also thinking about adding some sort of border around the edge of the screen to minimize the uneven-ness of the cut. I'm thinking of either a thin silver or red border around the screen would look nice.
dragonhead wrote:sweet. ive spent a third of my life on benheck!