Org NES
How would I go about do this?
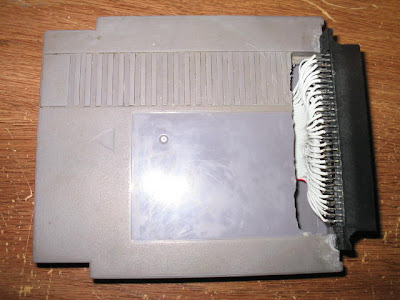
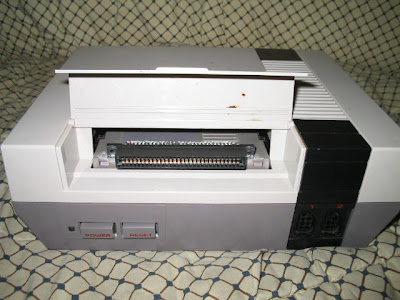
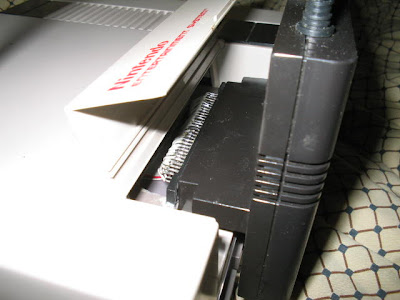
I want to make a custom (non portable) case. It would be much easier if I made it a top loader
Relocate NES game connector?
Moderator: Moderators
-
TomKStones
- Posts: 132
- Joined: Sun Jun 13, 2010 5:41 am
- 360 GamerTag: TomKStones
- Location: Australia
Re: Relocate NES game connector?
I've never done that before but;
EDIT: I am an idiot. The cart slot thingy is U not N shaped, the result of my instrustions above would be have the wires smooshed against the top of the case. Qlue the original connector to the bottom where you want it to sit (and it is not touching metal) and cut the slot.
Link: some people who aren't idiots:
forums.benheck.com Modding a front loading NES into a top loading NES
benheck.comDie Zero Insertion Force Cartridge Slot! DIE DIE DIE!
NIstead to putting the other end in the cradle, point them through the top.
Spoiler:
Link: some people who aren't idiots:
forums.benheck.com Modding a front loading NES into a top loading NES
benheck.comDie Zero Insertion Force Cartridge Slot! DIE DIE DIE!
NIstead to putting the other end in the cradle, point them through the top.
-
TomKStones
- Posts: 132
- Joined: Sun Jun 13, 2010 5:41 am
- 360 GamerTag: TomKStones
- Location: Australia
Re: Relocate NES game connector?
Thats a lot more confusing then I thought it would be...
& $30 shipping is just a bit too much.
EDIT
I guess it is kinda "U-Shaped".

Solder wires to mobo?
& $30 shipping is just a bit too much.
EDIT
I guess it is kinda "U-Shaped".
Solder wires to mobo?
Re: Relocate NES game connector?
You can solder to the metal bars that form the bottom of the U, this way you could remove the wires later and put things back the way they were if something goes wrong.
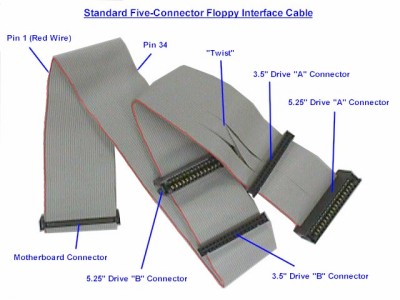
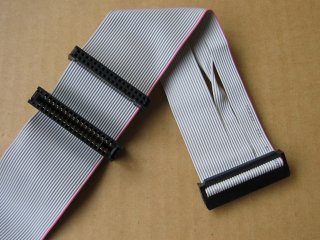
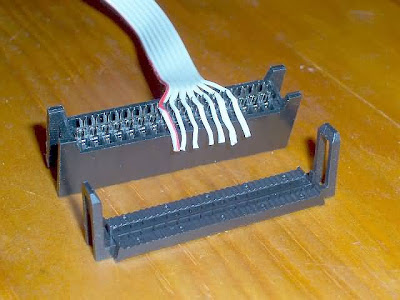
Actually; if you could find a couple of old PC-Floppy-Drive cables with the card-edge connectors you could cut the sides out and avoid soldering alltogether.
Open benheck.comSoup up your old 8-bit NES and scroll down to "Die Zero Insertion Force Cartridge Slot! DIE DIE DIE!"
Ben's replaced the pseudo-ZIF connector with the floppy cables, though I suspect that he had rewire them to flip top and bottom row.
With longer wires you could put and point that anywhere you like.
Can someone confirm that the NES-ZIF connector flips top and bottom?
-
TomKStones
- Posts: 132
- Joined: Sun Jun 13, 2010 5:41 am
- 360 GamerTag: TomKStones
- Location: Australia
Re: Relocate NES game connector?
After minutes of "googling", I found this.
http://forums.benheck.com/viewtopic.php ... w=previous" onclick="window.open(this.href);return false;
Conveniently located at BenHeck's very own forums.
~~~
I found THIS.
But they appear to only have output.
http://forums.benheck.com/viewtopic.php ... w=previous" onclick="window.open(this.href);return false;
Conveniently located at BenHeck's very own forums.
~~~
I found THIS.
But they appear to only have output.
Re: Relocate NES game connector?
Sorry, I'm not communicating very well.
(using floppy cables)long
(the original U adaptor)
there is one slight problem with this plan however:
 unless all of the wires cross then the label will point to the back.
(using floppy cables)long
Spoiler:

Spoiler:
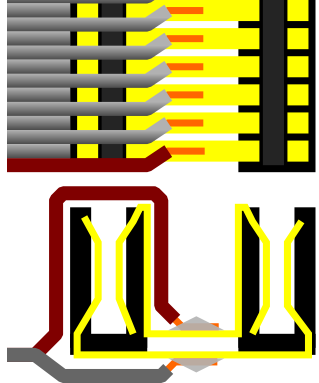 unless all of the wires cross then the label will point to the back.
-
TomKStones
- Posts: 132
- Joined: Sun Jun 13, 2010 5:41 am
- 360 GamerTag: TomKStones
- Location: Australia
Re: Relocate NES game connector?
You're communicating good, it's just I'm new to this stuff, and don't understand it at all.
Using the floppy drive cable's looks much more harder then I thought it would be, what happens if the games had all 72 Pins? They wouldn't work then wouldn't they?
If I did the original connector, I'd only need 36 cables right?
Using the floppy drive cable's looks much more harder then I thought it would be, what happens if the games had all 72 Pins? They wouldn't work then wouldn't they?
If I did the original connector, I'd only need 36 cables right?
Re: Relocate NES game connector?
Thanks;
Yes, if there was some game that uses all 72 pins than it would not work; however the EXPansion bus is not used, but for two documented exceptions[1] the Miracle Keyboard Piano Teaching System, and the Baton Teleplay System. The consensus is that NTSC and PAL NES do not have any games or peripherals that use the expansion port (or its bits)[2].
No, you would need more than 26 cables.
While the EXPansion bus is not present in Famicom, or clone systems. skipping the 10 pins of the expansion bus you would need 62 wires since there are two rows of pins/fingers in the connectors (top and bottom) in 36 pairs.
edit:
It's unfortunate that card extenders are now digikeyridiculously expensive, if they cost what they did 15 years ago you could just pop one in to your cart slot and have an instant top loader.
hmm...Unless I've gotten GND and CLK/5V confused.
-
TomKStones
- Posts: 132
- Joined: Sun Jun 13, 2010 5:41 am
- 360 GamerTag: TomKStones
- Location: Australia
Re: Relocate NES game connector?
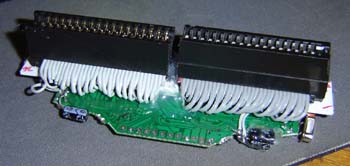
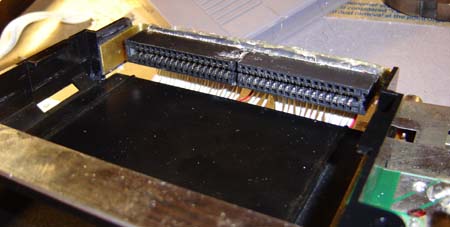
I would prefer full compatibility. 72 wires from the connector to the mobo seems like the only way.
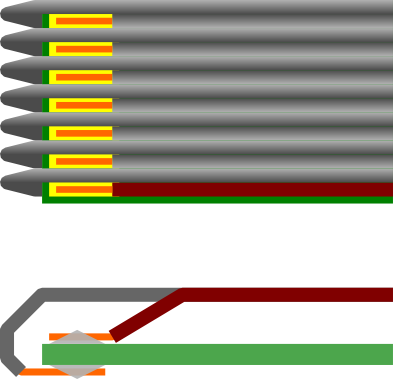
Umm, what does that picture mean :S
Umm, what does that picture mean :S
Re: Relocate NES game connector?
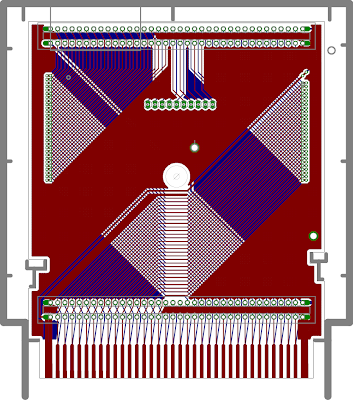
72 wires it is.
The picture is of a hypothetical 'cartridge' that would plug into an unmodified NES extending it to where the cover is.
It also rotates the port 180° so that the label would face forwards. it is incompatible with the original cover, not terribly cost effective, and only has 62/72 pins because I am lazy, and I don't have a physical cartridge to measure.
Similar to drk421's nesdev.parodius.com72-NES/60-Famicom adaptor, this design moves the cart connection point forwards. (images)
Spoiler:
-
nevermind1534
- Senior Member
- Posts: 1977
- Joined: Fri Feb 06, 2009 1:36 pm
- Steam ID: nevermind1534
- Location: Detroit, MI
- Contact:
Re: Relocate NES game connector?
I have a game genie that I could include with an NES board. That would have the cartridge connector on it.
Kyo wrote:"does anyone here know how to fly a plane?"
"STAND BACK EVERYBODY, I HAVE A FAKE ID"
-
TomKStones
- Posts: 132
- Joined: Sun Jun 13, 2010 5:41 am
- 360 GamerTag: TomKStones
- Location: Australia
Re: Relocate NES game connector?
That wouldn't make it a "toploader" would it though? It would just extend the port forward a-bit?nevermind1534 wrote:I have a game genie that I could include with an NES board. That would have the cartridge connector on it.
Using the cart as a connector's looks like a pretty good idea, but it still wouldn't be a "toploader".
-
nevermind1534
- Senior Member
- Posts: 1977
- Joined: Fri Feb 06, 2009 1:36 pm
- Steam ID: nevermind1534
- Location: Detroit, MI
- Contact:
Re: Relocate NES game connector?
You'd still have to connect the game genie to the contacts on the NES's motherboard, but if you did that, it would make it a top loader (depending on where you decide to mount it).
Kyo wrote:"does anyone here know how to fly a plane?"
"STAND BACK EVERYBODY, I HAVE A FAKE ID"
-
TomKStones
- Posts: 132
- Joined: Sun Jun 13, 2010 5:41 am
- 360 GamerTag: TomKStones
- Location: Australia
Re: Relocate NES game connector?
How does the game genie connect? vertically?
Re: Relocate NES game connector?
The Game genie connects horizontally (in line with the original cartridge port) however it contains the same digikey.comfemale card edge connector that can be soldered upright to make a top loading extension cartridge (heck you could even cut all the traces and use it for the male connector too.