The Afternoon projects thread.
Moderator: Moderators
-
snowpenguin
- Posts: 1306
- Joined: Thu Jun 11, 2009 4:10 pm
Re: The Afternoon projects thread.
By the point the solder fumes get through the fan, you can't even see them anymore. It works from pretty far away, so more than a foot.
-
snowpenguin
- Posts: 1306
- Joined: Thu Jun 11, 2009 4:10 pm
Re: The Afternoon projects thread.
Here's another pic just in case anyone cares.

Hot glue globs. SS style.
Hot glue globs. SS style.
-
ShockSlayer
- Niblet 64
- Posts: 5059
- Joined: Thu Jun 29, 2006 12:47 pm
- Location: In my inbox.
Re: The Afternoon projects thread.
http://twitter.com/ShockSlayer" onclick="window.open(this.href);return false;
-
nic8082242
- Posts: 266
- Joined: Fri Nov 09, 2007 5:54 pm
- PSN Username: ncmlls
- Location: In the Hills,Oklahoma
Re: The Afternoon projects thread.
Added some old computer Speakers to my bag where you can't see them only here them and see the 3.5mm line in jack coming from pocket. Speakers suck and pick up interfearance when cell is getting a text or call, think I'm gonna replace the speakers

Re: The Afternoon projects thread.
You'd need a lot more than that for it to even be close to SS style.snowpenguin wrote:Hot glue globs. SS style.
Making stuff with my new beautiful CNC machine!
Would you like a professional looking custom case for your portable? I may be able to help you. Check out this link:
http://forums.benheck.com/viewtopic.php?f=13&t=32724
Would you like a professional looking custom case for your portable? I may be able to help you. Check out this link:
http://forums.benheck.com/viewtopic.php?f=13&t=32724
-
schmellyfart
- Portablizer Extraordinaire
- Posts: 1151
- Joined: Sun Mar 05, 2006 8:29 pm
- Steam ID: schmellyfart
- Location: Gilbert, AZ
Re: The Afternoon projects thread.
Just finished installing an aftermarket downpipe this afternoon.


Re: The Afternoon projects thread.

N64, PS2, and Wii. One power cord, one A/V connection.
~spinout
spinout182.com
spinout182.com
-
ttsgeb
- Posts: 155
- Joined: Mon Feb 25, 2008 9:19 pm
- 360 GamerTag: ttsgeb
- Steam ID: ttsgeb
- Location: behind you, don't look, I'll just be behind you.
Re: The Afternoon projects thread.
so how's that set up, is there a switch in there for the av, or is it just whatever's on with all consoles going directly to a single output. Also, if there is a switch, does it apply to the consoles power as well so only one is on at a time, or did you just grab an extension cord with a 3 way split and stick all the consoles and their power supplies in one big box?
Re: The Afternoon projects thread.
The user has to have the 2 ounces of brains it takes to figure out not turn more than one on at a time, LoLttsgeb wrote:so how's that set up, is there a switch in there for the av, or is it just whatever's on with all consoles going directly to a single output. Also, if there is a switch, does it apply to the consoles power as well so only one is on at a time, or did you just grab an extension cord with a 3 way split and stick all the consoles and their power supplies in one big box?
~spinout
spinout182.com
spinout182.com
-
bicostp
- Moderator
- Posts: 10491
- Joined: Mon Mar 07, 2005 5:47 pm
- Steam ID: bicostp
- Location: Spamalot
- Contact:
Re: The Afternoon projects thread.
I bought an El Cheapo digital camera tripod at Dollar Tree today and made this:

Tada?
Building was really simple:
1. Chop the part the camera attached to off with a dovetail saw (hacksaw goes too slow through rubbery plastic)
2. Make dents where the screws will go to make screwing them in easier
3. Using a socket screwdriver, start screwing self-tapping sheet metal screws into the tripod legs. (This doubled the amount of metal in the unit. )
)
4. Find that the rubbery plastic feet are solid and go up the leg about half an inch. (They feel really solid.)
5. Repeat on the other side.
6. Cut the tapping parts off 2 of the screws so the threads can bite better. (If I left them on, maybe 1 or 2 threads would make it in. )
)
7. Install screws
Eventually I'll probably add some rubber gasket-in-a-tube to the threads for thinner things, but the flanges on the screws fit into a plastic seam on the PDA and hold it really well. (It's much thicker and heavier than an iPhone/iPod Touch, so if you have one of those and want to build a pocketable stand for it on the cheap, here you go!) The legs swivel out, but by virtue of cheap engineerin, the legs with the screws can turn on the plastic hinge parts, so the screws are always in alignment! The top could use some epoxy as well, just to make sure it stays put.
It's not comfortable to use the touchscreen on (wobbles a little, and the feet have almost no grip), but it's great for watching videos!

No the LCD doesn't look nearly this bad in real life.
Total build time: About 15 minutes.
Tada?
Building was really simple:
1. Chop the part the camera attached to off with a dovetail saw (hacksaw goes too slow through rubbery plastic)
2. Make dents where the screws will go to make screwing them in easier
3. Using a socket screwdriver, start screwing self-tapping sheet metal screws into the tripod legs. (This doubled the amount of metal in the unit.
4. Find that the rubbery plastic feet are solid and go up the leg about half an inch. (They feel really solid.)
5. Repeat on the other side.
6. Cut the tapping parts off 2 of the screws so the threads can bite better. (If I left them on, maybe 1 or 2 threads would make it in.
7. Install screws
Eventually I'll probably add some rubber gasket-in-a-tube to the threads for thinner things, but the flanges on the screws fit into a plastic seam on the PDA and hold it really well. (It's much thicker and heavier than an iPhone/iPod Touch, so if you have one of those and want to build a pocketable stand for it on the cheap, here you go!) The legs swivel out, but by virtue of cheap engineerin, the legs with the screws can turn on the plastic hinge parts, so the screws are always in alignment!
It's not comfortable to use the touchscreen on (wobbles a little, and the feet have almost no grip), but it's great for watching videos!
No the LCD doesn't look nearly this bad in real life.
Total build time: About 15 minutes.
Twitter
http://www.pcwgaming.com" onclick="window.open(this.href);return false;
If you want a Dropbox account, please use my referral link
http://www.pcwgaming.com" onclick="window.open(this.href);return false;
If you want a Dropbox account, please use my referral link
-
banditpaw1
- Portablizer
- Posts: 617
- Joined: Mon Apr 13, 2009 6:46 pm
- Location: CONNECTICT
-
Michaelthurston
- Posts: 281
- Joined: Wed Jun 24, 2009 1:28 pm
- Steam ID: MichaelThurston
- Location: Texas
Re: The Afternoon projects thread.
After Seeing the "SegaMegaTV" by Dragonhead, I decided to start on one myself,
Here it is so far, roughly put together.
It just uses the trimmed mobo, and the top half of the case, Controller ports stick out of the top of the TV.
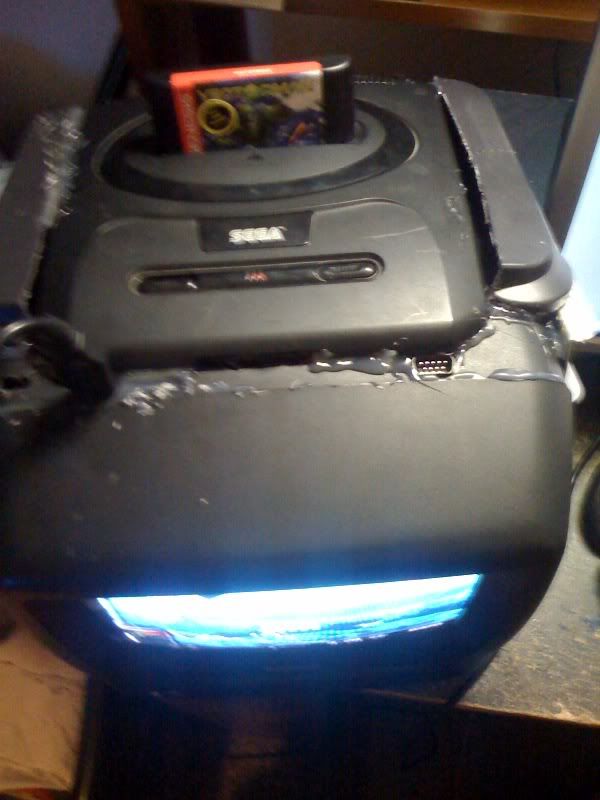
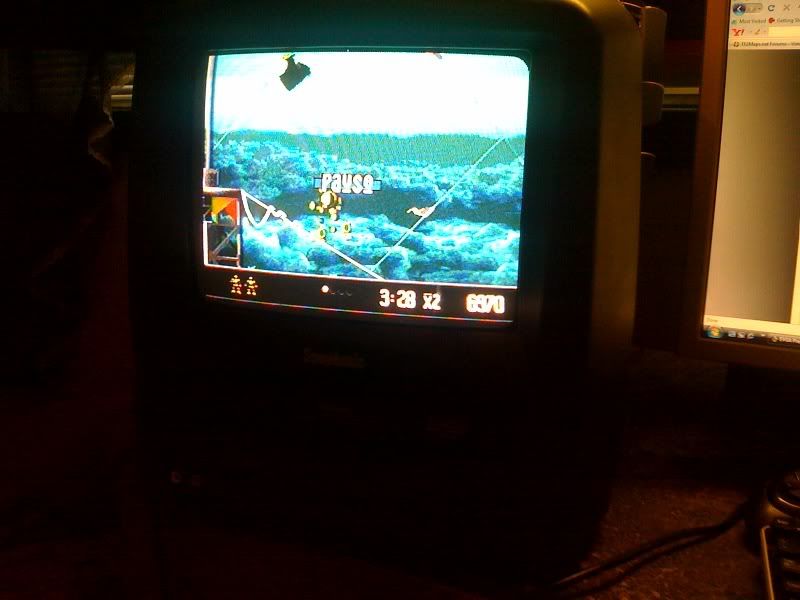
Sorry for the blurry pics, just in a rush.
And yes i know it looks horrible right now, I dont have any bondo xD
Here it is so far, roughly put together.
It just uses the trimmed mobo, and the top half of the case, Controller ports stick out of the top of the TV.
Sorry for the blurry pics, just in a rush.
And yes i know it looks horrible right now, I dont have any bondo xD
Completed Projects:
Un-named N64p
Abstract 64
Abstract 64 v.2
Rcube
Thursty64
No. More. Commissions.
Currently Owned(In Response to WeaponEpsilon):
21 Platforms; 38 Individual Consoles; 380 Singular games(0 Duplicates!)
Un-named N64p
Abstract 64
Abstract 64 v.2
Rcube
Thursty64
No. More. Commissions.
Currently Owned(In Response to WeaponEpsilon):
21 Platforms; 38 Individual Consoles; 380 Singular games(0 Duplicates!)
-
Super Cameraman
- Posts: 1123
- Joined: Mon Feb 27, 2006 6:25 pm
Re: The Afternoon projects thread.
I arranged the Pokemon theme for a marching band. Hopefully we'll be able to play it.
Here's a sort of crappy MIDI-ish file if you want to hear what it sort would sound like. Hopefully if we play it, I'll get a decent recording.
Here's a sort of crappy MIDI-ish file if you want to hear what it sort would sound like. Hopefully if we play it, I'll get a decent recording.
If you're looking at this post and it was made before 2008, just ignore it.
-
ttsgeb
- Posts: 155
- Joined: Mon Feb 25, 2008 9:19 pm
- 360 GamerTag: ttsgeb
- Steam ID: ttsgeb
- Location: behind you, don't look, I'll just be behind you.
Re: The Afternoon projects thread.
I made a fedora. . . out of duct tape, took me 4 hours last weekend. Anyways. . . I also took a picture with my webcam and made it look all special like.

also, that's a great job arranging the pokemon theme. I'm not a big fan of pokemon, but that was quite nice. I would have CC, but I'm keeping in mind that it's meant for a marching show. . .
also, that's a great job arranging the pokemon theme. I'm not a big fan of pokemon, but that was quite nice. I would have CC, but I'm keeping in mind that it's meant for a marching show. . .
-
stuntpenguin007
- Posts: 667
- Joined: Sun Apr 27, 2008 12:21 pm
Re: The Afternoon projects thread.
I made a solder fume intake fan like snowpenguin's. I'm really impressed. I can't even smell them anymore, and It's pretty cool how the smoke goes rushing away from you.
It's made up of a 12v power brick, a gamecube power switch and an xbox fan.
@snowpenguin - the smoke seems to go up to the handle of the soldering iron before going off through the fan. Have you noticed this? Maybe it's just where I'm positioning the fan.
Thanks for the idea. This should save a few headaches.
SNESP WIP
Case - 50%
acquired parts - 90%
assembly - 0%
Case - 50%
acquired parts - 90%
assembly - 0%