The Retro64 Worklog. NEWS: Finished! Got nice pics!
Moderator: Moderators
-
jjhammerstein
- Senior Member
- Posts: 1562
- Joined: Tue Nov 18, 2008 7:15 pm
- Location: Southern CT
- Contact:
Is that the same as in a first party PS2 controller, do you know?
Also, could you measure the height of the bottom section for me?
Also, could you measure the height of the bottom section for me?
GET FREE WOW GOLD SEX VISIT MODRETRO
-
Sun-Wukong
- Posts: 225
- Joined: Tue Aug 26, 2008 4:58 pm
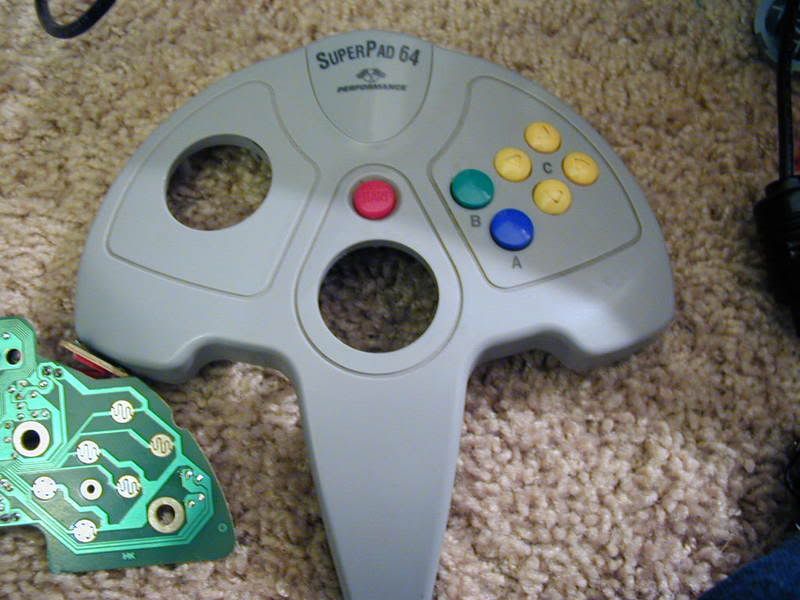
I have that exact same controller.Mario wrote:I have the 3rd party controller I plan to use, it is called a Superpad 64. The board inside is quite large, but the cool thing about this controller is that most of it can be removed. The left and right sides can be chopped off leaving about a 2x2 inch board. (5x5cm) Here is what the controller looks like:
Chapel wrote:Ah shucks, I was really hoping to make an SNES encased in a 19 pound glob of hotglue and duct tape.
The joystick? Is this about your "Shortest Joystick" thread? The joystick is exactly 13mm high.jjhammerstein wrote:Is that the same as in a first party PS2 controller, do you know?
Also, could you measure the height of the bottom section for me?
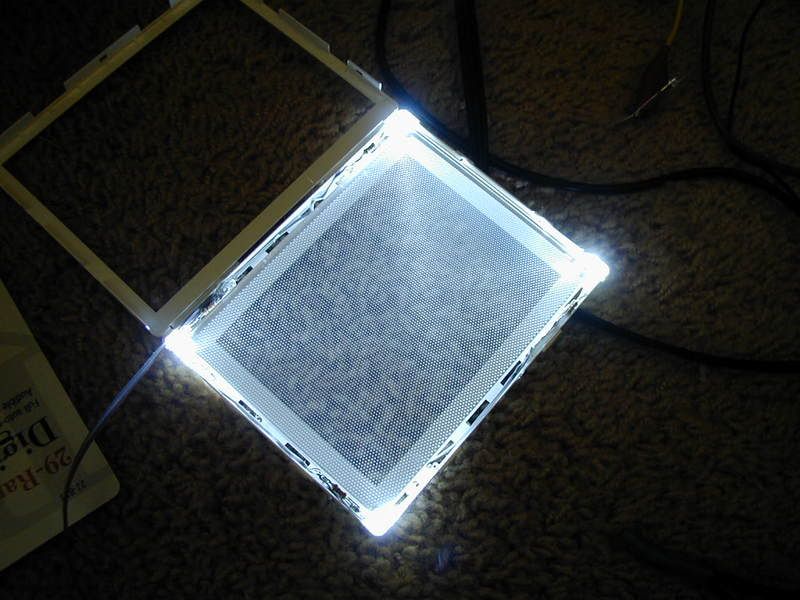
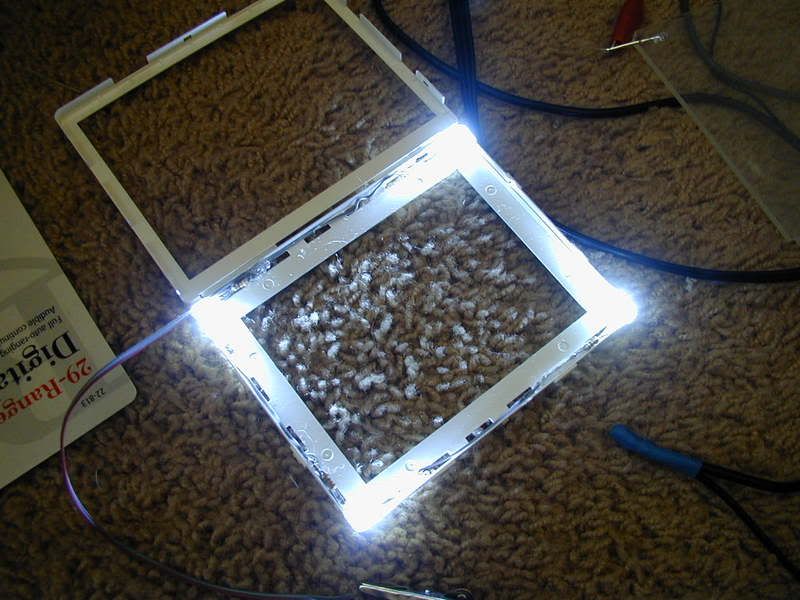
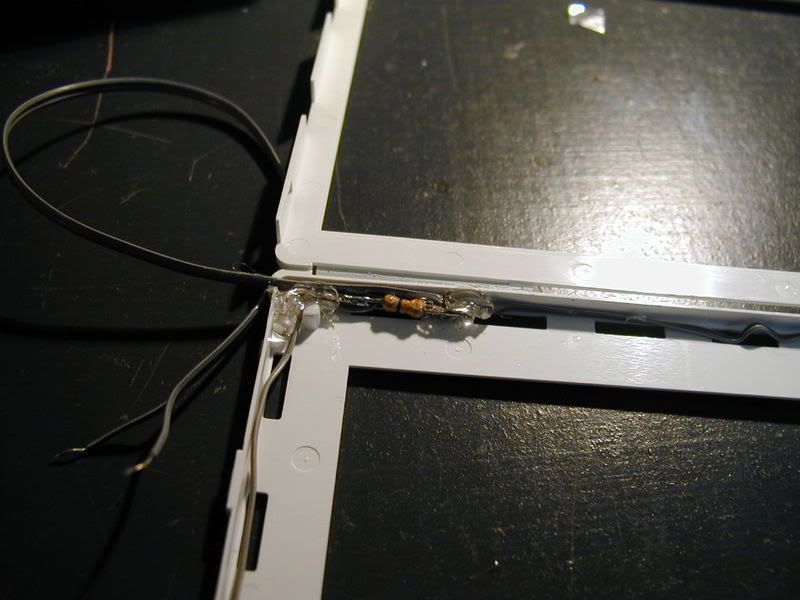
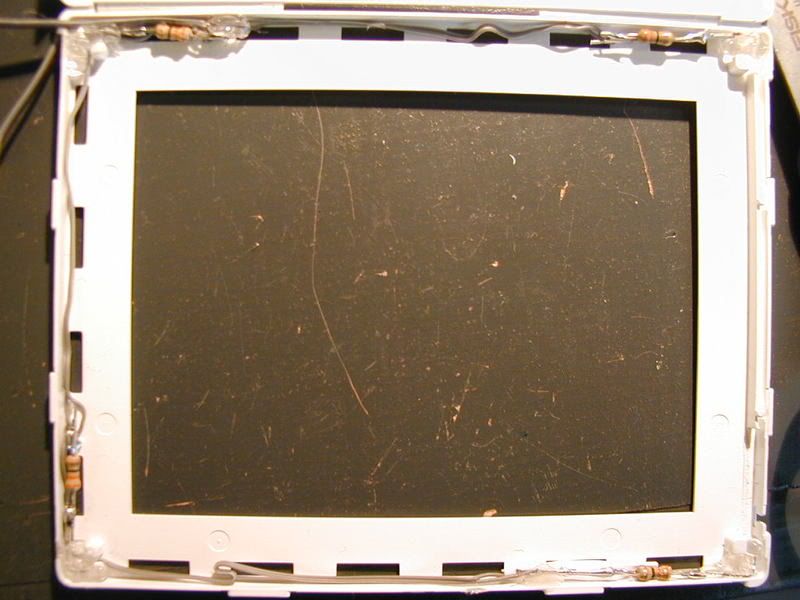
Update: PSone screen LED mod is done. There is one thing that distinguishes this one from others, though. Since the screen is on the outside of the case (As mentioned before, there is no way it would fit inside), all the resistors and wire had to be inside the light box. It was pretty tricky fitting it all in. Unfortunately, I had it all back together before I realized I hadn't diffused the LEDs. The light is still plenty bright, though. I also put a piece of aluminum foil under the glass diffuse sheet to reflect light upwards. It works very well.
Here is the screen being tested:
Without diffuser glass:
A close-up of the LED and resistor:
Zoomed out:
Just to prove everything's contained in the light box:
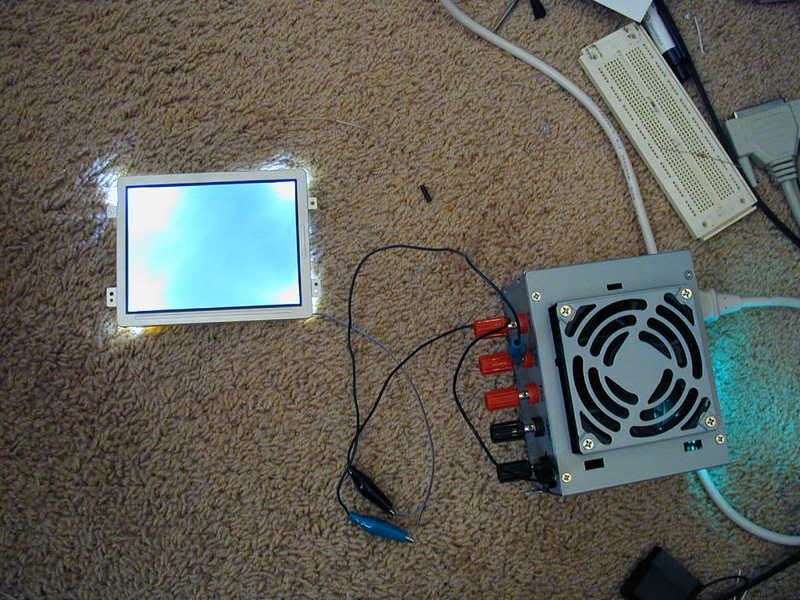

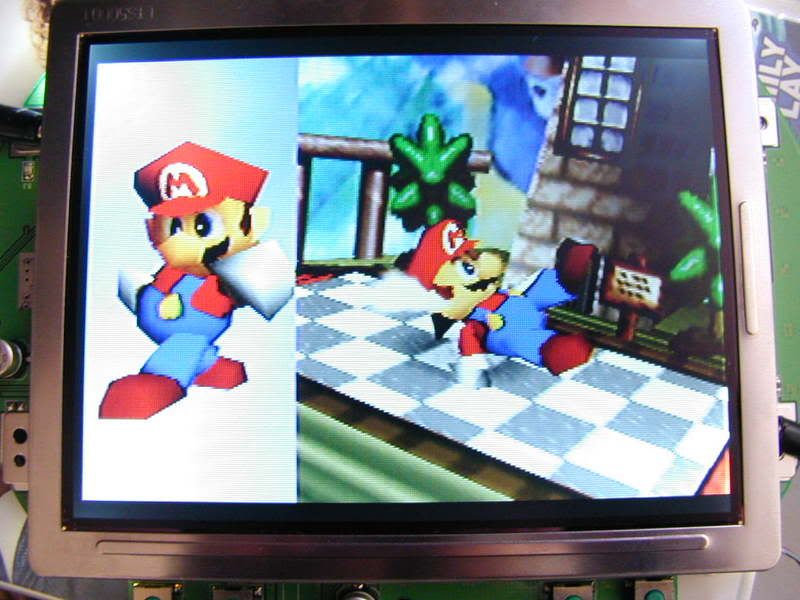
Yes, the corners have bright spots. It's not that noticeable in-game, plus I'm not really a lighting freak like some here are. As long as I can see the game, it's good.
A couple test shots:
The screen is plenty bright, but the colors are too dark for me. I may still have to do the brightness mod.
-
themadhacker
- Senior Member
- Posts: 2670
- Joined: Wed Aug 06, 2008 7:53 pm
- Location: ohio
-
Life of Brian
- Moderator
- Posts: 2867
- Joined: Wed Aug 03, 2005 5:55 pm
- Location: Oklahoma
- Contact:
Mario wrote: Yes, the corners have bright spots. It's not that noticeable in-game, plus I'm not really a lighting freak like some here are.
If it looks like that in the picture (and there is definitely a difference) then it must look good in real life.
It takes a big man to cry, but it takes a bigger man to laugh at that man.
Ridonkulous
Ridonkulous
-
bacteria
- Portablizer Extraordinaire
- Posts: 3984
- Joined: Fri Apr 20, 2007 12:14 am
- Location: Hampshire, UK
- Contact:
Me probably, I am a "lighting freak" and also don't like scratches and marks on the screen either.collinE wrote:Mario wrote: Yes, the corners have bright spots. It's not that noticeable in-game, plus I'm not really a lighting freak like some here are.who could you be talking about???
If it looks like that in the picture (and there is definitely a difference) then it must look good in real life.
Interesting - another person who did the LED mod and confirmed "the corners have bright spots" - I would find that noticeable in game play personally; however, if/when my florescent tubes pack in, I will probably have to resort to doing the LED mod.
Good work Mario so far, and good workspace you have too!

-
Life of Brian
- Moderator
- Posts: 2867
- Joined: Wed Aug 03, 2005 5:55 pm
- Location: Oklahoma
- Contact:
The corners always have bright spots if one does an LED mod - it's just a matter of degree as to how bright and how noticeable it is. The trick is to see how much you can even out the lighting while still keeping it nice and bright.bacteria wrote:Interesting - another person who did the LED mod and confirmed "the corners have bright spots"
dragonhead wrote:sweet. ive spent a third of my life on benheck!

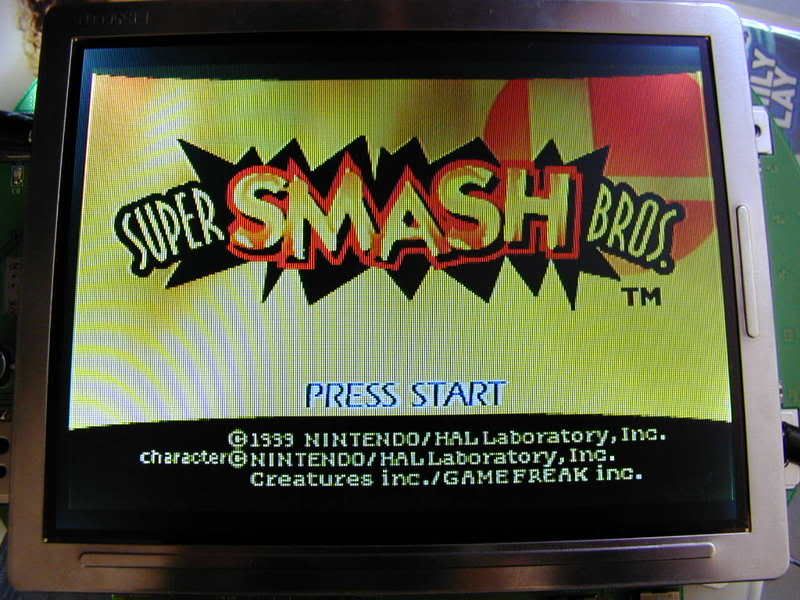
See the last picture I posted of the SSB title screen? Can you see the bright spots in there? Pretty hard, right? Now pretend you're intensely focused on a game and tell me if you think you'd really notice it that much. I think it's a small loss compared to the energy savings. I did the math and on my portable I'm getting almost 2 extra hours of battery life by doing this mod. Quite worth it in my opinion.bacteria wrote:Me probably, I am a "lighting freak" and also don't like scratches and marks on the screen either.collinE wrote:Mario wrote: Yes, the corners have bright spots. It's not that noticeable in-game, plus I'm not really a lighting freak like some here are.
If it looks like that in the picture (and there is definitely a difference) then it must look good in real life.
Interesting - another person who did the LED mod and confirmed "the corners have bright spots" - I would find that noticeable in game play personally; however, if/when my florescent tubes pack in, I will probably have to resort to doing the LED mod.
Good work Mario so far, and good workspace you have too!
Thanks for the comment about my work area. It needs a major cleaning, but you don't need to be a rocket scientist to figure that out.
Here's a little update about the case. This project is called the Retro64, right? Well, I found the perfect piece of plastic for the back of the portable.

Hopefully you can recognize this; It's the top of an NES! I had most of it cut out at that time, here it is fully cut out:
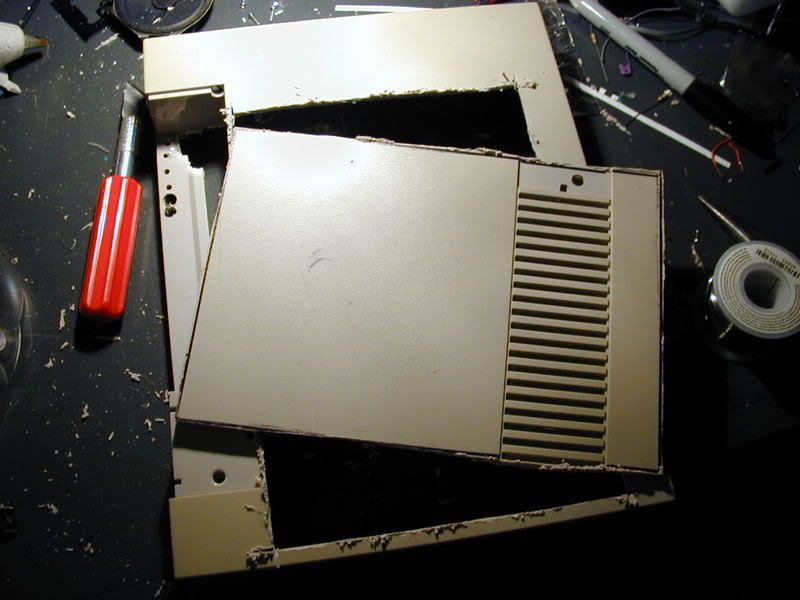
(BTW, it's 2mm plastic)
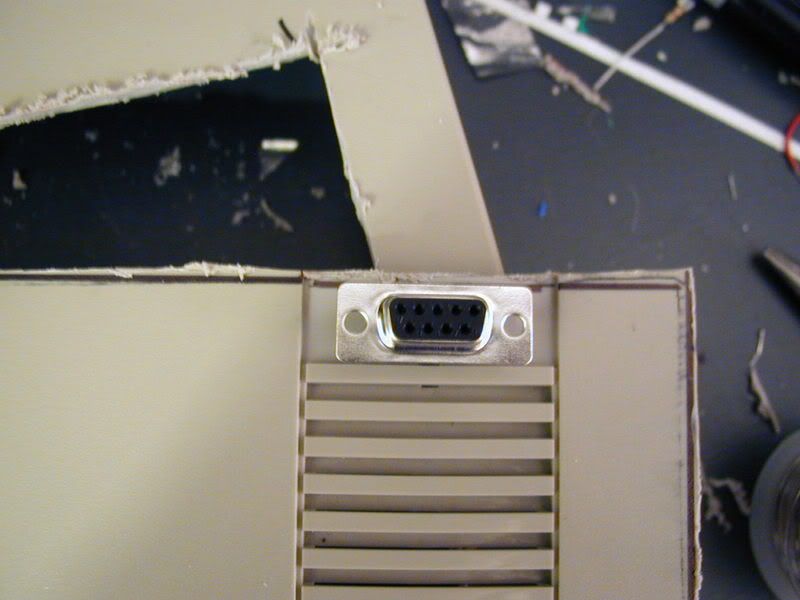
I think I'll put the AV out/charge port in that empty space up there, like this:
The good thing about using this for the back piece is 1)It's free 2)It's retro
I will need to file the sides down to meet the sharpie lines I drew. You may be thinking "Those colors look horrible together" don't worry, I am going to paint the case. I want something bright and unique, either lime green, sky blue, or neon orange (or just plain orange). Tell me which you think will look best.
Also, an unfortunate accident. I had the plastic already cut out and there was a plastic stub on the bottom. I had just been using my dremel for a half hour and didn't feel like picking it up again. So I got my x-acto knife and put it against the stub to cut it off. I am holding the piece of plastic when the knife slips, and stabs my thumb, going about a half-centimeter in.
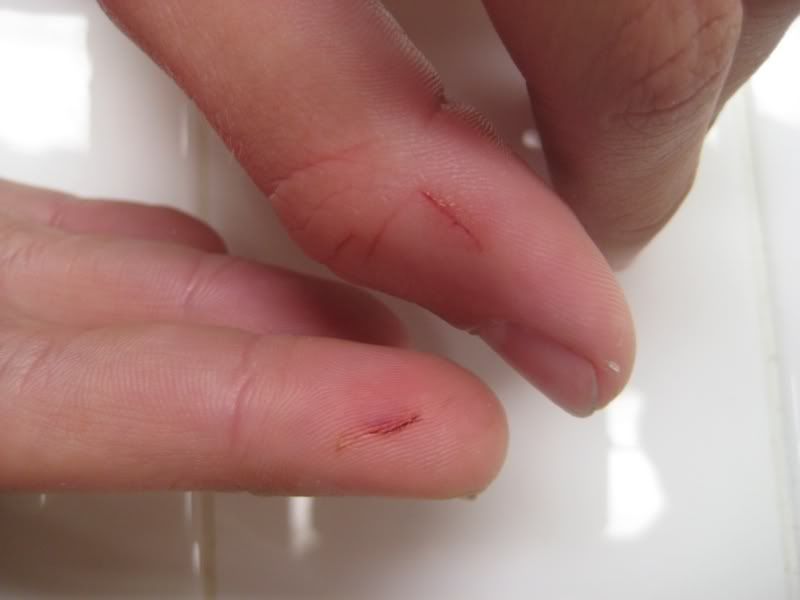
This is today, it doesn't look that bad but trust me, it did. Always use your tools with caution.
-
palmertech
- Senior Member
- Posts: 3225
- Joined: Sat Feb 02, 2008 1:40 am
- Location: California, land of the homeless and hippies
Whoops, I cleaned it with water then put peroxide on it. What is wrong with using water?palmertech wrote:Ouch, done that myself. Exacto wounds suck, hard for them to clot, and deep.
Protip: Don't get it wet.
As for the NES plastic, it is far better plastic than most of the junk that is made today, excellent choice.
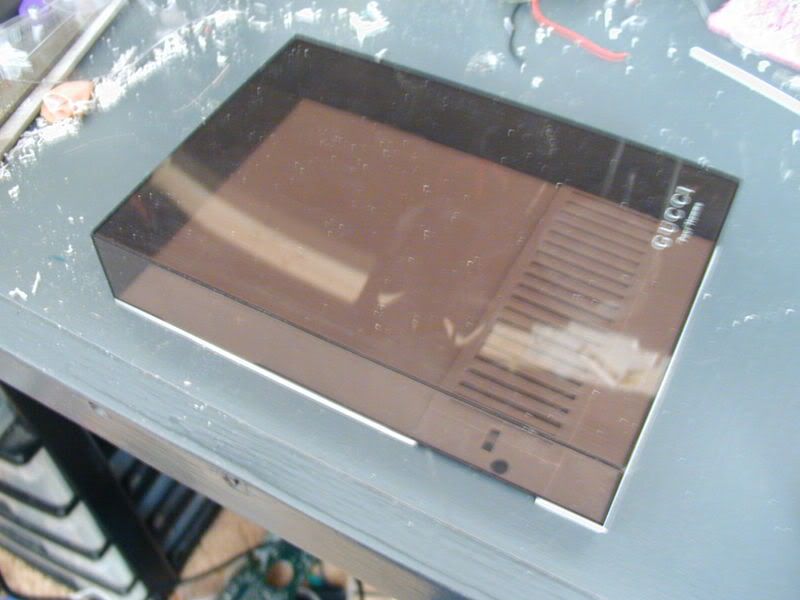
Do you like the look of the plastic? With the vents, and all? I think it's great. Will help with cooling, too.
Just spent an hour filing that piece of plastic, it turned out very well. I got the edges to the dimensions they need to be. Here is the finished piece:
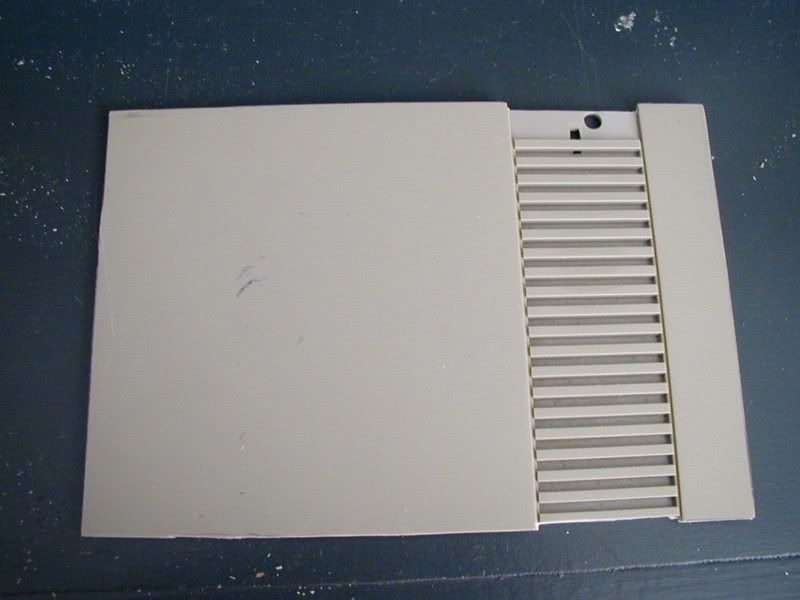
My crappy first-digital-camera-of-the-90s makes the edges look curved, but they most certainly are not.
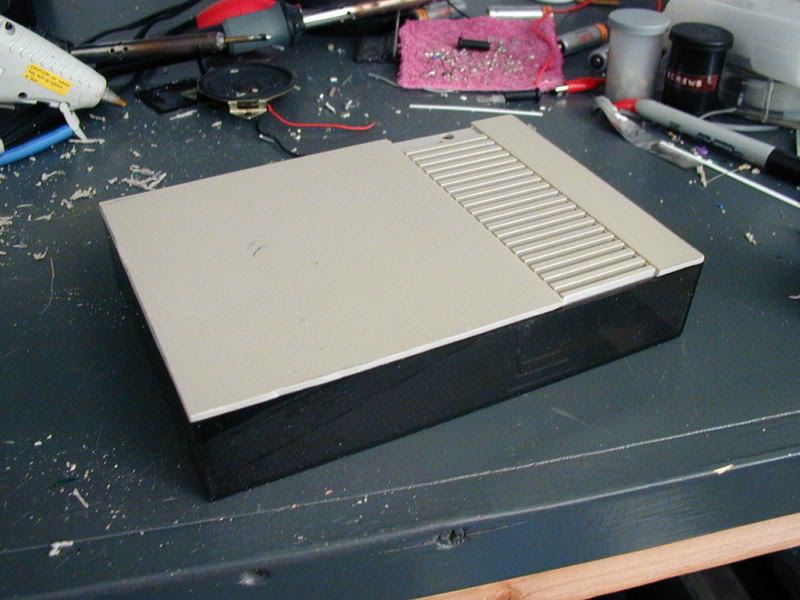
There's the plastic on the other half of the case, rather shmexy I do think
Now I'm going to cut the Z and R buttons. I'll do the font of the case once I get my tact switches from eBay. I'm ordering those today, as well as my regulator, heat sinks, and fan.
-
palmertech
- Senior Member
- Posts: 3225
- Joined: Sat Feb 02, 2008 1:40 am
- Location: California, land of the homeless and hippies
Nothing wrong with water, but last time I got an exacto cut, thought it was okay, then went in the pool the next day. Exacto deep cut+Finger wrinkles=bad. I suppose I mean "Don't soak it".
I think the plastic is an awesome idea, but DON'T put peroxide/bleach on it. Some vintage console forums say it is a good way to remove yellowing/aging and restore to original finish, but it makes it more brittle. Okay for normal consoles, not good for portables.
I think the plastic is an awesome idea, but DON'T put peroxide/bleach on it. Some vintage console forums say it is a good way to remove yellowing/aging and restore to original finish, but it makes it more brittle. Okay for normal consoles, not good for portables.

Excellent