Bacteria's N64/GBA combined portable - Nintendo 64 Advance

Includes but not limited to: SNES, Genesis, Sega CD, PlayStation 1, Nintendo 64, Dreamcast, Game Gear and I guess the Virtual Boy.

Moderator: Moderators

Post Reply
bacteria
Portablizer Extraordinaire
Posts: 3984
Joined: Fri Apr 20, 2007 12:14 am
Location: Hampshire, UK
Contact:

Post by bacteria »

Life of Brian - Thanks for your comments. I don't know why the D-pad has gone "screwy" on the N64. It isn't worth spending hours disassembling the system back to basics to find out, for a D-pad on the N64 which I may well not use anyway.

Couldn't find the issue, so decided to make alterations. The four switches were required to switch between the N64 and GBA. Each switch controlled two contacts, so in effect, 4 switches alternated between 8 sets of contacts. Two sets controlled whether the GBA or N64 was fed power, one more contact was used to make both speakers on the GBA play (mono via both speakers, rather than just one mono speaker) or stereo on the N64; one is for the "common" wire for the D-pad and the other 4 for the D-pad (up, down, left, right).

I now only need the 2 switches, one switch (2 sets of contacts) for the power to the systems and the other switch for one set of contacts for the speakers (as described above). I therefore migrated two of the switches inside the case, keeping the contacts are they were so if I discover what the fault is I can see to it; and put the two switches I needed in the middle, so they are more equidistant in comparison to the mains on/off power switch on the other side of the case.

I then put two pieces of wood in the holes and hot glued them in place. You won't see any of this when the case is finished, of course. I intend to make a top over the two switches so they move together.

Image

Image

I tested the system on GBA and N64, fine.
Image
bacteria
Portablizer Extraordinaire
Posts: 3984
Joined: Fri Apr 20, 2007 12:14 am
Location: Hampshire, UK
Contact:

Post by bacteria »

I probably won't be able to update until Monday, let's see. Still got many hours of project time left before finish, and I still have some ideas to incorporate.

Removed the base (mounting board). Cut out screw holes in the front part of the case to recess the screws to secure the fan in place. I then drilled out holes for the fan exhaust and screwed it in place. The bottom piece of the case (sits on top of the fan in pic) will be screwed in place so can be easily removed. The fan is being held in entirely by the two screws.

I have also put the old M3 Flashcard in place now, so it means I can play with other games rather than just the G&W game!

I need to have three pieces to the case, so it can be removed and put back in place as and when required. If I make the whole thing as one piece, I won't be able to assemble it, as the wiring will get in the way and cause problems.

The first piece is done, the second piece will be the bottom of the case where the power in lead will go, this will be screwed to the front case; the sides (slopes) will be screwed in place to the piece already done and the third and last piece will be the flat base.

To make it fairly easy to remove the case and get to the inside of the case, I need to make minor compromises, like visible screws, etc - I have no choice.

Image

I have also hot glued some scrap wood pieces to the existing case, where it meets the N64 mobo, thereby ensuring the system can't fall out, as these wood pieces act as stops.

Image
Image
minkster
Posts: 652
Joined: Tue Jul 19, 2005 9:03 pm
Location: NJ

Post by minkster »

lookin good :D I remember you saying this project was going to be finished by page 30. So it better be done! just kidding..im looking forward to updates as usual :wink:
Minktendo-Dead
Next portable: who knows ;)
Valium
Posts: 1412
Joined: Wed Jun 06, 2007 12:08 pm
Location: Nova Scotia, I'm over from kurt

Post by Valium »

It looks a lot bigger than I imagined.
Image
bacteria
Portablizer Extraordinaire
Posts: 3984
Joined: Fri Apr 20, 2007 12:14 am
Location: Hampshire, UK
Contact:

Post by bacteria »

minkster - nah, if I ended the project posting on page 30 it would miss out on a lot of interesting stuff! Some more pages to come before completion, but not many.

Valium - probably because of my fairly poor camera skills - focusing on the mid section makes it look artificially big. :wink: Looking at an unmodded N64 console, it is about 70mm high, so those people who made an N64p using the original case are only 25mm less high than mine, and the unmodded N64 is about 45mm at its thinnest (mine 29mm).

Image

Pic above shows the difference between an unmodded N64 case and my project in size, hopefully it helps to put things into perspective, better than just providing an explanation. As you see, mine is easier to hold and use as it is flat. The size isn't an issue for holding the system comfortably and using it; weight is more of an issue - the weight of the system at the moment is absolutely fine, but if it were heavier, that would be more of a problem as your hands would tire quicker.

Both systems are level, just my camera shot isn't great, as per usual. :oops:

As mentioned before, when the system is encased in the box, and I only have to "pretty the case", I intend to make some photos of me holding the case.

On Monday I have lots of parcel wrapping (sold lots of things on e-bay), which need going to the Post Office, after this I will spend time on this project and update progress, as relevant.
Image
Kyo
Senior Member
Posts: 2470
Joined: Tue Jan 02, 2007 11:59 am
Location: Germany

Post by Kyo »

wow, I imagened it to be gigantic, but this is sub-gigantic at best!
So Many Kinds of Bagels
Posts: 265
Joined: Sat Mar 17, 2007 10:20 pm

Post by So Many Kinds of Bagels »

Yea, actually that looks really comfortable.
Valve is the best company.
c_mon
Portablizer Extraordinaire
Posts: 464
Joined: Fri Jan 05, 2007 11:45 am
Location: Turkey

Post by c_mon »

Two seperate units would be thinner and lighter but of course this is your taste. Still compact for such a work though...
bacteria
Portablizer Extraordinaire
Posts: 3984
Joined: Fri Apr 20, 2007 12:14 am
Location: Hampshire, UK
Contact:

Post by bacteria »

c_mon - Yes indeed. The GBA part doesn't weigh much to be frank, can't remember the amount, about 150-200g in total. Making two separate units would make the mid section less high, by about 1/3 (especially as I wouldn't need homemade buttons which made me have to raise the PSone screen), however you still can't hold this area when playing, which is why it isn't really relevant. The plus side for having to had raised the PSone screen is that I had room for the PSone contrast and volume buttons on the top, which is nicer.

If I had made a separate N64p and an updated BigBoy Advance (GBA) for both systems, the case would have been the same width and length (comfort for use), the sides would have been the same height (comfort for use), the mid section would have been about 2/3 the height. The downside is that that the two systems separated would weigh more together (two cases, two PSone screens, etc) and would be harder to transport. Having one combined system (all be it a bit thicker) means only one system to transport, which is far more convenient.

I also fancied trying this as it didn't appear that anyone else had tried a dual system at the time, although BenHeck has since (according to his mainpage) made a dual system - Atari and NES (NES on a chip) as I recall. :wink:

In a forthcoming project I intend to mod my GP2x, as mentioned before, I will use a similarly sized case, however as the GP2x only has one mobo, I might be able to make the back of the case flat and one piece possibly.
Image
Life of Brian
Moderator
Posts: 2867
Joined: Wed Aug 03, 2005 5:55 pm
Location: Oklahoma
Contact:

Post by Life of Brian »

I'm really looking forward to your GP2X project!

Thanks for the pic of your portable next to an N64 case - that really helps me get an idea of the scale. Not too bad!
dragonhead wrote:sweet. ive spent a third of my life on benheck!
Image
bacteria
Portablizer Extraordinaire
Posts: 3984
Joined: Fri Apr 20, 2007 12:14 am
Location: Hampshire, UK
Contact:

Post by bacteria »

Life of Brian - Once the tv out is fixed to be a proper 320x240 resolution (someone is working on it at the moment) I intend to mod my GP2x fully - mind you, unless we have a "Handheld" forum on this site, I won't have anywhere to post it....
Image
Kyo
Senior Member
Posts: 2470
Joined: Tue Jan 02, 2007 11:59 am
Location: Germany

Post by Kyo »

Well, you can still post it in Technical Questions and Answers, or in forum 42, I suppose. If we don't get that handheld-forum, we really need an "everything else" forum...

Anyway, looking forward to the soon-to-be-seen done thing.
bacteria
Portablizer Extraordinaire
Posts: 3984
Joined: Fri Apr 20, 2007 12:14 am
Location: Hampshire, UK
Contact:

Post by bacteria »

Haven't had much time for project, spent yesterday hanging pictures on the wall (wife has been nagging for a while for this), and getting things sold on e-bay packaged and in the post office.

I did have a couple of hours yesterday, but spent it doing some minor repairs and trying to solve a problem which ended up not being one, then putting it all back together again!

I doubt I will have time this afternoon after work for the project, may do, may not; again, same tomorrow, but will definitely have the mornings for this project on Thursday and Friday.

Kyo - a Technical Q&A is not the forum for a handheld mod in progress as it isn't a Q&A and Forum 42 is only for irrelevant postings about trivial stuff. It means no-where to post, so can't be posted...

Update - great, Handheld Forum at last; I can post my GP2x project there when I start it! :D
Image
bacteria
Portablizer Extraordinaire
Posts: 3984
Joined: Fri Apr 20, 2007 12:14 am
Location: Hampshire, UK
Contact:

Post by bacteria »

About time for another update! I had some time this morning for the project.

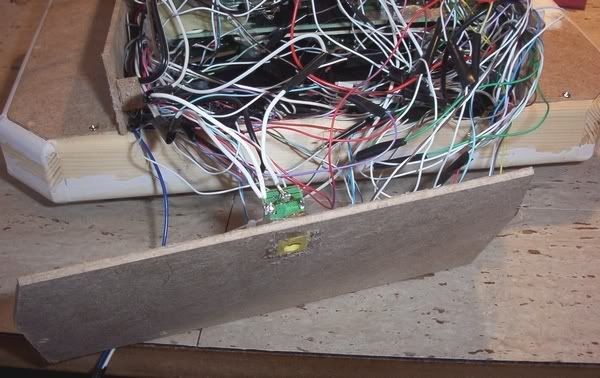
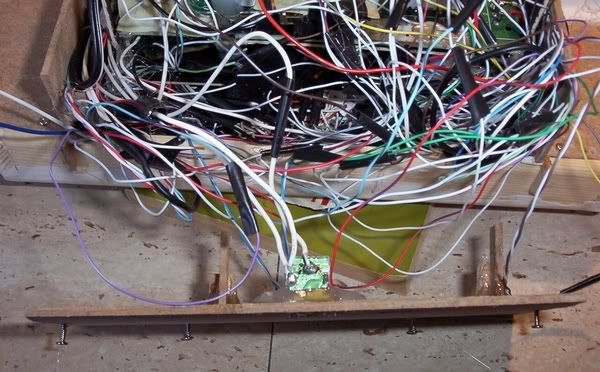
I cut out the piece for the bottom of the case, which will hide all those unsightly wires!

I figured the best place for a power-in plug for external power was at the bottom towards the rear, when playing a game, if the power-in plug is on the top or side of the case it would be unsightly and would get in the way, at the base it won't be seen, and also the cable is not going to move about anything as much as if it went anywhere else. I dremelled the PSone power in plug to remove the excess, then used lots of hot glue to secure it in place over the hole I made for it.

Image

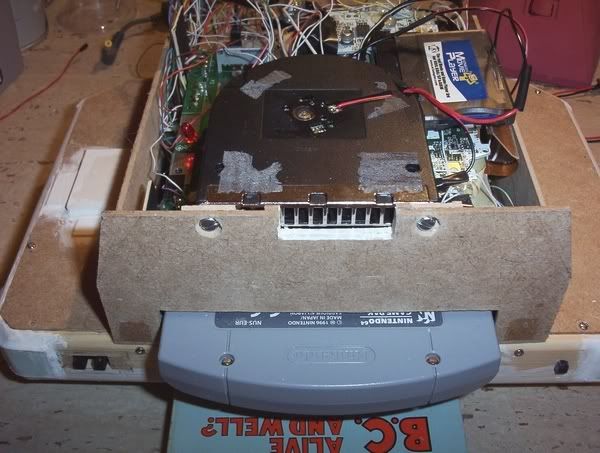
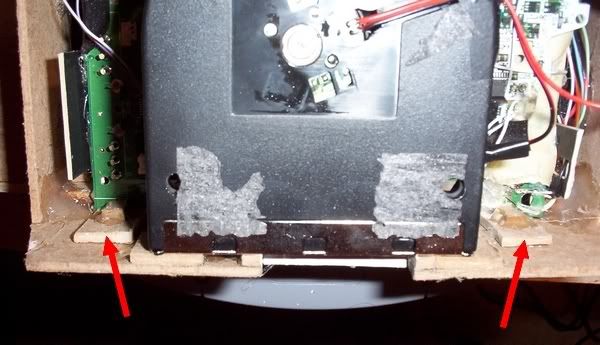
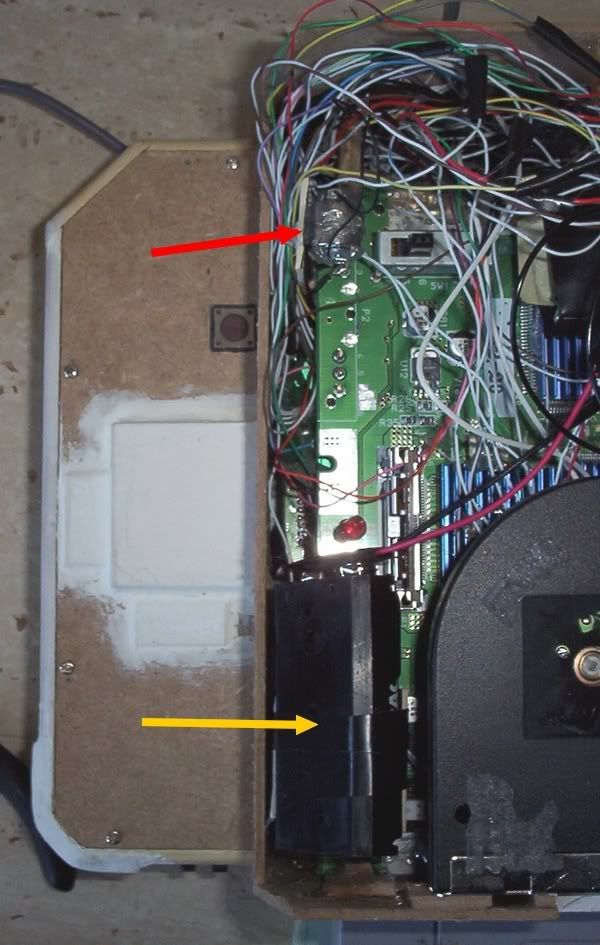
When inserting an N64 cart, I might whack it in a bit hard sometimes, so I made two backstops so the N64 mobo is connected to the rear of the case. I thought this a wise precaution, in the same way as I made backstops on the other side of the N64 case.

Image

When the case rear was secured on via the screws, I hot glued a small piece of wood to one of these backstops to ensure the N64 mobo is securely held in place.

Image

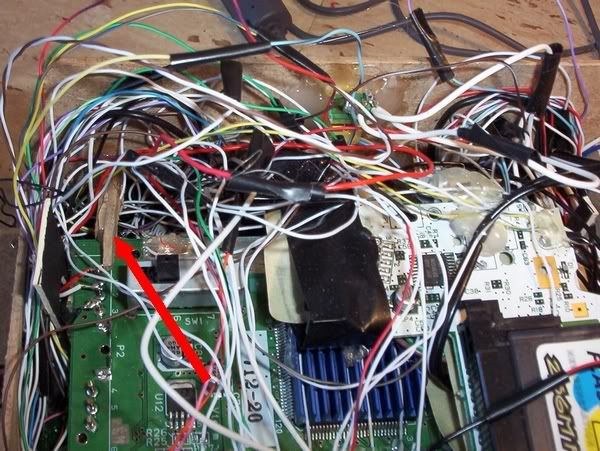
There were tiny gaps between the case from the "D" shaped wood I used for the case sides and the mid sections, so I cut out two shaped pieces and glued them in place (on the case, not the mid section) with normal glue. This helps to keep the case quite airtight.

Image


View from rear of case:

Image

Run out of time again today, the next job will be to secure in the battery for the GBA mobo (using the small single cell 3v photo battery). I had intended to replace the two watch batteries for the N64 memory card with one of these 3v photo batteries too, but testing with the multimeter the two watch batteries output 3v, so fine, and I don't want to tempt fate by changing them!! After this, I can then make the two sloping sides and the base of the case (on top of pic!) in one piece and secure that in place.

I got some more dust on the PSone screen, managed to get compressed air to deal with this, with the straw attachment; saved me having to dismantle the case again!

If, from using the fan for the N64, I get occasional dust on the PSone screen, I intend to make a couple of small holes (about 3mm diameter) in a couple of places in the wood on the side rear (where my fingers hold the system), so I can insert the compressed air tube down to the sides of the PSone screen, give it a squirt, remove; job done, small piece of sticky tape replaced to maintain its level of being air tight. Don't know if I need to do this, if I can do it from the top of the case as I am at the moment, that is fine. I can't seal the PSone screen in place and make it airtight, otherwise I can't remove it later if I need to.

I have made the case very sturdy and strong. It dismantles quite easily (I have had to do this a few times) and reassembles easily and reliably. I am pleased with the work so far. A lot of work has gone into the design and construction.

The weak points of the design I have done are the homemade buttons (not the shoulder buttons, they are fine), I know that. They won't last forever, especially as I (daftly) backed their spacers with mounting board instead of plastic. I wanted to make them easy to remove, however in doing so they may, after time, split. At least I covered the card with hot glue; that may be sufficient. If I get a problem with the buttons, I will replace them with plastic backed homemade ones, which will definitely not come off and be heavy duty versions. I won't do this at the moment, no need to, all is fine as it is, just forward thinking.

Once I have the rest of the wood in place, I can proceed to make it look pretty. Project will then be finished. Don't worry though, lots more pics to post before then! :wink:
Image
bacteria
Portablizer Extraordinaire
Posts: 3984
Joined: Fri Apr 20, 2007 12:14 am
Location: Hampshire, UK
Contact:

Post by bacteria »

I anticipated spending a couple of hours on the project today, only had a few minutes as it turned out. I spent a while setting a spare PSone screen set up to connect my GP2x to it to take pics from a program a guy on the GP2x forum is developing to give proper 320x240 output. That took a while. I then decided, if my old flashcart for the GBA is going to be used (if the new M3 cart, when it arrives, also doesn't like my GBA mobo in my project case), I would decide which games I wanted to load on it; there are some great games on the GBA but a lot of dross. I had to set up the old program to work via parallel port on my XP computer; and (slowly) copy the games over. This took a while.

I probably won't have any updates until Monday, working nights on weekend, but have Monday - Thursday for project time!!

All I did today was secure the two battery packs in place, red arrow are the two watch batteries for the N64 memory pack, the orange arrow is for the GBA batteries. I tried my photo 3v battery, for some reason it didn't work, so went back to the AA's. Strange.

Image

Sorry for such a short update, but I thought it better to make a small update than none. Back on Monday!!
Image
Post Reply