
(more pics at bottom, or here)
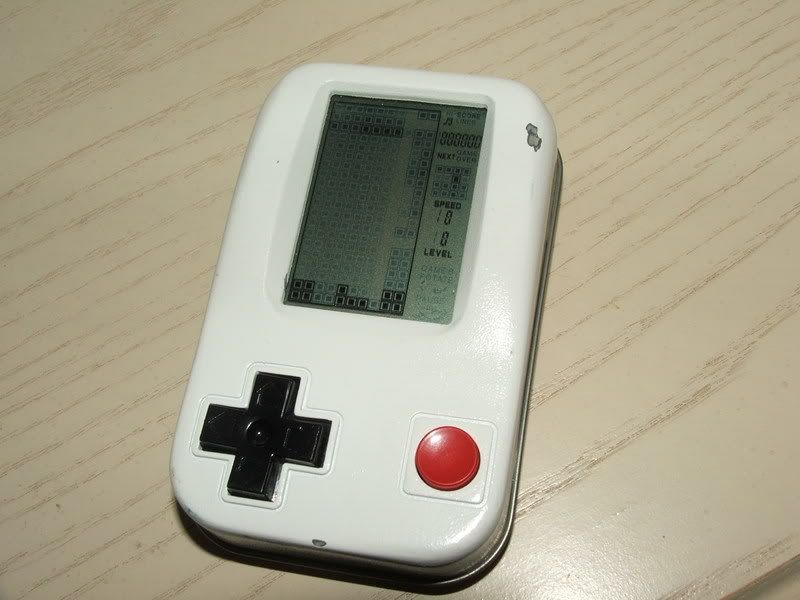
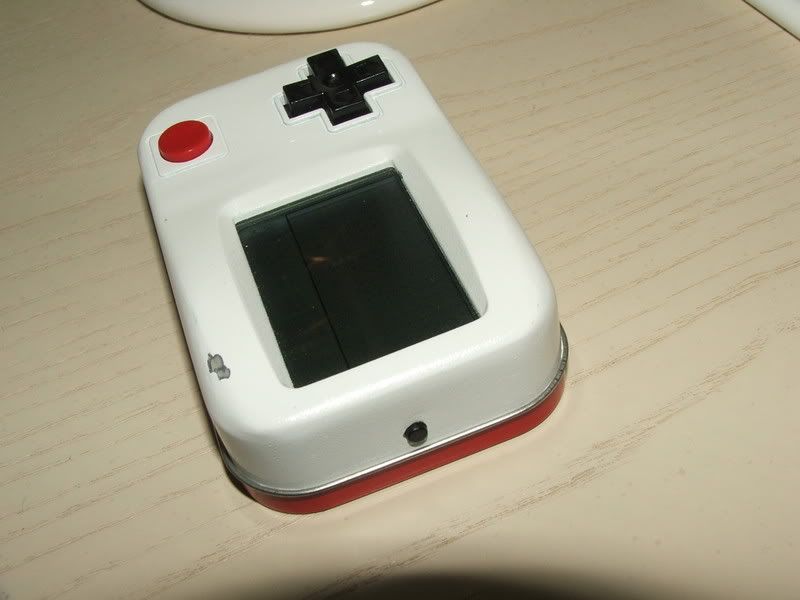
It is basically a ton of oldie games on a calculator-style LCD, in a very portable, minty Altoids stylin' case.
I made it to give to my girlfriend on the day of a big concert, just because I thought she would like it
These are the games I can recall that it has:
Tetris (classic, and tons of other versions), Tank, Car racing games (dont know the name), Breakout, Centipede, and tons of others. It has much better selection, and casing, than my previous one.
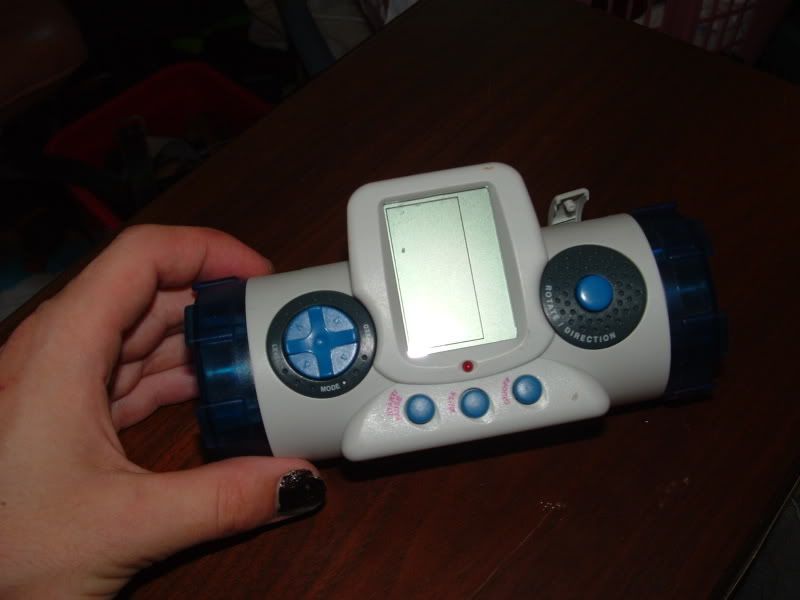
This is what it looked like before the majikal* transformation into the altoids case. I have no clue what it really is to be honest.
*TM, Lucretius Inc
http://img.photobucket.com/albums/v510/ ... before.jpg
(Ignore the black fingernail, lets just say bored sisters can be really evil
Here be the story! (or rather what I can recall from a month ago, when it was built)
This thing had to be the weirdest gaming thing I have ever seen. It had an LED that lit up and and a HUGE rumble motor that set off every time you pushed the action button! It scared me to play, with it blinking and rumbling like a gaming device from hell with its tail on fire! That and it had two speakers, one on each side, that added nothing but crappy sounds and occasional "beeps". Why they needed two speakers, as to infer that it had stero sound, I have no idea.
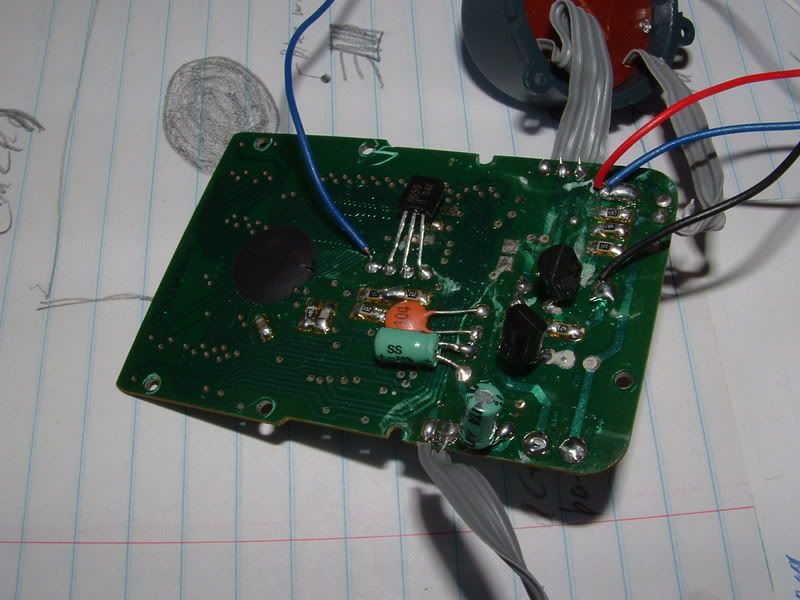
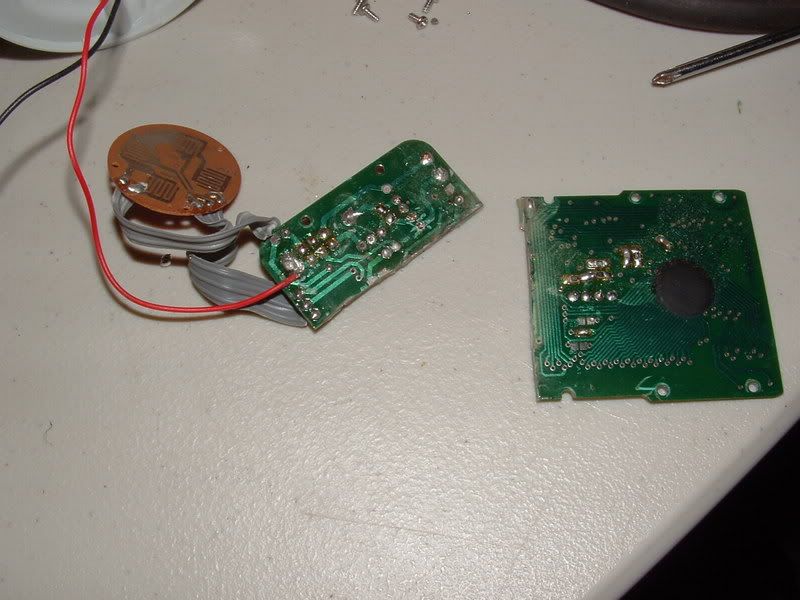
I took it apart and looked it over.
http://img.photobucket.com/albums/v510/ ... /board.jpg
But OH NOES, the board is too long! It would collide with the D-pad board, and wouldnt work at all. So after a bit of tracing I realized that most of the traces were worthless. Most of them were for the sound parts, and since I was not keeping the sound I no longer needed those. The other traces were for Sound muting, pause (and the "up" button on the d-pad shared the same trace, so it was just a repeat button, thus worthless), and power (which was the only one I needed). A quick, precise cut with a dremel and it was severed.
http://img.photobucket.com/albums/v510/ ... ittage.jpg
Severed traces were resoldered elsewhere on the board.
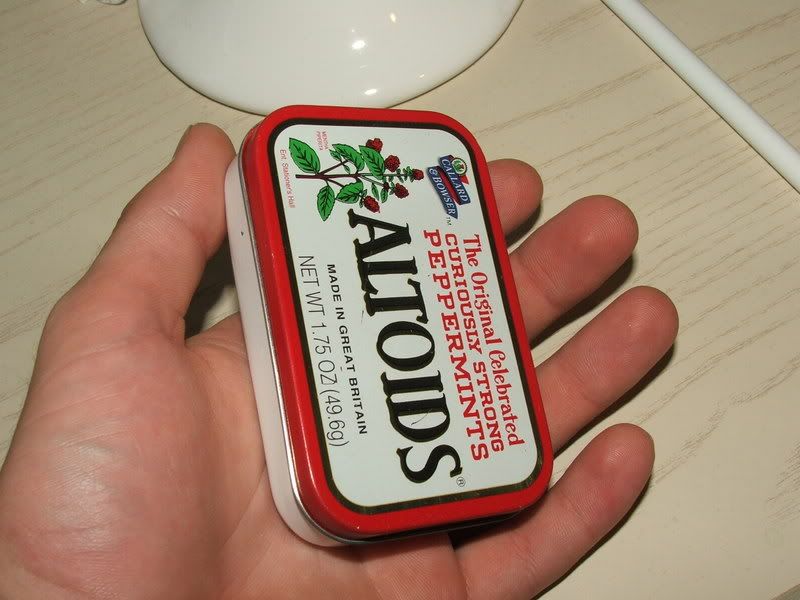
Then I went onto making the lusciously minty case that would hold this electronic treasure. A "classic" altoids case was selected out of the ones at the grocery store checkout (there are new mint case designs now, I liked this look the best still). The mints were then eaten, or experimented on to see if they would catch flame when lit with a lighter. To my surprise THEY FLAME LIKE A CANDLE! Weird.
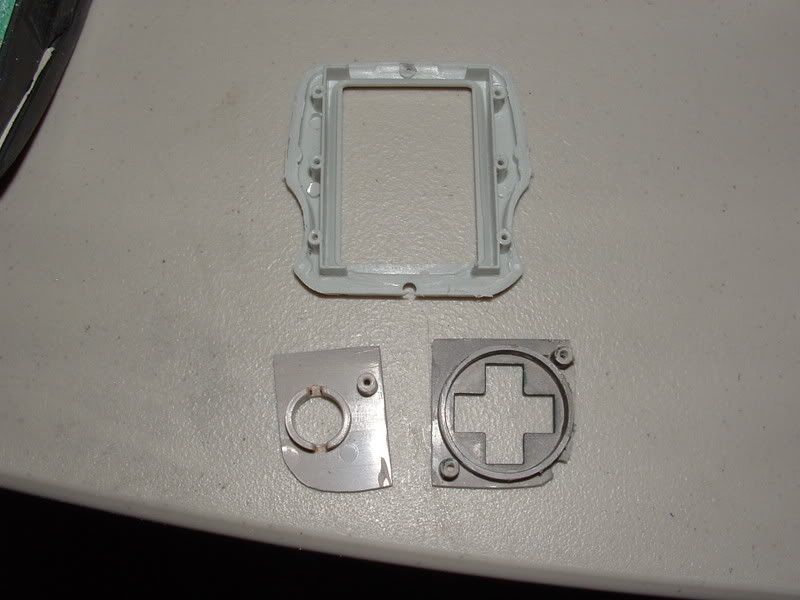
back to the case. The LCD holder was dremeled from the original case Sand paper was set on a flat surface (table) near the edge, then the rough cut LCD plastic holder was rubbed back and forth along it to get it sanded flat. A NES controller was also taken for this project. The D-pad and the right button plastic were dremeled, then sanded.
http://img.photobucket.com/albums/v510/ ... /parts.jpg
(The reason the d-pad is black is because it was painted before this project, and the other part was from a different controller)
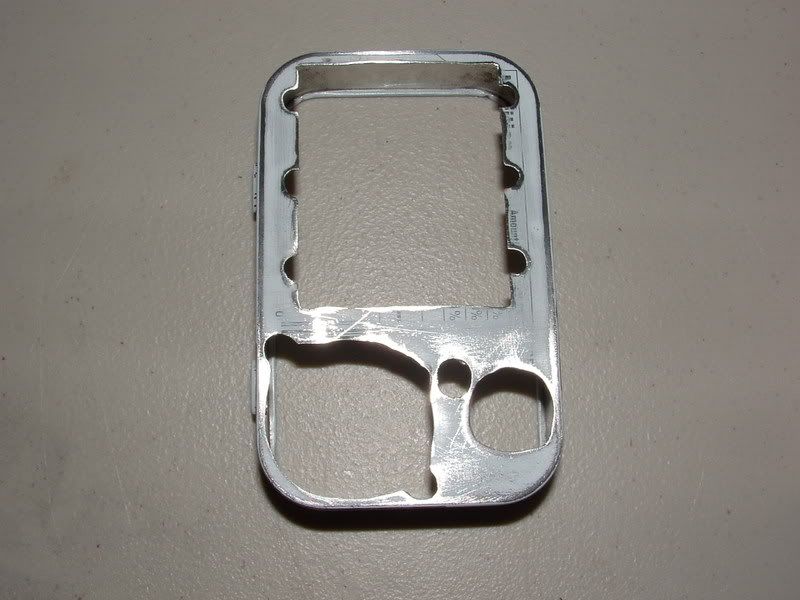
Then holes were dremeled in the mint case for the parts. It was also sanded so that the parts would be superglued to the actual metal of the case, not just the paint.
http://img.photobucket.com/albums/v510/ ... es_cut.jpg
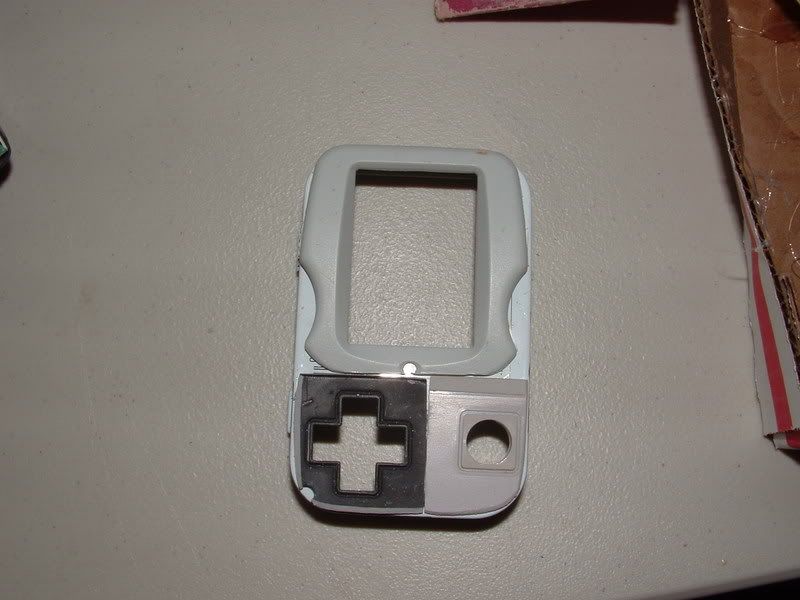
A hole was also dremeled on the top of the case for a tactile pushbutton to stick out, which would be the power button.
The pieces were fitted,
http://img.photobucket.com/albums/v510/ ... cement.jpg
then superglued in.
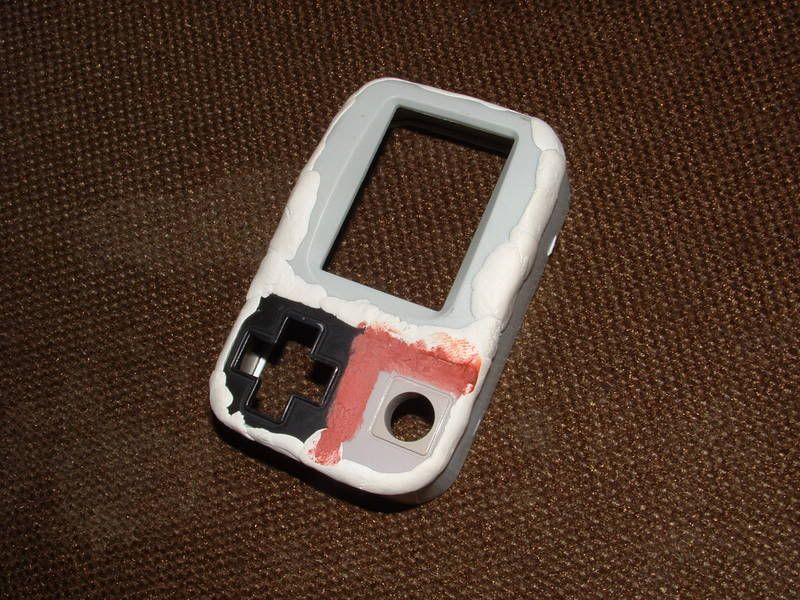
Then I went onto the bondo process. I used two kinds of bondo here, bondo marine putty for the the big gaps, and the much easier to spread on spot putty for the small cracks that needed filled. They're a great combo together.
First bondo stage.
http://img.photobucket.com/albums/v510/ ... _start.jpg
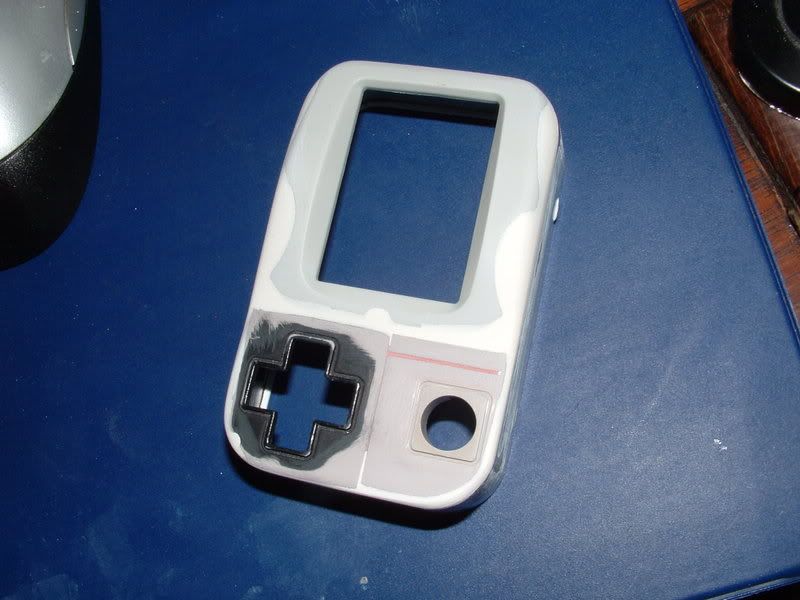
Sanded that down
http://img.photobucket.com/albums/v510/ ... -final.jpg
Then added another coat of spot putty on the cracks that showed between the plastic and marine putty.
http://img.photobucket.com/albums/v510/ ... _final.jpg
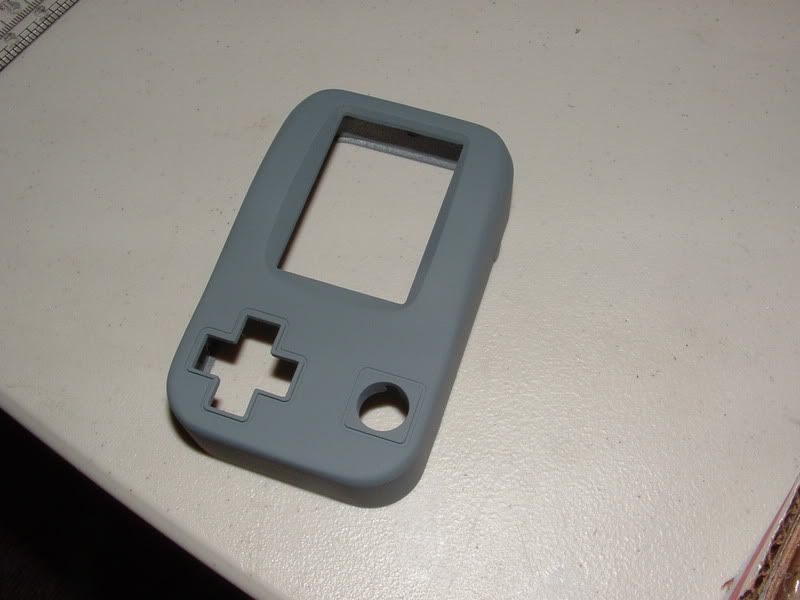
Smooth sanded that down, then grabbed some Krylon primer, and gave it a nice coat.
http://img.photobucket.com/albums/v510/ ... primer.jpg
Then wet-sanded the primer.
http://img.photobucket.com/albums/v510/ ... t_sand.jpg
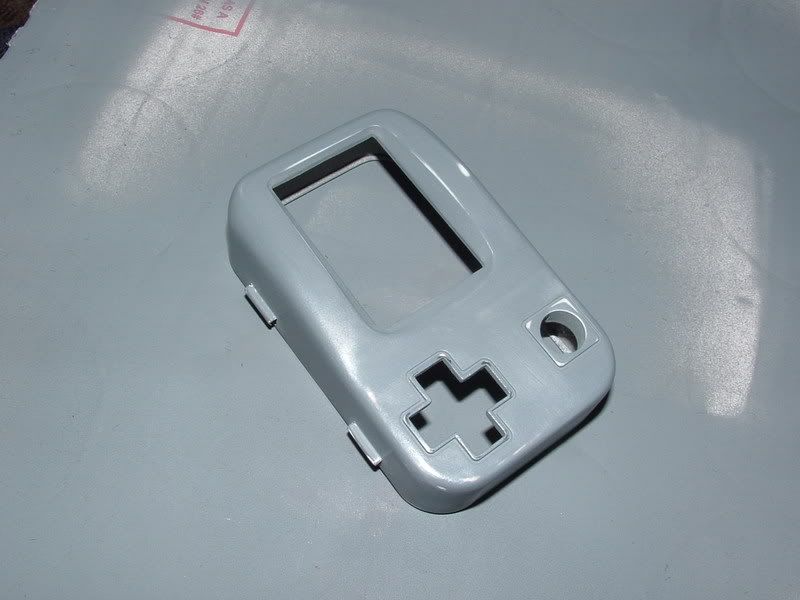
After that it just a coat of white paint, another coat after 10 minutes after that, and the case was done.
It wasn't really that easy, I was trying to finish this at 10 PM to give to the girl the next day. I tripped and it fell into some sand, with the paint still wet
Then getting up early at 5 AM (same day), I started on the wiring. It was tricky because left and up shared the same trace, and down and right shared the same trace, and some of the others shared traces too, but I forget them. So I had to cut a few traces, rewire some, only a small bump but still annoying at 5 AM.
So used some small solid wire, and wired everything up. Kinda tricky becuase the traces were in weird places, but only took a few minutes.
Then I superglued the 2 AAA battery holder onto the lid using a special superglue primer made for polypropolene (the plastics that they use for those "shiny" battery holders). Then attached the lid to the case by bending the prongs back.
Had to dremel some NES controller screw to the right depth to hold the controll boards in. No biggie there. Screwed the boards in then.
After all that, all that was left was to hot glue everything to keep it from moving around, slam the case shut, and give it to the pretty girl.
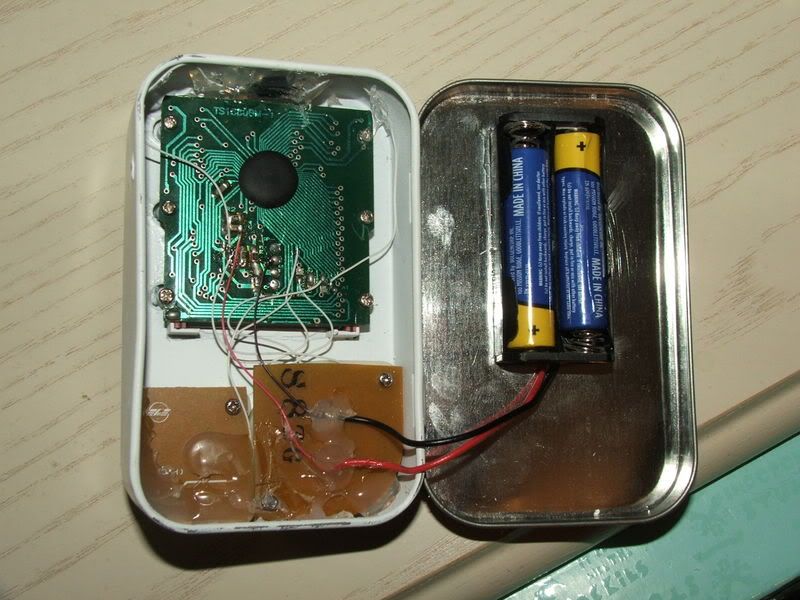
Inside shot with lid open
http://img.photobucket.com/albums/v510/ ... nsides.jpg
These pics were taken after she had been carrying it in her purse for a long time, so there are a few scratches from car keys
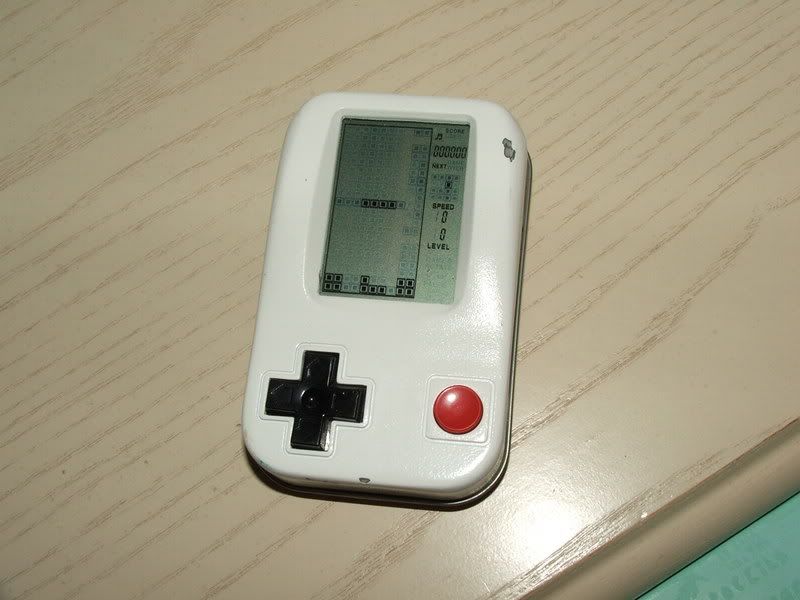
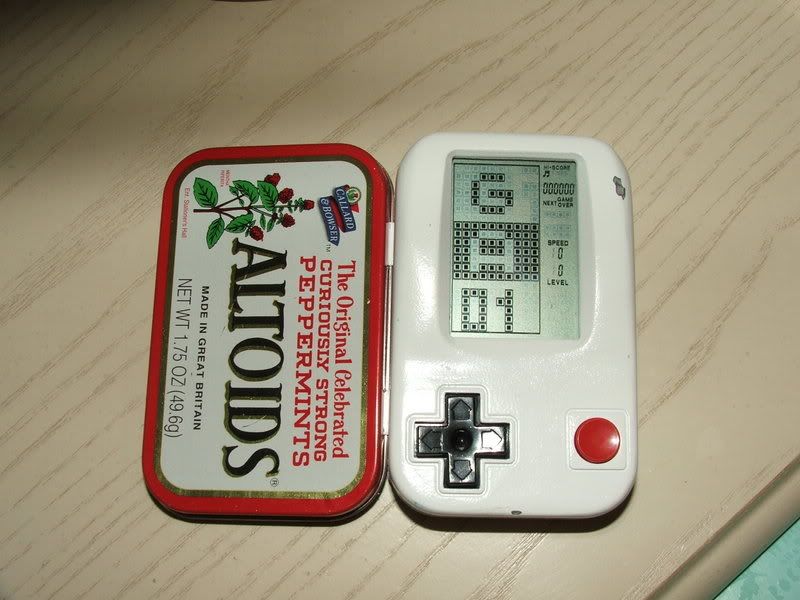
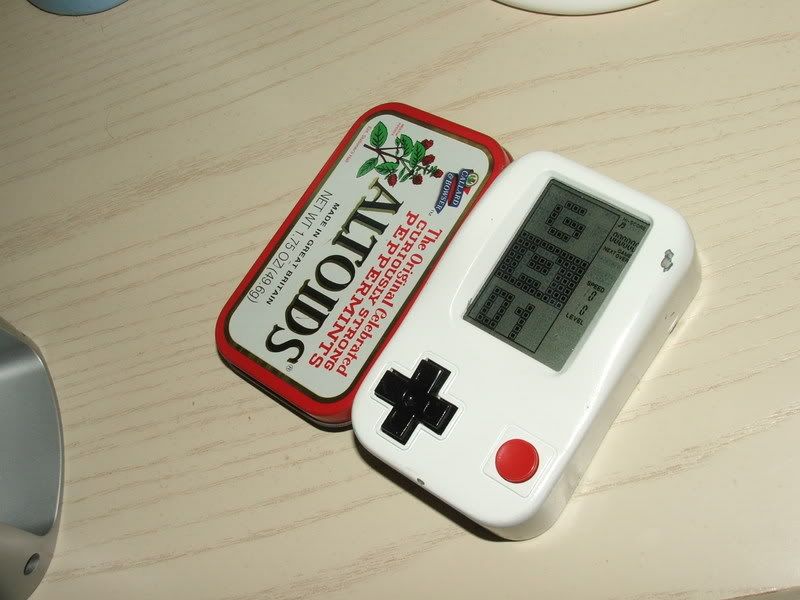
http://img.photobucket.com/albums/v510/ ... ying_1.jpg
http://img.photobucket.com/albums/v510/ ... laying.jpg
http://img.photobucket.com/albums/v510/ ... screen.jpg
Please note that the screen looks much better in real life. For some reason the camera showed a ton of blocks that weren't there.
http://img.photobucket.com/albums/v510/ ... d_open.jpg
http://img.photobucket.com/albums/v510/ ... open_2.jpg
http://img.photobucket.com/albums/v510/ ... open_3.jpg
http://img.photobucket.com/albums/v510/ ... button.jpg
Whats neat about this thing is that you can pause your game, then just power it off, turn it back on later and the game will still be right where you paused it! sweet.
Well, thats it. Hope you guys like it, I had a blast building it. Questions, please ask away!


