Bacteria's Multi-Console System: Screen+Case+N64 - FINISHED

Includes but not limited to: SNES, Genesis, Sega CD, PlayStation 1, Nintendo 64, Dreamcast, Game Gear and I guess the Virtual Boy.

Moderator: Moderators

Post Reply
bacteria
Portablizer Extraordinaire
Posts: 3984
Joined: Fri Apr 20, 2007 12:14 am
Location: Hampshire, UK
Contact:

Post by bacteria »

atarihacker - Thanks!


I have had some queries from the forum about how I cut perspex for case making in the past, so made a short video.

Three steps:

* Use a CD marker pen and mark out guidelines to cut against.
* Use a thin drill bit to cut close to line.
* Use sanding bit to trim away until line is straight and smooth.

I made a short video:

Image

I also uploaded this to Forum 42 too.
Image
bacteria
Portablizer Extraordinaire
Posts: 3984
Joined: Fri Apr 20, 2007 12:14 am
Location: Hampshire, UK
Contact:

Post by bacteria »

Ok, the various voltages work fine. I have also made the back piece for the casing. The sides have a total height of 30mm as mentioned before; I have had to allow extra height for the joysticks and rumble motors, decided not to have raised areas on the back as it looks bad, rather it flat and smooth; consequently, with the backing on it has a total height of 19mm overall, this is thicker than my last version, however the overall height of the screen and system together could well still come to 30mm overall, maybe 32mm on the handhelds; I have some ideas as to how to do this.

I have also marked out a few more sheets of perspex to the size of the backing casing, which will be used for the system half. This will save me time. Marked out enough to do my first four systems, I will do more later.

I need to make the battery compartment now, then I can paint the back of the system casing, then assemble the N64 components into the system case.

Out of time today on project work, only spent the afternoon today on project as I used the morning to get stuff on e-bay. I will spend all tomorrow on project though.
Image
bacteria
Portablizer Extraordinaire
Posts: 3984
Joined: Fri Apr 20, 2007 12:14 am
Location: Hampshire, UK
Contact:

Post by bacteria »

Back of casing painted and varnished. Battery compartment made for two Li-ions. Rigged up a two pole switch to power the system (switch on) and show an LED on the left to show the left Li-ion is connected correctly and the right for the right (switch off). When the system is on the LED's are off. This means that I will need to remove the batteries when finished playing a session as otherwise the LED's will stay on! I thought it would look nice to have the LED's illuminating on the sides, nice and discreet.

In this pic, it shows what I mean. I need to screw the case down, and also trim the edges from the paint to make it look better. Anyway, coming on nicely; nearly at the stage I can start getting the N64 guts in the system. I have already removed the components from the old version, in readiness.

Anyway, milestone pic:

Image

I had to lightly put my finger on the space in the pic to maintain contact on the battery; I will be building a surround for the top, which will keep the batteries in place and secure.

The batteries are at the bottom of the case, as you hold it, as this stops the console from trying to tilt, and sits better.

I have had quite a lot of problems painting on the perspex, it took lots of coats, however the spray paint I originally tried didn't work well. I am pleased with the finish, and as I mentioned above, I need to scrape away some of the excess paint on the edges and re-apply, to make it look nicer.

I'm not going to paint the system halves of the system, rather I will use some paper behind. This also allows me to print images to show through the casing as required.

Anyway, like it so far??
Image
Dbstew
Posts: 65
Joined: Wed Apr 02, 2008 4:35 am
Location: The Netherlands

Post by Dbstew »

I love it!

I love the leds! But why not add an additional switch to turn them off? I think after a while it will be annoying to keep having to remove the batteries!
bacteria
Portablizer Extraordinaire
Posts: 3984
Joined: Fri Apr 20, 2007 12:14 am
Location: Hampshire, UK
Contact:

Post by bacteria »

Dbstew - thanks!

I was tempted to have an extra switch just for this purpose, however I don't want to have more switches as it looks cluttered. I have made a top for a switch with perspex, so it looks far better than a "hobby DIY" look.

If I have to stop playing a game for an hour or so I will keep the batteries in place as the LED's draw very little power to run. The batteries are a snug fit, but with the top off, fall out of the system when upside down easily, so very easy to remove. I just need to experiment with either a tightly fitting top for the battery compartment or a couple of screws to do the job.

I won't know if I have resolved the issues with interference and cross-talk until I get the console system half working. Will keep you posted!! :D
Image
bacteria
Portablizer Extraordinaire
Posts: 3984
Joined: Fri Apr 20, 2007 12:14 am
Location: Hampshire, UK
Contact:

Post by bacteria »

I think the issue I had with the paint was that the paint I used was a "one coat", so was perhaps too thick. Anyway, end result is what matters!

Spent about 2 hours this morning smoothing the edges and painting them in a lighter shade; case is screwed down now.

Next job will be to get the topping for the battery bay (won't take long), then onto the N64 bit! Yay!!

You can see in the pic that I drilled holes for a thick wire to loop over for the connections to the li-ions - simple idea and works! Not bothered to make the inside look lovely, doesn't matter. Also, the hole in the case in the battery compartment was the only easy way I could lift off the casing before I made the battery case sides - may leave this as is too - invisible when batteries are inside anyway.

Image
Image
bacteria
Portablizer Extraordinaire
Posts: 3984
Joined: Fri Apr 20, 2007 12:14 am
Location: Hampshire, UK
Contact:

Post by bacteria »

Update - Opened up two crap N64 games and hacked apart the traces parts for my contacts.

Cut a piece of perspex to be the system case base.

Soldered to the traces and soldered wires to these connectors, secured them in place with hot glue. Inserted one of the connectors into its port.

Image

No more time today, tomorrow hope to complete the other connector. Next stage then will be to do the battery holder top (not done that yet!), turn the system on and check I am getting the voltages I need from the right cables (this way I shouldn't fry the system when it is connected. Then it is just a case of securing the N64 boards in place and soldering wires to the right places and making the top for the system where the game cart will reside in the system.

The cart ports I am using hold the connector mobos in place very well, there is no chance the console system will detach from the screen section this time, more likely that I will need to devise a lifting mechanism to release them!!
Image
bacteria
Portablizer Extraordinaire
Posts: 3984
Joined: Fri Apr 20, 2007 12:14 am
Location: Hampshire, UK
Contact:

Post by bacteria »

Spent most of today getting the battery compartment finished. I had various thoughts on how to do this, in the end I half cut through a nail, bent it 90 degrees, soldered it together, dremeled off the pointed end and made two slides to secure the top to the rest of the compartment.

I made my own tops for the slides, much better than having exposed nail heads!

Image

I then cut out a piece of foam and stuck it inside, put the batteries in the system, put the top on and slid the nails across (they move easily). I then shook the case about and it didn't lose contacts with the batteries (job done!).

Image

Top bit needs painting, put a couple of coats on, needs a sand and another coat, then varnish.

Image

Hot glued the N64 mobo, controller and memory/rumble pack in place, to a piece of perspex designed to slot into the case base easily.

I also desoldered the reset button on the N64 mobo as it is a bit tall (!).

Image

As you see in the pic below, the total height of the N64 guts on the handhold area is the same as that of the external case; ie 30mm tall. I will need to put a 2mm perspex sheet on top; as also the flat capacitors on the other side of the N64 mobo come to 31mm tall, I can remove some of the perspex from this area so both sides will be 32mm tall, inclusive. If you recall, that was my target height initially.

Image

I need to wire it all up now, and hope all works ok (after all this work!).
Image
mothatrucka
Banned
Posts: 588
Joined: Sun May 04, 2008 12:21 pm

Post by mothatrucka »

Those slides are brilliant. Fantastic work!
ImageImage
TRUCK- Eating kittens and kicking puppies since 1982.
bacteria
Portablizer Extraordinaire
Posts: 3984
Joined: Fri Apr 20, 2007 12:14 am
Location: Hampshire, UK
Contact:

Post by bacteria »

mothatrucka wrote:Those slides are brilliant. Fantastic work!
Thanks, appreciated. They look so much better. I need to finish them to make them look as nice as I can make them. The slides only work for about 8mm or so, enough to slide out of the way, or through 2 x 2mm perspex sheets, to secure the back panel to the battery compartment. I managed to make a subtle but worthwhile improvement to the battery wires, added a small blob of solder to the contacts, when the battery drops home the contacts are immediately made; the battery top just has to then keep the cells in place, which it does. 8)
Image
sirkez5
Posts: 26
Joined: Wed Jun 04, 2008 2:36 pm

Post by sirkez5 »

super , Do you speak French?
bacteria
Portablizer Extraordinaire
Posts: 3984
Joined: Fri Apr 20, 2007 12:14 am
Location: Hampshire, UK
Contact:

Post by bacteria »

sirkez5 wrote:super , Do you speak French?
No. Any reason you ask?

I speak "the international language" of English!


UPDATE:

Wired up both connector slots, had to re-do one as I started wiring to trace 1 instead of 2 on the hacked cart connectors (I am using alternate traces to connect wiring to)! I need to check voltages ok before I wire these wires to the system and the control wiring; then I can turn the system on and test!

Might get the chance to do this this afternoon, if not, definitely tomorrow morning, I will then be able to post some more news...
Image
bacteria
Portablizer Extraordinaire
Posts: 3984
Joined: Fri Apr 20, 2007 12:14 am
Location: Hampshire, UK
Contact:

Post by bacteria »

---(nearly) GREAT NEWS---

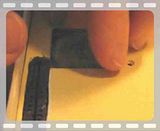
Finished wiring everything up, tentatively put in the batteries, used some elastic bands to hold the game cart in place (as system needs to be upside down to test), turned on, got sound, adjusted with volume control, fine, adjusted contrast (Doom 64 is dark), fine; used controls - all fine, apart from the fact I got the joystick mobo the wrong way around so left=right, up=down, etc; easy enough to rectify although it will mean opening the case and doing some basic surgery. Bottom line is that I didn't get the character doing minor side-steps or moving erratically or some directions not working as I had before. All seems fine. I will correct the joystick orientation and then test again.

This at least proves my theory works and is viable. Until I got to this testing stage I had no way to know if I was going to be plagued with cross-talk and interference on the wiring as I had before or not. Seems fine, so far! :D

I should be able to post more about this later this morning hopefully.

UPDATE:

Problem - gawd, isn't there always at least one?? It looks like I need to make the joysticks able to rotate, a bit like I did before and wanted to avoid. The orientation of the GameCube joystick, N64 joystick and PlayStation joysticks are different. I wired the joysticks in the system in the orientation as per GameCube, hence left=right, up=down, etc - reversed on the N64.

On some controllers, the X axis is on the left and others on the right; the Y axis can be on the top or bottom. Pain. This means I have to make the joysticks able to rotate. I have to work out the best way to do this; unfortunately this will mean cutting the back of the screen+controls casing, I don't have a lot of choice.

This is a bit of a setback and will need some further modding. Joystick rotation is never normally a problem as normally a system is only designed to work with one setup, this project needs to work for many, so is an issue. Image Never mind, I will resolve this, just a pain.
Image
bacteria
Portablizer Extraordinaire
Posts: 3984
Joined: Fri Apr 20, 2007 12:14 am
Location: Hampshire, UK
Contact:

Post by bacteria »

Right, this is how I will resolve the problem. Rather than a rotating element which needs screwing in place, like I did before (not ideal), I am securing the joystick base to a square piece of perspex. The idea is that when the console half is disconnected from the screen half the joysticks will be free, so I can easily rotate them. When the console half is connected to the screen half the square will find home in the screen case and stay in place. This will also be handy if a console half doesn't release from the screen half easily, I can press the joysticks fairly hard and that should do the trick (I shouldn't need to do this, I add, just a thought!).

I wasn't posting project progress before, but there seems a lot of interest from members (over 13200 hits so far, about 100-150 a day - many thanks guys for that, means a lot to me), so here are some pics - I think you will agree this is neat, and will work well!

Image

Image

Image

:D
Image
bacteria
Portablizer Extraordinaire
Posts: 3984
Joined: Fri Apr 20, 2007 12:14 am
Location: Hampshire, UK
Contact:

Post by bacteria »

This is what I meant: the joystick is mounted on a piece of perspex and an exact cut is made through the casing, press the area and you can then rotate the joystick. With the system half in place, the joystick will not have anywhere to move, ideal.

Image

I will be painting the joystick backing, although I might use a lighter colour for this (like the surround). I will have to mark legends like "GC", "PS1" etc with an arrow so I know I have the right orientation before putting the system half in place.

I have the other side to do now, the main joystick part. The yellow joystick will only be used for the GameCube and PSone, whereas the grey (main) joystick will be needed for the N64, GameCube, Psone. The GX4000, Jaguar, SNES, NES, plug'n'play, MegaDrive, SMS don't use an analogue joystick at all.

Here is a short video of the joystick rotation (casing is not secured down, hence screw holes), enjoy!

Image
Last edited by bacteria on Tue Jun 10, 2008 7:04 am, edited 1 time in total.
Image
Post Reply