ZN-40 SNES, coming right up sir! (7/31/08: DONE!)
Moderator: Moderators
-
Metroid fan
- Senior Member
- Posts: 2158
- Joined: Fri Apr 15, 2005 2:36 pm
- Location: Somewhere in the universe
- Contact:
-
Life of Brian
- Moderator
- Posts: 2867
- Joined: Wed Aug 03, 2005 5:55 pm
- Location: Oklahoma
- Contact:
I used some high impact styrene, but regular folk would just call it plastic. Plexiglass would probably work just as well, but I don't enjoy cutting that or sanding it. There are plenty of good links to plastic suppliers in the vacuum forming threads in the case building section of the forums.
dragonhead wrote:sweet. ive spent a third of my life on benheck!

-
Life of Brian
- Moderator
- Posts: 2867
- Joined: Wed Aug 03, 2005 5:55 pm
- Location: Oklahoma
- Contact:
Cartridge slot, you say!?!
Hello everyone. I managed to wrangle some free time on Sunday to work on this, even though it meant driving back to school on Monday morning and running straight to class. It was worth it because I believe I've created something awesome!
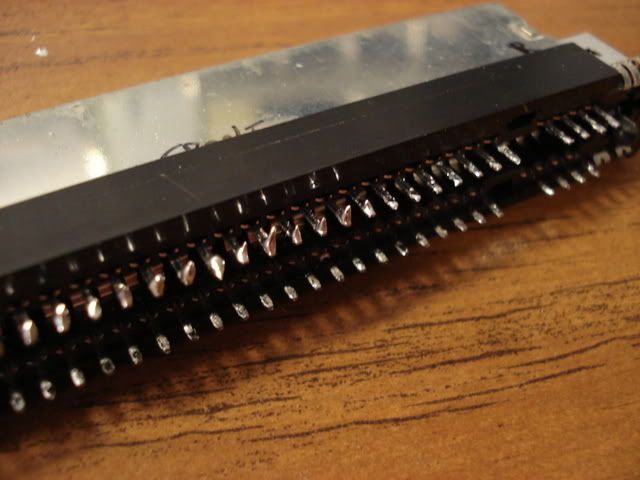
On Saturday I tried and tried to make a cartridge slot just like I did for the first ZN-40 SNES. However, I kept screwing up and either I bent the metal in the wrong place or I wasn't careful and snapped the metal by bending it too far (I was using a vise). I ran out of time that day and it was a good thing that I stopped because I was about to start throwing things. Frustrating!
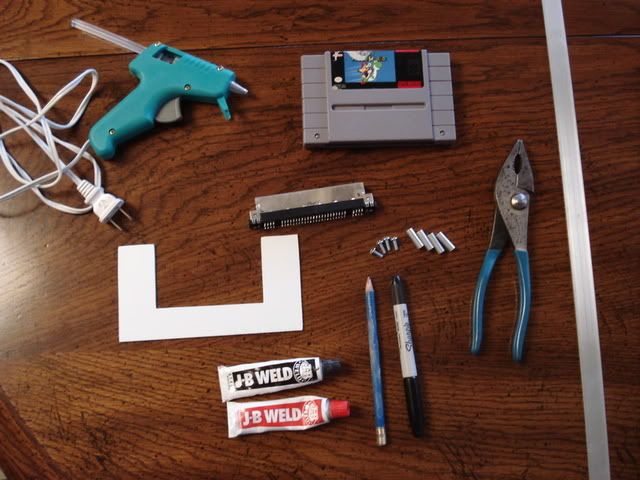
Here is a picture I took that day. I intended to do a write up about making a cartridge slot like my first one, but I managed to waste almost all of the aluminum strip that I had and my free time was used up.
The next day, after church, I came home and learned that my dad had brought home his shop-vac from the business he owns. It's a 6.0 hp beast of a machine and perfect for vacuum forming! About a month ago I randomly decided to try making a better vacuum forming box because my first one was too large to get good suction.
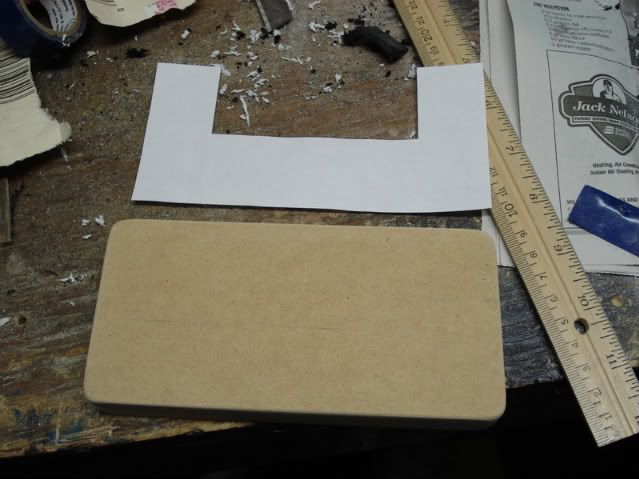
I whipped up a mold using some 3/4" MDF board (the same thickness as an SNES cartridge) and some 1/4" plywood stuff (the batteries are exactly 1" thick) and my handy new band saw that I got for Christmas from my folks. I used some glue and finishing nails (I got impatient for the glue to dry) to put the two pieces of wood together.

Put the mold on some risers. I probably should have made it a little higher even than this.

The newspaper is to keep my jeans from getting dirty! I straddled the hose when doing the work. (No, I didn't put the eyes on the shop-vac. I think my older brother did that a couple of years ago.)
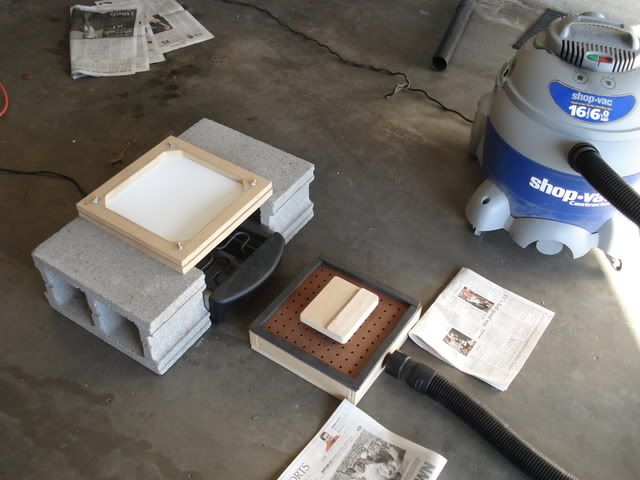
Since I have plenty of 3/4" MDF board laying around I decided to make everything with it. The box, the mold, and my plastic holding frame are all 3/4" thick. The plastic is just beginning to get soft in this picture.
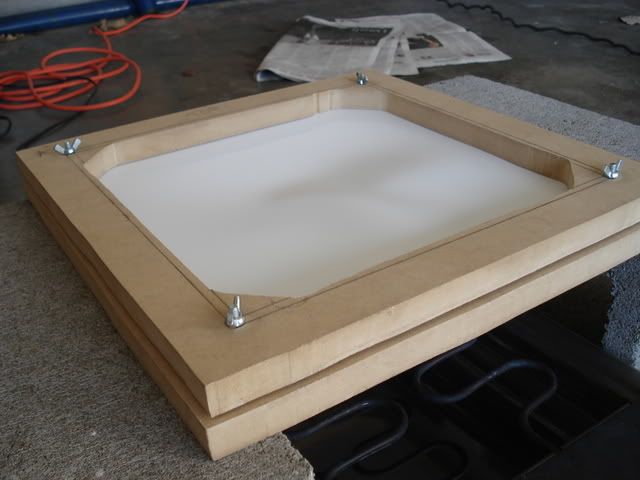
Now, I only had two pieces of plastic left over from the last time I tried vacuum forming (which had pathetic results). So I only had two shots at this. It was either get this right or wait a couple more weeks for more plastic to come in. I purchased my plastic from this company, by the way. Best price I can find!
What do you know - the first try failed! But luckily I had a second piece and that one came out fine. I probably should have set the mold on some taller risers to get straighter walls, but I think it will turn out all right when I'm done hacking it into shape. There's still plenty of cutting and sanding to do before I'm done!
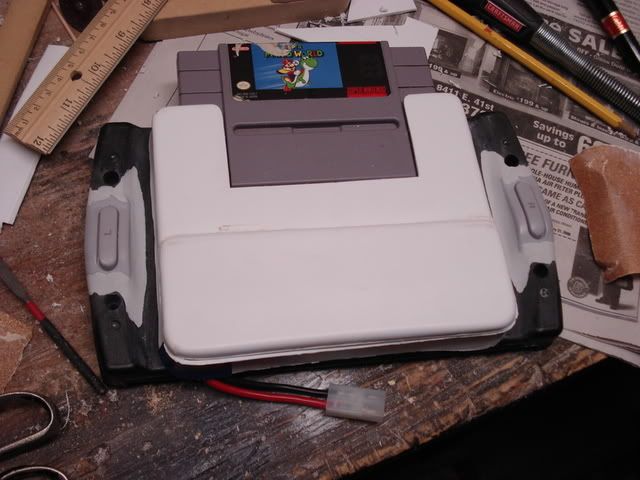
This corner cracked Easily fixable, though. I'm going to bondo this to the case anyway.
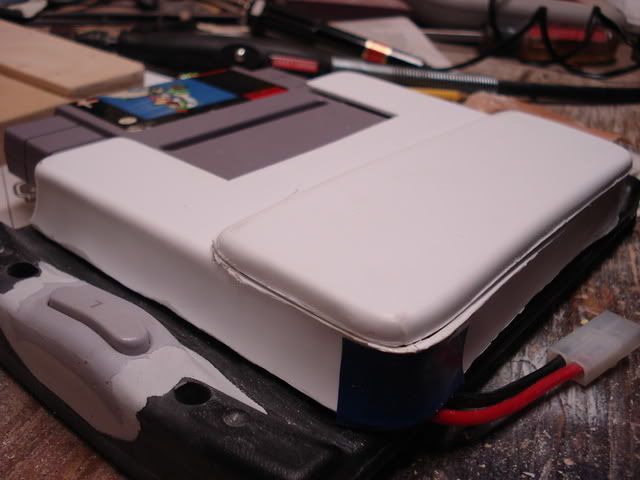
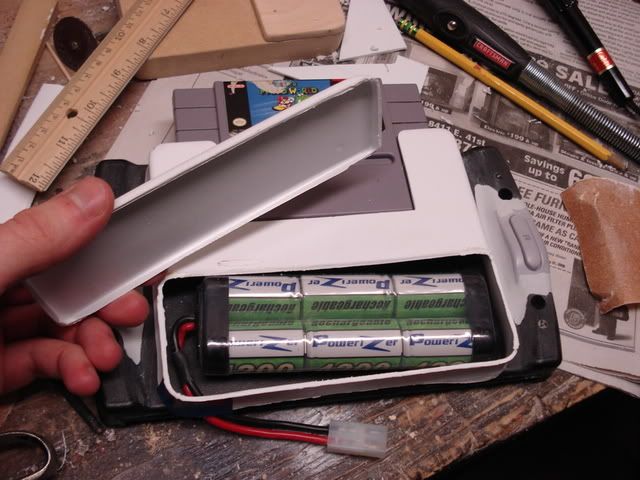
Thanks to this design we now have a battery compartment! I cut the plastic with a hot knife blade attachment I have for one of my cheapo soldering irons.
So, lessons learned:
1) Don't make your vacuum forming box too thick. It's better to have a thin one than a thick one because it takes too long to suck out all the air from a big box and that gives you crappy results.
2) Practice! This is the first "successful" run I've ever had at vacuum forming. I wasted about 10 sheets of 1 sq. ft. plastic before my first success.
3) Is this the best setup for vacuum forming? Hardly. It's just what I've cobbled together. I think if I can figure out a design for suspending my grill thing upside down over my vacuum box then I'll be able to lower the plastic straight down without worrying about alignment. If you don't have the plastic centered when lowering it onto the mold then you're screwed and need to try again!
I'm really pleased with this design over my previous one because this provides a compartment to hold the batteries instead of just sticking them on with some Velcro or whatever.
More delicious goodness next week!
On Saturday I tried and tried to make a cartridge slot just like I did for the first ZN-40 SNES. However, I kept screwing up and either I bent the metal in the wrong place or I wasn't careful and snapped the metal by bending it too far (I was using a vise). I ran out of time that day and it was a good thing that I stopped because I was about to start throwing things. Frustrating!
Here is a picture I took that day. I intended to do a write up about making a cartridge slot like my first one, but I managed to waste almost all of the aluminum strip that I had and my free time was used up.
The next day, after church, I came home and learned that my dad had brought home his shop-vac from the business he owns. It's a 6.0 hp beast of a machine and perfect for vacuum forming! About a month ago I randomly decided to try making a better vacuum forming box because my first one was too large to get good suction.
I whipped up a mold using some 3/4" MDF board (the same thickness as an SNES cartridge) and some 1/4" plywood stuff (the batteries are exactly 1" thick) and my handy new band saw that I got for Christmas from my folks. I used some glue and finishing nails (I got impatient for the glue to dry) to put the two pieces of wood together.
Put the mold on some risers. I probably should have made it a little higher even than this.
The newspaper is to keep my jeans from getting dirty! I straddled the hose when doing the work. (No, I didn't put the eyes on the shop-vac. I think my older brother did that a couple of years ago.)
Since I have plenty of 3/4" MDF board laying around I decided to make everything with it. The box, the mold, and my plastic holding frame are all 3/4" thick. The plastic is just beginning to get soft in this picture.
Now, I only had two pieces of plastic left over from the last time I tried vacuum forming (which had pathetic results). So I only had two shots at this. It was either get this right or wait a couple more weeks for more plastic to come in. I purchased my plastic from this company, by the way. Best price I can find!
What do you know - the first try failed! But luckily I had a second piece and that one came out fine. I probably should have set the mold on some taller risers to get straighter walls, but I think it will turn out all right when I'm done hacking it into shape. There's still plenty of cutting and sanding to do before I'm done!
This corner cracked
Thanks to this design we now have a battery compartment! I cut the plastic with a hot knife blade attachment I have for one of my cheapo soldering irons.
So, lessons learned:
1) Don't make your vacuum forming box too thick. It's better to have a thin one than a thick one because it takes too long to suck out all the air from a big box and that gives you crappy results.
2) Practice! This is the first "successful" run I've ever had at vacuum forming. I wasted about 10 sheets of 1 sq. ft. plastic before my first success.
3) Is this the best setup for vacuum forming? Hardly. It's just what I've cobbled together. I think if I can figure out a design for suspending my grill thing upside down over my vacuum box then I'll be able to lower the plastic straight down without worrying about alignment. If you don't have the plastic centered when lowering it onto the mold then you're screwed and need to try again!
I'm really pleased with this design over my previous one because this provides a compartment to hold the batteries instead of just sticking them on with some Velcro or whatever.
More delicious goodness next week!
dragonhead wrote:sweet. ive spent a third of my life on benheck!
-
Life of Brian
- Moderator
- Posts: 2867
- Joined: Wed Aug 03, 2005 5:55 pm
- Location: Oklahoma
- Contact:
-
Life of Brian
- Moderator
- Posts: 2867
- Joined: Wed Aug 03, 2005 5:55 pm
- Location: Oklahoma
- Contact:
A small update:
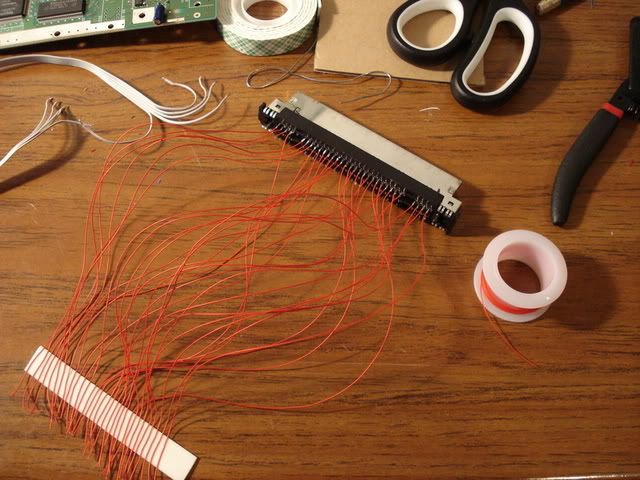
Unfortunately I was fairly sick this past weekend. All I managed was to wire up the cartridge connector and add screwposts to the cover using aluminum threaded spacers that I glued/bondo-ed into place.
With this particular setup, I need to connect wires to the cartridge connector first, attach it to the cover I made for the back, and then attach the cover to back of the case. After that it's time to paint! I'll likely get to that this upcoming weekend.
It's important to add a little bit of solder to each connector first. It makes life so much easier later.
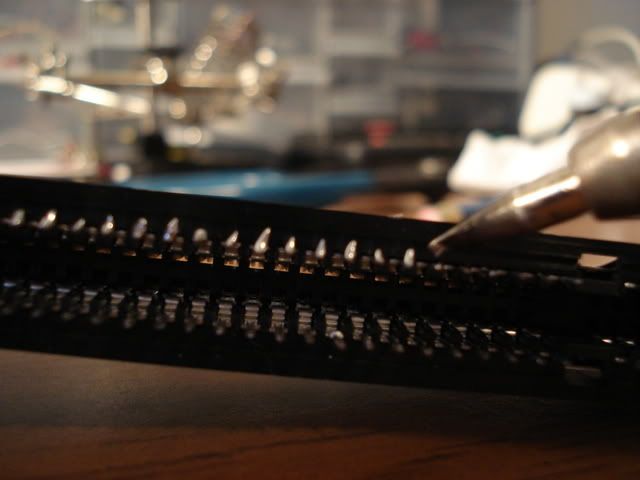
I initially used 30 gauge wrapping wire from RadioShack. However, it tends to break easily at its soldered connections and I couldn't afford that once I integrate the connector into the case. After thinking about it for a while I decided to not use this setup.
Since I'm practically out of IDE ribbon cable, I bought some more wire from my local RadioShack (it was 22 gauge stranded wire). However, this stuff is a little bit thicker and stiffer than what I'm use to. It will still work, though, and I'm not concerned about these connections breaking loose any time soon which is a definite plus.
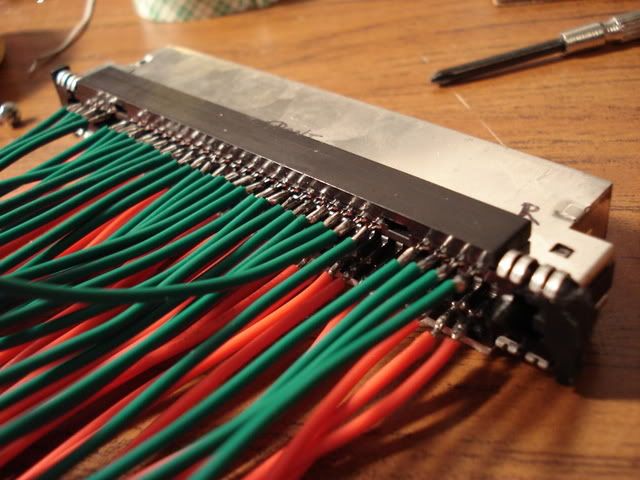
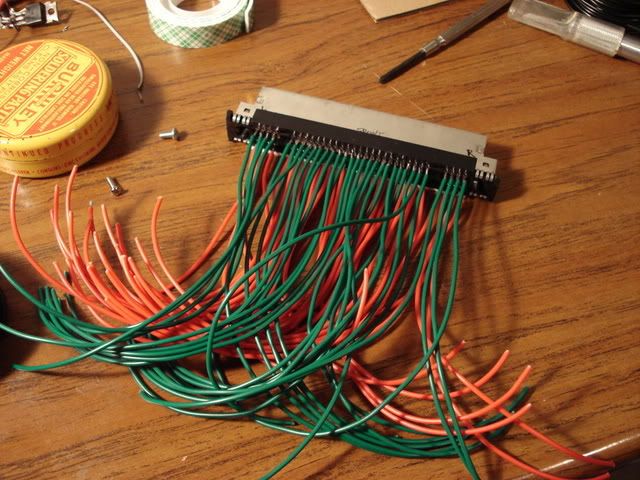
Once all is in place I'll have to carefully double check each wire as I attach it to the SNES board with my multimeter. Luckily it has an audible continuity tester (in non-geek speak that means it beeps for me when I'm touching the correct connections). I thought about devising something to keep the wires in order until it's time to connect them, but I'd have to double check everything anyway so why bother?
Much more fun stuff to come!
Unfortunately I was fairly sick this past weekend. All I managed was to wire up the cartridge connector and add screwposts to the cover using aluminum threaded spacers that I glued/bondo-ed into place.
With this particular setup, I need to connect wires to the cartridge connector first, attach it to the cover I made for the back, and then attach the cover to back of the case. After that it's time to paint! I'll likely get to that this upcoming weekend.
It's important to add a little bit of solder to each connector first. It makes life so much easier later.
I initially used 30 gauge wrapping wire from RadioShack. However, it tends to break easily at its soldered connections and I couldn't afford that once I integrate the connector into the case. After thinking about it for a while I decided to not use this setup.
Since I'm practically out of IDE ribbon cable, I bought some more wire from my local RadioShack (it was 22 gauge stranded wire). However, this stuff is a little bit thicker and stiffer than what I'm use to. It will still work, though, and I'm not concerned about these connections breaking loose any time soon which is a definite plus.
Once all is in place I'll have to carefully double check each wire as I attach it to the SNES board with my multimeter. Luckily it has an audible continuity tester (in non-geek speak that means it beeps for me when I'm touching the correct connections). I thought about devising something to keep the wires in order until it's time to connect them, but I'd have to double check everything anyway so why bother?
Much more fun stuff to come!
dragonhead wrote:sweet. ive spent a third of my life on benheck!
-
Life of Brian
- Moderator
- Posts: 2867
- Joined: Wed Aug 03, 2005 5:55 pm
- Location: Oklahoma
- Contact:
-
bacteria
- Portablizer Extraordinaire
- Posts: 3984
- Joined: Fri Apr 20, 2007 12:14 am
- Location: Hampshire, UK
- Contact:
Now that is interesting....I thought it was smaller than this....the width is similar to my project casing, but less deep (13.3cms vs about 20cms), and 2" is 52mm; I aim for about 30-33mm for thickness for handhold areas. Yes, comfortable to hold, indeed, looking at the pics, it looks like 52mm in mid thickness, and more like 30mm on handhold areas?? (is this right?).Life of Brian wrote:According to Polycase.com the dimensions of the case are 9.18" W x 5.25" L (23.3 cm x 13.3 cm) and total thickness will be around 2" or so. Very comfortable to hold!
Nice work.

-
Life of Brian
- Moderator
- Posts: 2867
- Joined: Wed Aug 03, 2005 5:55 pm
- Location: Oklahoma
- Contact:
Well, like all things in life, there's been a few changes.
I came across these batteries and we've decided to go ahead and use them. This means that the batteries can be built internally (just the right space for them inside the ZN-40) and the cartridge will now be flush with the case when inserted. I'll need to redesign the cartridge connector cover on the back, but that's no big deal. We're going to have li-poly's! It's going to be awesome.
By the way, I came across a decent deal on ribbon cable, if anyone's needing some. Probably not as cheap as bumming some from your local PC repair shop, but if you're reclusive this might be handy. Only downside is their cheapest shipping is like $6, so really I suggest going to a PC repair store and just buying some off of them.
dragonhead wrote:sweet. ive spent a third of my life on benheck!
-
Life of Brian
- Moderator
- Posts: 2867
- Joined: Wed Aug 03, 2005 5:55 pm
- Location: Oklahoma
- Contact:
Update time! I decided to do a video update this time.
Video Worklog #1
So, yeah, I'm back to doing the bent aluminum thing with plastic on top instead of a vacuum formed shape. It's going to look great when finished.
Thanks to a suggestion from my younger brother, I discovered a very easy way to get the aluminum bent just the way I wanted it. It involves cutting a piece of wood, shaping it just right, and then bending the metal around it.
Clamp the metal in place and then bend around the corner
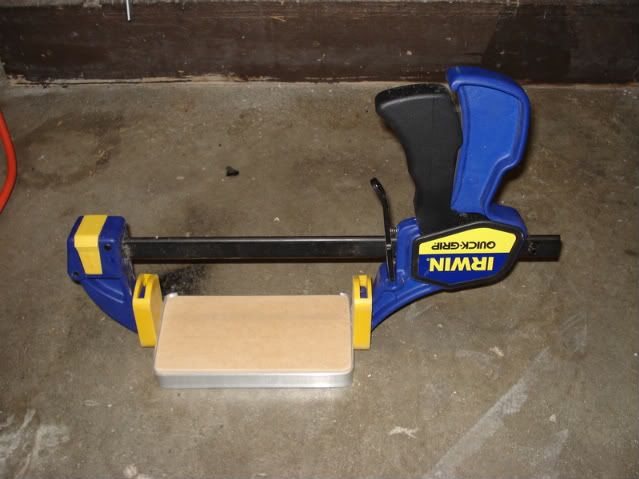
Use aviation snips to cut right through the metal. Easy!
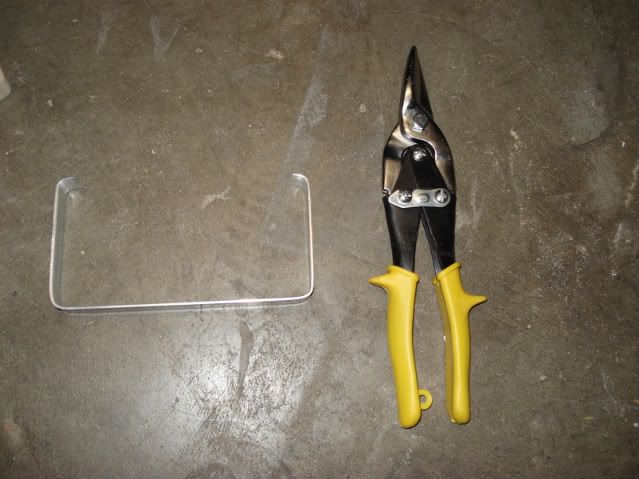
Perfect fit

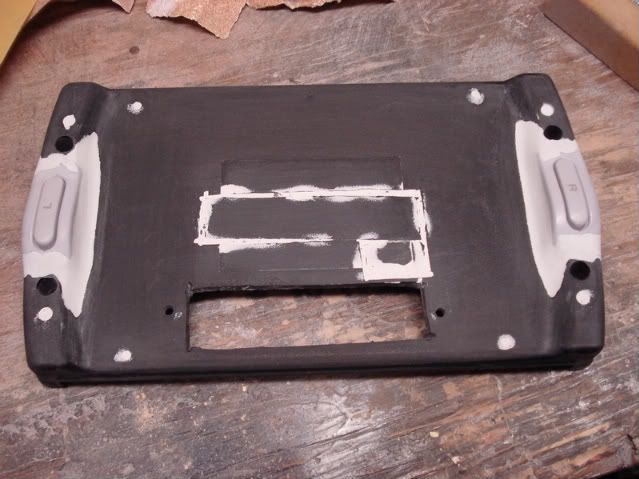
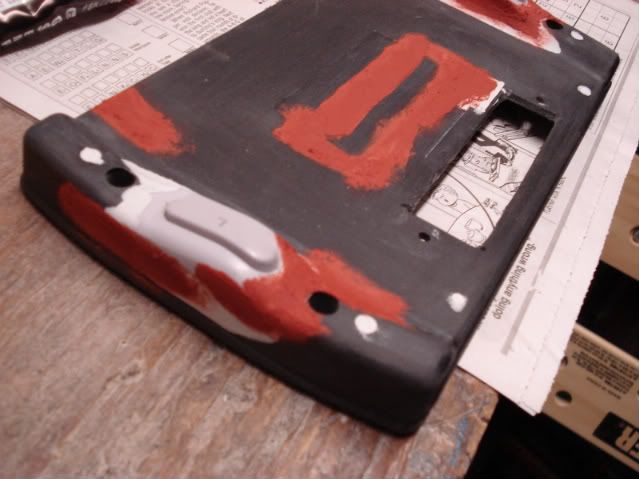
I had to patch up the hole I previously cut because I'm sliding the whole cartridge slot assembly downwards. The top of the cartridge will be flush with the top of the case when I'm done.
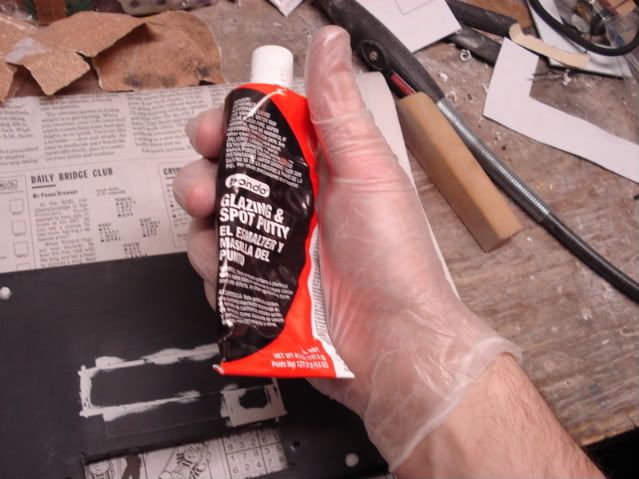
Spot putty is great, but it probably isn't good getting it on your fingers when spreading it around. Might give you cancer or something... I bought some cheap disposable gloves to wear this time.
And then once it dries sand it all down, of course
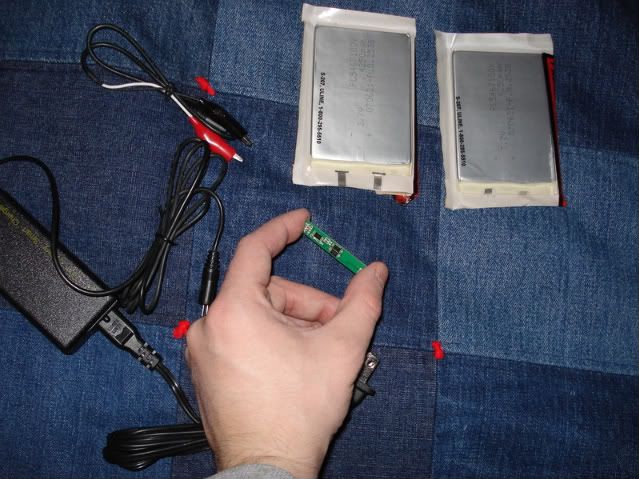
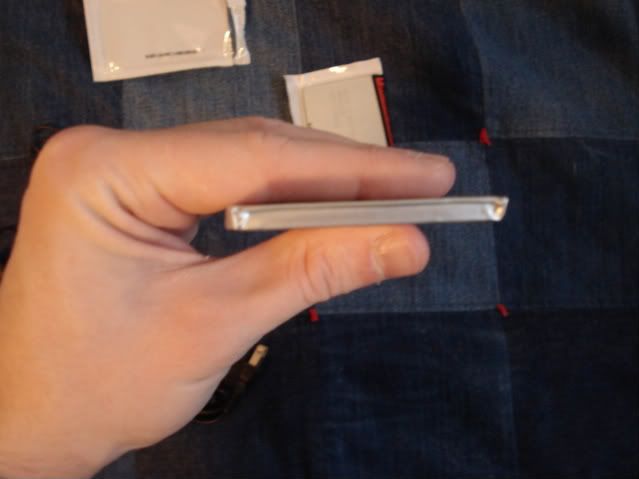
The new batteries finally came in. They're thin! The charger is small too - about the size of a PSP charger, actually. The circuit board I'm holding is the protection circuit for the batteries. It's way smaller than I expected.
0.5 cm of goodness here...
Watch the video for more information!
Anybody notice that I'm on the front page of the site today?
Video Worklog #1
So, yeah, I'm back to doing the bent aluminum thing with plastic on top instead of a vacuum formed shape. It's going to look great when finished.
Thanks to a suggestion from my younger brother, I discovered a very easy way to get the aluminum bent just the way I wanted it. It involves cutting a piece of wood, shaping it just right, and then bending the metal around it.
Clamp the metal in place and then bend around the corner
Use aviation snips to cut right through the metal. Easy!
Perfect fit
I had to patch up the hole I previously cut because I'm sliding the whole cartridge slot assembly downwards. The top of the cartridge will be flush with the top of the case when I'm done.
Spot putty is great, but it probably isn't good getting it on your fingers when spreading it around. Might give you cancer or something... I bought some cheap disposable gloves to wear this time.
And then once it dries sand it all down, of course
The new batteries finally came in. They're thin! The charger is small too - about the size of a PSP charger, actually. The circuit board I'm holding is the protection circuit for the batteries. It's way smaller than I expected.
0.5 cm of goodness here...
Watch the video for more information!
Anybody notice that I'm on the front page of the site today?
dragonhead wrote:sweet. ive spent a third of my life on benheck!
-
lovablechevy
- Portablizer Extraordinaire
- Posts: 1104
- Joined: Wed Nov 01, 2006 3:09 pm
- Location: busy with a project
- Contact:
-
Life of Brian
- Moderator
- Posts: 2867
- Joined: Wed Aug 03, 2005 5:55 pm
- Location: Oklahoma
- Contact:
-
johnbjuice
- Posts: 520
- Joined: Thu Nov 30, 2006 11:52 pm
- Location: California
- Contact: