I'm afraid to tin the batteries, what if they explode?!?Neildo_64 wrote:You don't NEED flux. You can use flux but you could also just use solder. Tin both areas first and then just solder them together. I never use flux (can't stand it) and I do a lot of fine/difficult soldering.
I tin the wire and hold it on the battery, then add the soldering iron for half a second so the solder melts, but the solder does not stick.
Also, I took off the tabs before I read your post.
What kind of flux do I get? Are there even different kinds? I know there's paste, but is that all there is?hailrazer wrote:Once you break off the metal tabs it is really hard to get solder to stick anywhere.
I have used flux and different types of solder and it is next to impossible to get it to stick.
"Sometimes" you can get it to stick on the small metal speck that the metal tab was stuck to.
I'll try soldering to the small piece of metal still stuck on there.
UPDATE-EDIT:
Here are my drawings for my Retro64. This is the front: (It is missing the speaker grills, and the A/B and C buttons will probably be swapped)
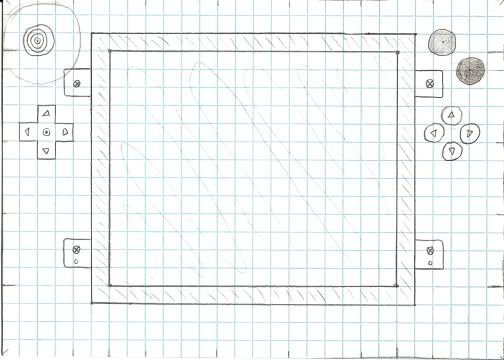
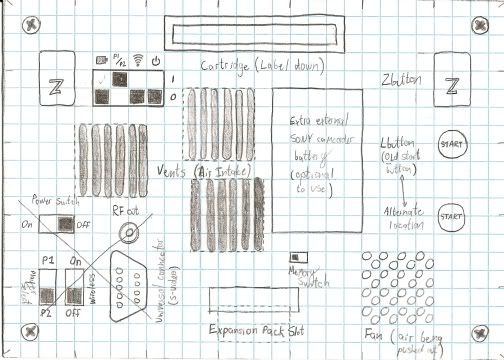
Here is the back. The crossed out stuff was where the switches were going to be, but I'm moving them. The universal video connector is my own design. It plugs in there, and it has L/R audio, Composite, RGB, and S-Video. It will be present on all my handhelds from now on.
The air vents will be above the RAM and the 2 CPUs. Air will be drawn in there, so it goes straight over the heatsinks. It is blown out in the lower-right corner.
The four switches next to the R button (which is a Z button) are, from left to right: Charge Battery (It cannot charge while playing), Wireless Player 1 or Player 2 select, Wireless On/Off, and Power On/Off. Up is on ( 1 ), down is off ( 0 ).
These were drawn while I was at school, so everything is not exactly yo scale except the PSone screen. Everything is VERY close to actual size. These images were shrunk to the real size of my portable (7" x 5"), so if you print them, they will be actual size.
Here are the buttons and screen placed on:
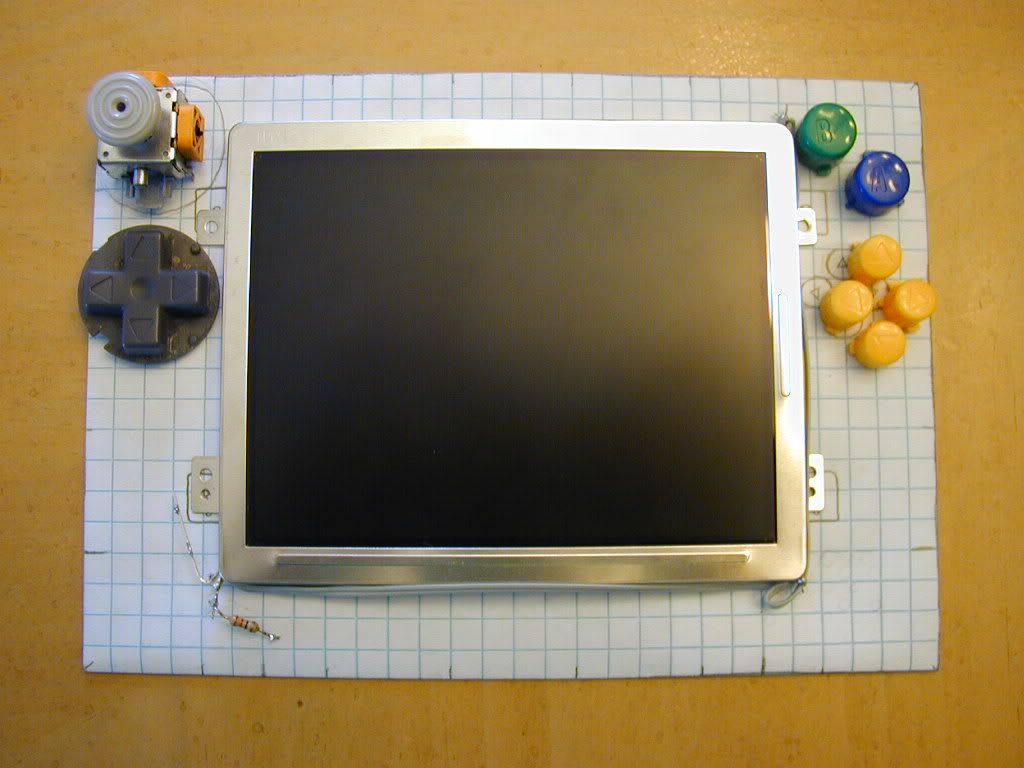
Here is the screen board chopped to the ABSOLUTE MAX! As you can see, it would be best to switch the C buttons and the A/B buttons, because there is more room up top. Plus, it's more like the original controller.