marbs N64p progress log (yes, there are pictures!)
Moderator: Moderators
@Neildo_64
Please tell me I'm not the only person finding it hard to squeeze it all in? I know I'll fit it all in, it's just going to be a bit cozy in there.
I decided to attempt to get everything running on batteries, but one problem...I didn't have a 7.2v battery! In a moment of genius, however, I came up with a cunning plan!
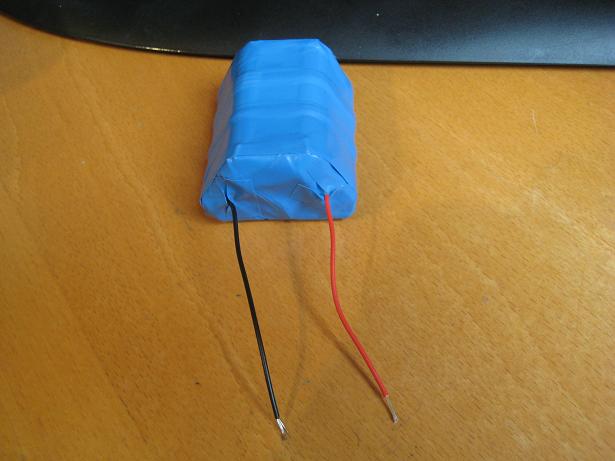
Using bits of wire and tape, I stuck 5 1.5v AA batteries together in series, giving me a total of 7.5v! Looks almost like a proper battery!
Using this battery, I have just been wiring it up. So far I've only hooked it up to the PSone screen, which I can report works successfully, yay! Next Im going to wire in the transformer thingy, and test my N64...however before I do that I have one question.
In making my N64 as low as possible, I ripped off the reset switch. Now I need to know, should I connect these two pins together (image of where reset button was with things I think I should solder together shown by yellow lines)

Also, one final question, would this be a good choice of battery for an N64p? 7.4v, 6400mAh. The only obvious problem I can see with it is that it's 6" long, which is edging on too long really
One final thing, solder doesn't seem to be sticking to my soldering iron, and it won't melt near the tip of the iron. Could this be because I used my soldering iron to cut the hole in my case for the cartridge slot, and if so (or not) how can I fix this?
Anyway now I'd better do some school work before tomorrow!
Please tell me I'm not the only person finding it hard to squeeze it all in?
I decided to attempt to get everything running on batteries, but one problem...I didn't have a 7.2v battery! In a moment of genius, however, I came up with a cunning plan!
Using bits of wire and tape, I stuck 5 1.5v AA batteries together in series, giving me a total of 7.5v! Looks almost like a proper battery!
Using this battery, I have just been wiring it up. So far I've only hooked it up to the PSone screen, which I can report works successfully, yay! Next Im going to wire in the transformer thingy, and test my N64...however before I do that I have one question.
In making my N64 as low as possible, I ripped off the reset switch. Now I need to know, should I connect these two pins together (image of where reset button was with things I think I should solder together shown by yellow lines)
Also, one final question, would this be a good choice of battery for an N64p? 7.4v, 6400mAh. The only obvious problem I can see with it is that it's 6" long, which is edging on too long really
One final thing, solder doesn't seem to be sticking to my soldering iron, and it won't melt near the tip of the iron. Could this be because I used my soldering iron to cut the hole in my case for the cartridge slot, and if so (or not) how can I fix this?
Anyway now I'd better do some school work before tomorrow!
Oh yes, it is VERY hard to fit everything inside. Especially keeping it looking nice and slim and not relocating the exp pack. You said 1.5V batteries? Are they not rechargeable? If so, that wont make a very good test battery for very long at all. I use a PC power supply with a lot of the wires hacked off as a test power supply for lots of stuff. If you hook the green wire to any ground wire, the power supply will come on (you have to do this to run it without a PC). I just put a switch here, and then you have a perfect test power supply. You would have to use a 7808 to get 8V though. Oh, and the soldering iron thing, you could try sanding it and afterwards, make sure its always tinned and you use a sponge when soldering. Also, those batteries would definitely be sufficient.
Last edited by Neildo_64 on Wed Jun 18, 2008 3:59 pm, edited 2 times in total.

Current projects:
Ultimate N64 Guide
N64 Portable (x2)
NES Portable
Ah, well I've been lazy and left the cart slot and expansion slot in their place. Relocating them just seemed to bring up too many problems. The portable will probably have quite a big behind but will look nice from the front 
One of my main concerns at the moment is cooling - I barely have any room to fit in heat sinks, so I was wondering if it would be feasable to just use those little blocks stuck on the chips for heatsinks, and just have a really good airflow going through (or would it be better to try and use a proper heatsink? only problem is I can't find one small enough).
One of my main concerns at the moment is cooling - I barely have any room to fit in heat sinks, so I was wondering if it would be feasable to just use those little blocks stuck on the chips for heatsinks, and just have a really good airflow going through (or would it be better to try and use a proper heatsink? only problem is I can't find one small enough).
Chipset heat sinks from old PC motherboards work great because they are usually super thin. They are bigger than the N64 chips, but they still fit on the mobo fine. I have some I would sell you if you wanted. I could take some pics of what I'm talking about if you want.
Last edited by Neildo_64 on Wed Jun 18, 2008 4:28 pm, edited 2 times in total.
Current projects:
Ultimate N64 Guide
N64 Portable (x2)
NES Portable

-
mothatrucka
- Banned
- Posts: 588
- Joined: Sun May 04, 2008 12:21 pm


-
project_failure
- Posts: 812
- Joined: Sun Dec 25, 2005 4:04 pm
- Contact:
You could bend all the fins on the heat sink to make them shorter. It would still have the same amount of surface area so they would still be just as effective. The only difference would be air flow.marbs wrote:Yes I suppose I could try and cut my heatsinks down, though I don't have access to a dremel (or at least, not one with a cutting attachment). The best I could do really is try and hacksaw through it, which could take a while...
It is not junk! It is assorted goods with no current use.Sword_Gun wrote:Klef your asking a whole bunch of videogame players.. for girl advice.. Nice.
-Project Failure
Thanks bacteria!
I don't think I will bend all the heatsink pins because they seem to be quite stiff, and won't bend very far.
Good news - using my homemade battery I connected up my PSone screen, N64 and transformer, and it all works fine! Well, I say fine, the image on the screen is a bit messed up but I'm pretty sure this is due to it not receiving enough voltage because some of my connections are a bit...dodgy. Gonna resolder the wires and then hopefully it'll display properly. I would post a picture, but I need the two hands in order to hold all the circuitry in place, so it'd be a bit tricky.
[edit]
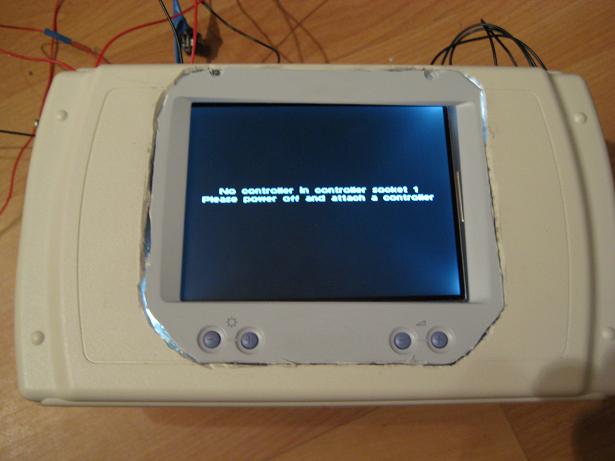
Figured out the image screwing up was due to my batteries not being able to cope or something, so then I thought I'd have to order my batteries and wait for them to arrive before I could make further progress, however just a few minutes ago I realised I was missing out a really obvious option - simply wire up the PSone screen power cable to test it!
After less then a minute of soldering I replaced my dodgy battery pack with the PSone screen power block thingy, and as you can see it's all in working order!

Next I need to do the controller (might need to buy some tact swithes for that possibly), possibly add other player ports and then pack it all in the case!
I have yet to decide upon a battery. I was interested in buying this battery, however I live in the UK and it estimates shipping to be over $60! (£30), which is way too expensive, so I'm probably going to have to start hunting on ebay.
Another task is to figure out how to construct the battery compartment. I currently just have psone screen sized slab of plastic from where I cut out the hole for the screen, and other odd little bits, which definitely isn't enough. Anyone know where I could buy small cases that would suit this purpose?
[edit2]
Slowly getting there!
I don't think I will bend all the heatsink pins because they seem to be quite stiff, and won't bend very far.
Good news - using my homemade battery I connected up my PSone screen, N64 and transformer, and it all works fine! Well, I say fine, the image on the screen is a bit messed up but I'm pretty sure this is due to it not receiving enough voltage because some of my connections are a bit...dodgy
[edit]
Figured out the image screwing up was due to my batteries not being able to cope or something, so then I thought I'd have to order my batteries and wait for them to arrive before I could make further progress, however just a few minutes ago I realised I was missing out a really obvious option - simply wire up the PSone screen power cable to test it!
After less then a minute of soldering I replaced my dodgy battery pack with the PSone screen power block thingy, and as you can see it's all in working order!
Next I need to do the controller (might need to buy some tact swithes for that possibly), possibly add other player ports and then pack it all in the case!
I have yet to decide upon a battery. I was interested in buying this battery, however I live in the UK and it estimates shipping to be over $60! (£30), which is way too expensive, so I'm probably going to have to start hunting on ebay.
Another task is to figure out how to construct the battery compartment. I currently just have psone screen sized slab of plastic from where I cut out the hole for the screen, and other odd little bits, which definitely isn't enough. Anyone know where I could buy small cases that would suit this purpose?
[edit2]
Slowly getting there!