Nintoaster 64 - Work in Progress

Includes but not limited to: SNES, Genesis, Sega CD, PlayStation 1, Nintendo 64, Dreamcast, Game Gear and I guess the Virtual Boy.

Moderator:Moderators

Post Reply
User avatar
shingfunger
Posts:5
Joined:Tue Nov 30, 2010 2:12 am
Nintoaster 64 - Work in Progress

Post by shingfunger » Fri Dec 10, 2010 7:27 pm

This is my first real post, and one of my first projects. This site has given me an amazing amount of information, so thank you. And I want to specifically thank bacteria for his n64 tutorials and vomitsaw for a ton of inspiration.

My little sister asked for a Nintendo 64 for Christmas. I decided just giving her my old one was no fun; so I wanted to build it into a toaster, repackage it in the toaster box, and trick her into thinking she was getting a kitchen appliance. A little bit of research later, I found vomitsaw’s super nintoaster, and this closely mimics that.


The pictures are small for the forum and you can click on the links for larger versions.

Image
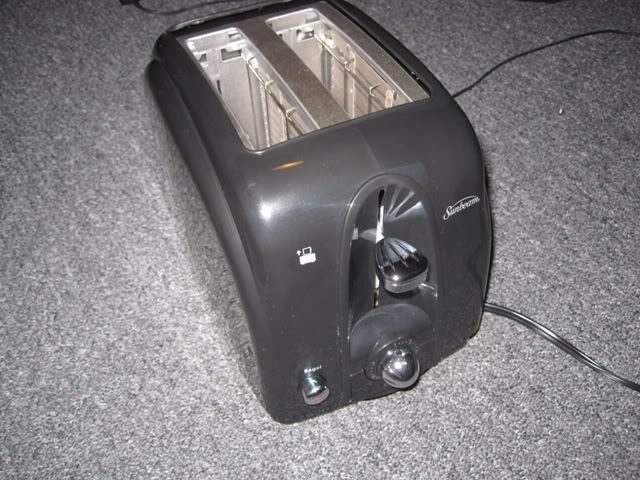
This is the toaster I’m using.
http://i45.photobucket.com/albums/f92/s ... er64/1.jpg

Image
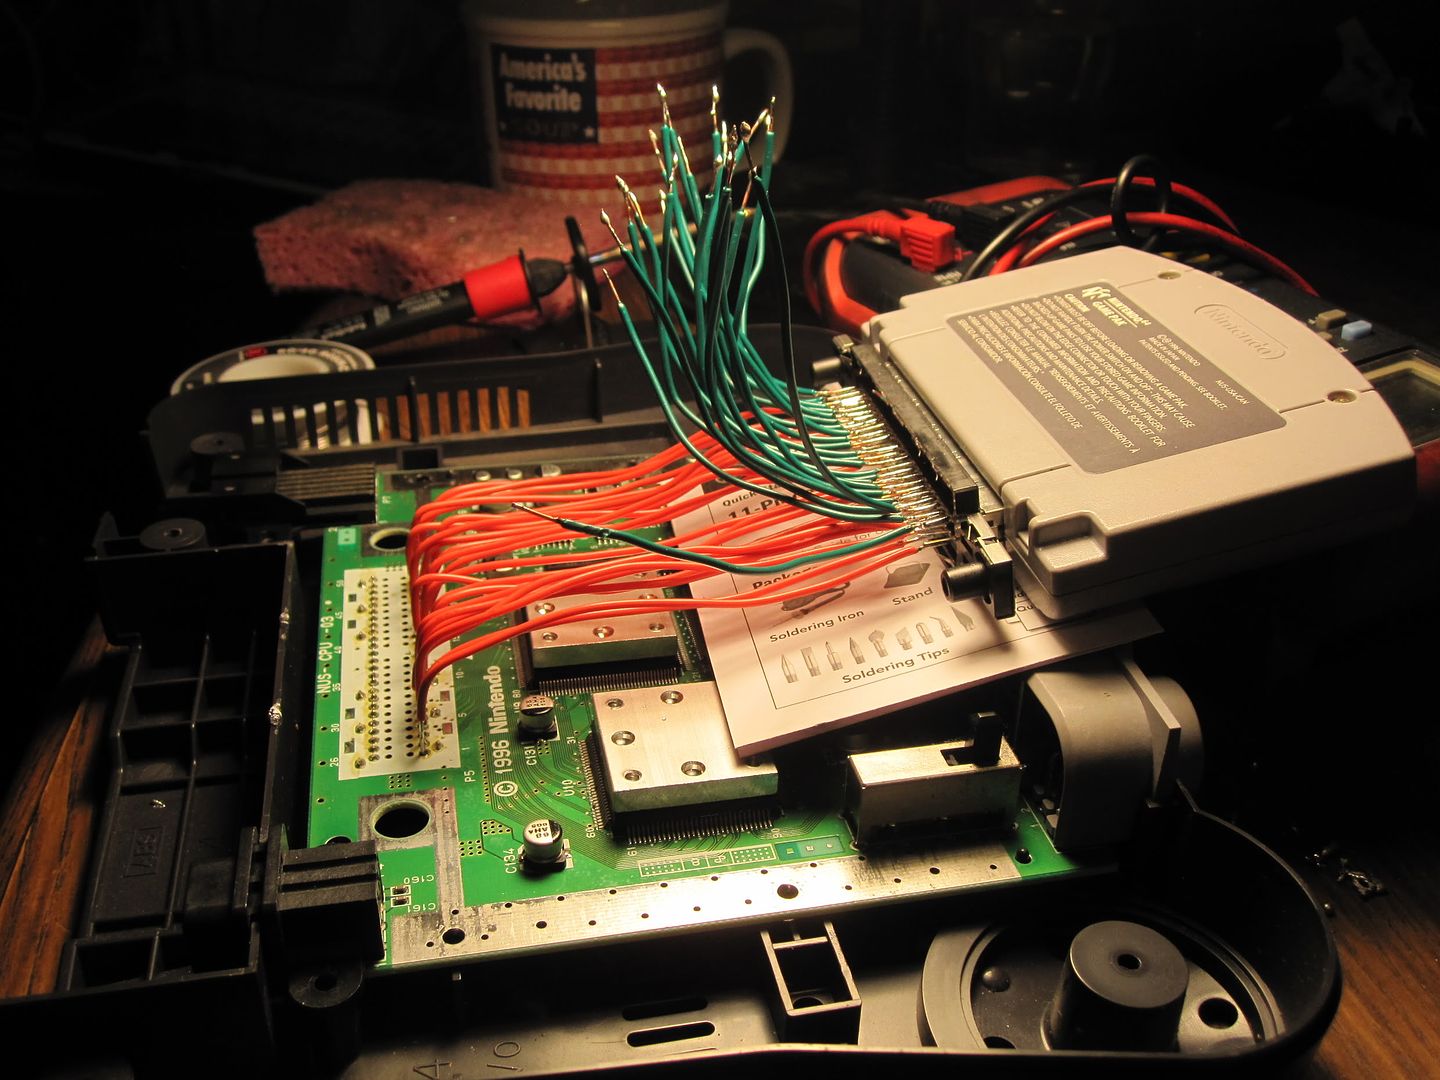
This is my second attempt at relocating the cartridge slot. Something went wrong the first time, but it gave me a junk motherboard to use.
http://i45.photobucket.com/albums/f92/s ... er64/2.jpg

Image
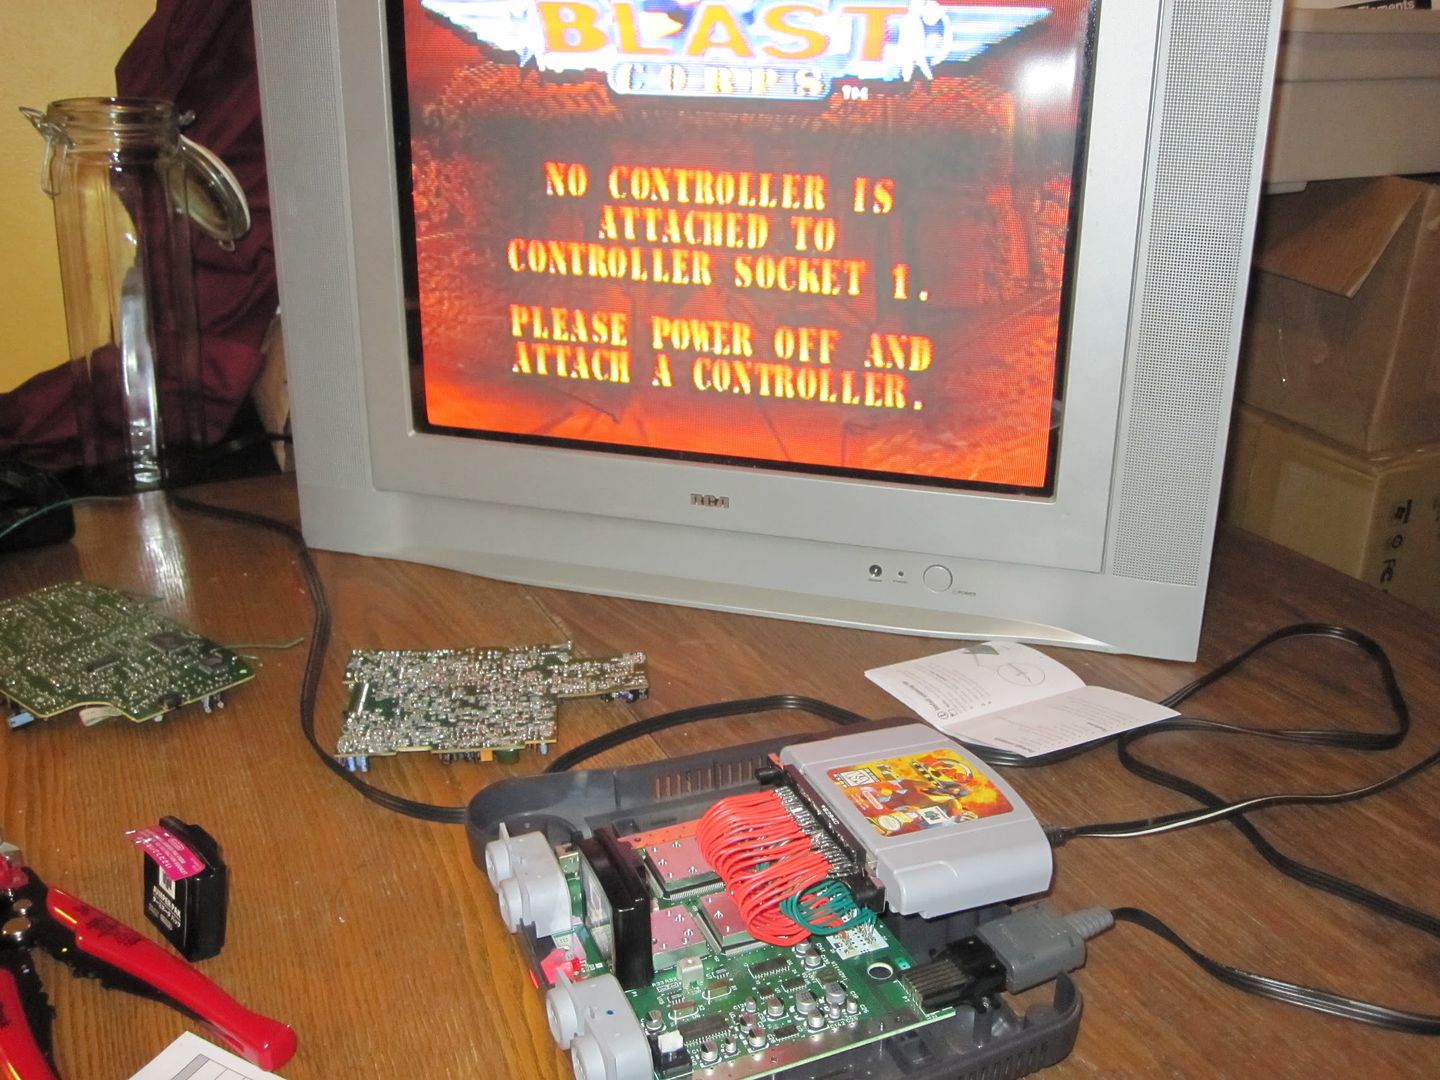
I was very happy when it worked.
http://i45.photobucket.com/albums/f92/s ... er64/3.jpg

Image
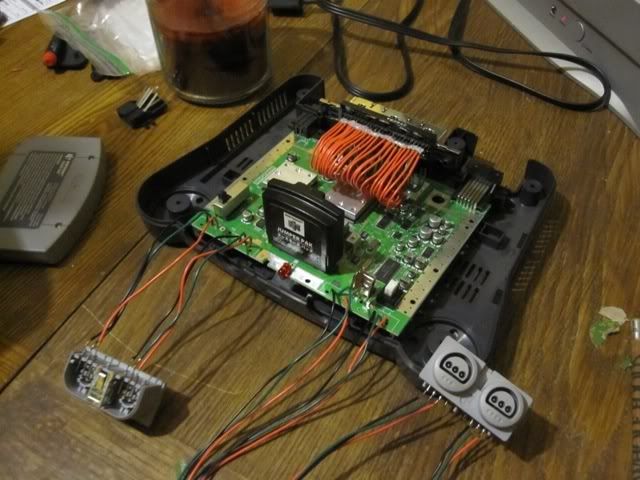
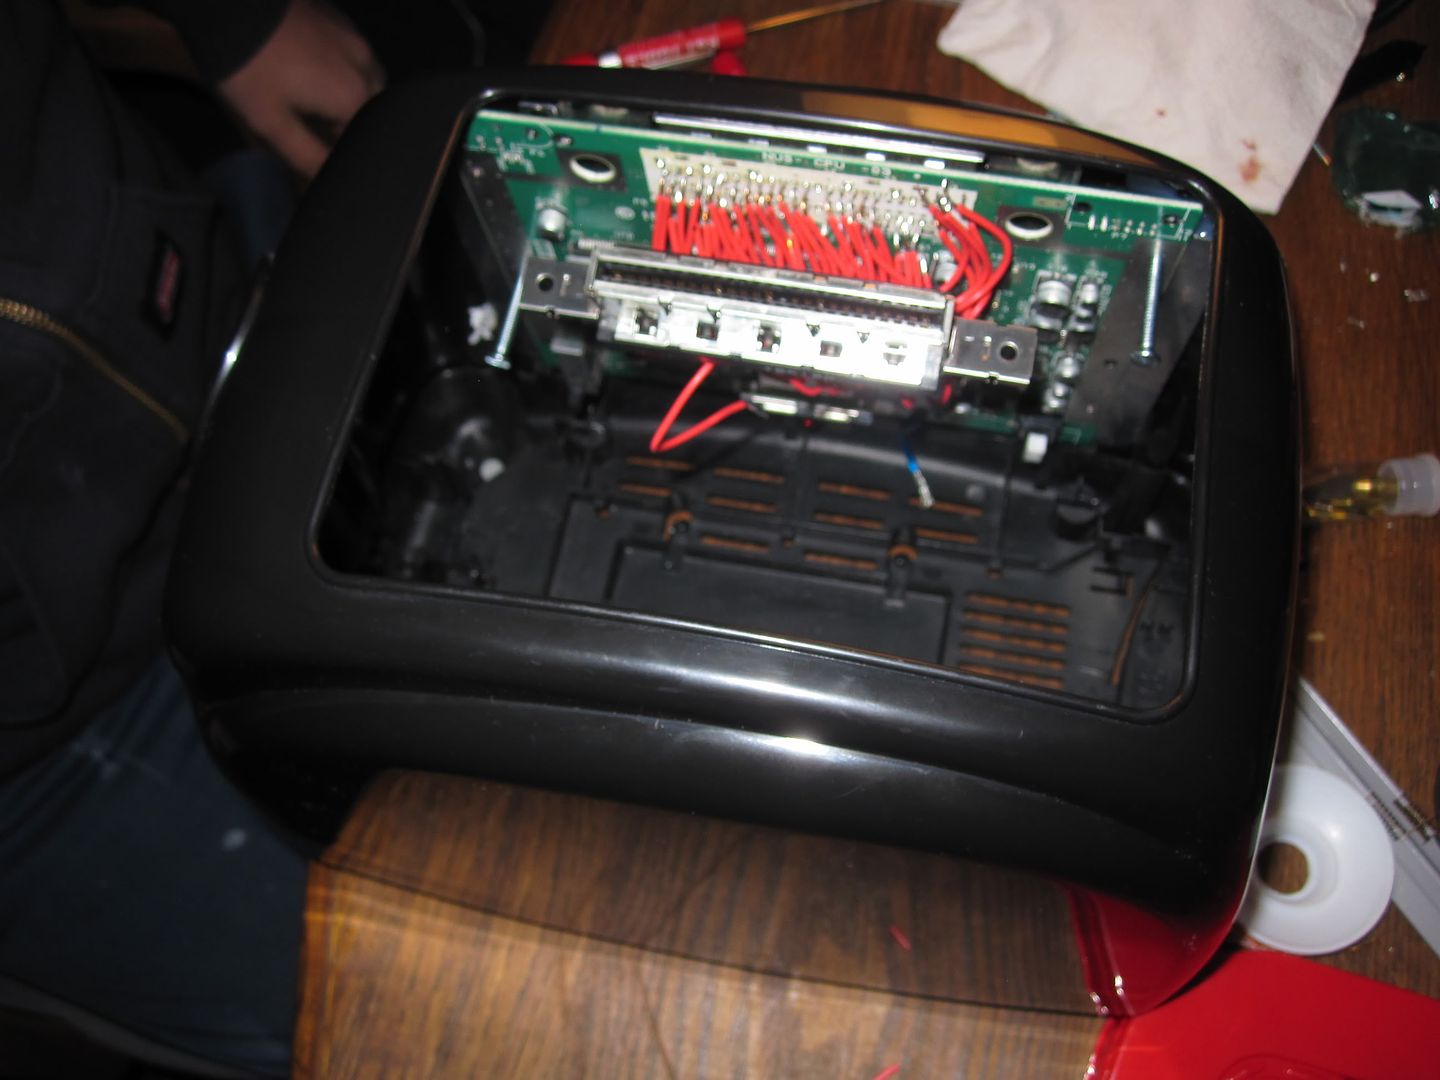
I relocated the controller ports. The wires for player 1/2 are much shorter than 3/4 because of where they need to run through the toaster.
http://i45.photobucket.com/albums/f92/s ... er64/4.jpg

Image
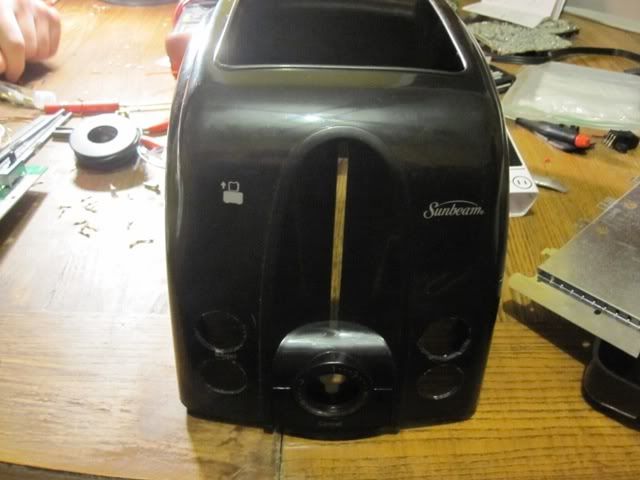
This is the front of the toaster where I cut holes for the controller ports.
http://i45.photobucket.com/albums/f92/s ... er64/5.jpg

Image
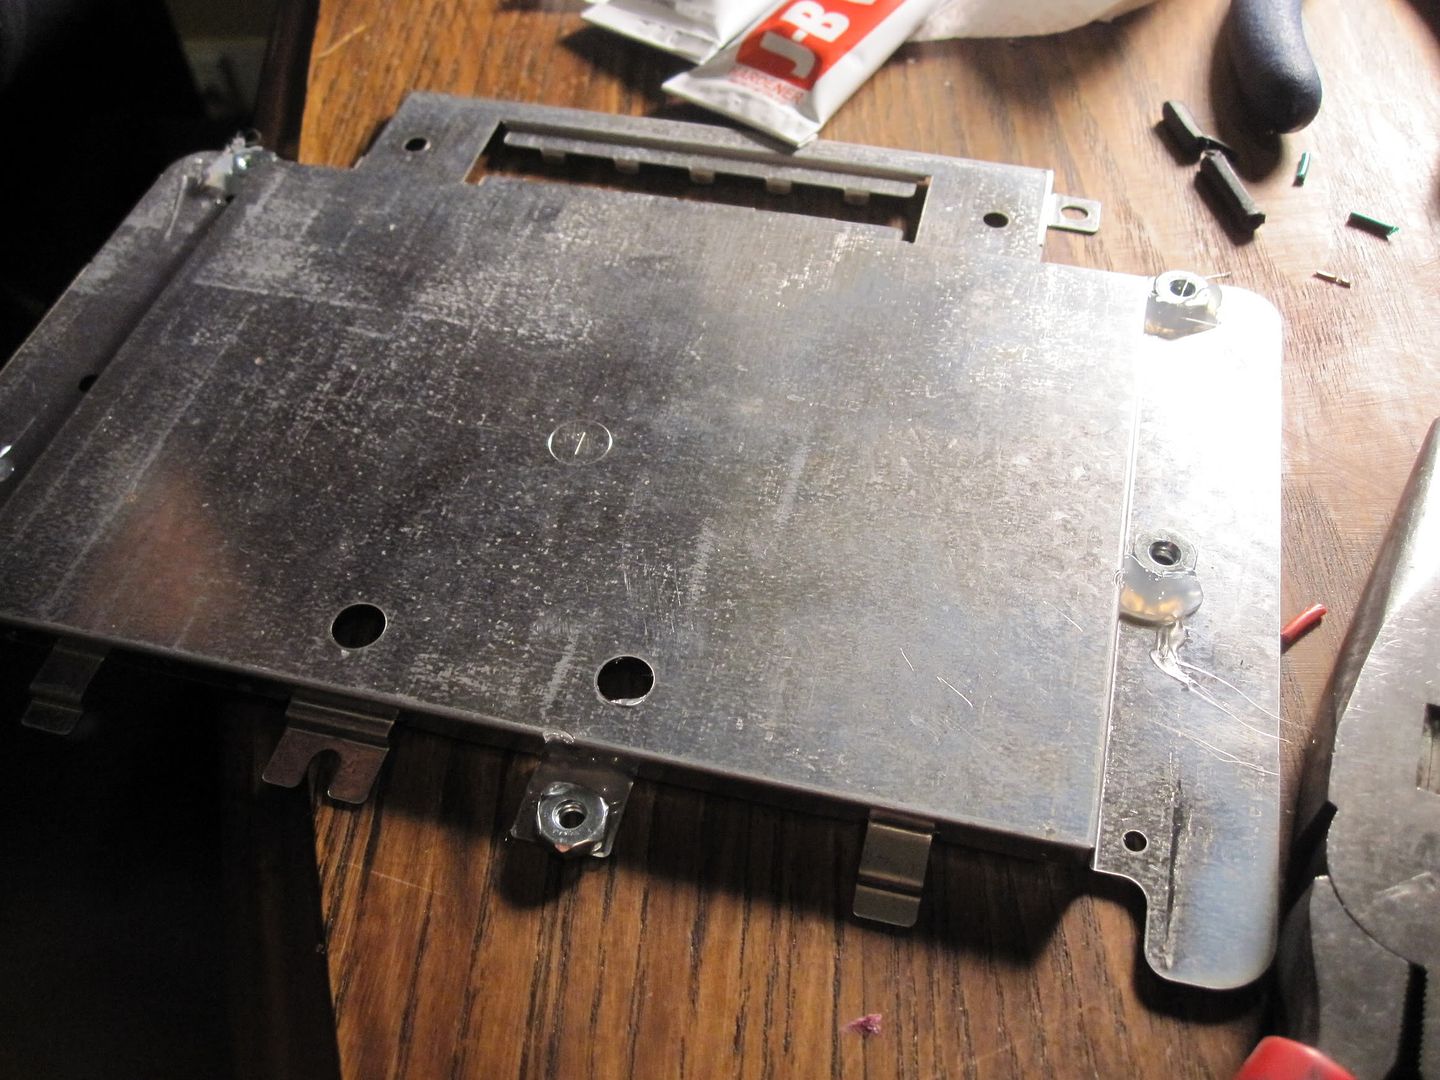
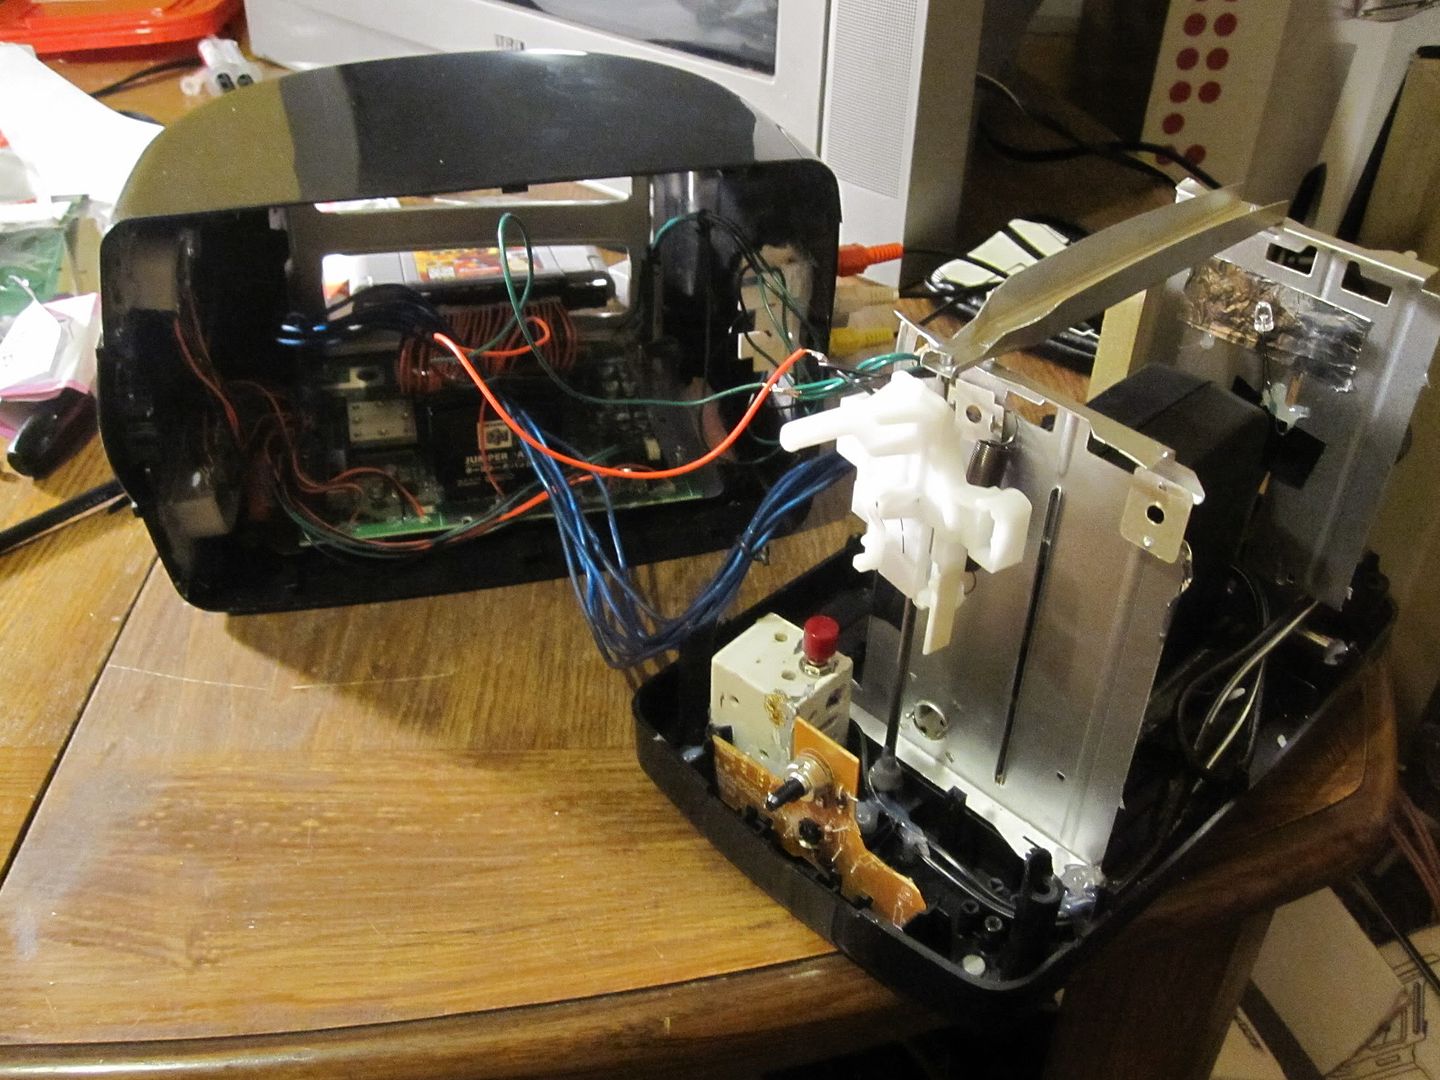
This metal piece was under the mobo in the n64 case. I’m going to use it for mounting. I had to hot glue then cold steel some nuts on the bottom so that I could bolt the motherboard down.
http://i45.photobucket.com/albums/f92/s ... er64/6.jpg

Image
After epoxying that metal piece to the toaster, I attached my junk motherboard to give an idea of it will fit inside. For the record I didn’t need to trim the motherboard at all to fit inside this, and the toaster is not a large one.
http://i45.photobucket.com/albums/f92/s ... er64/7.jpg


Image
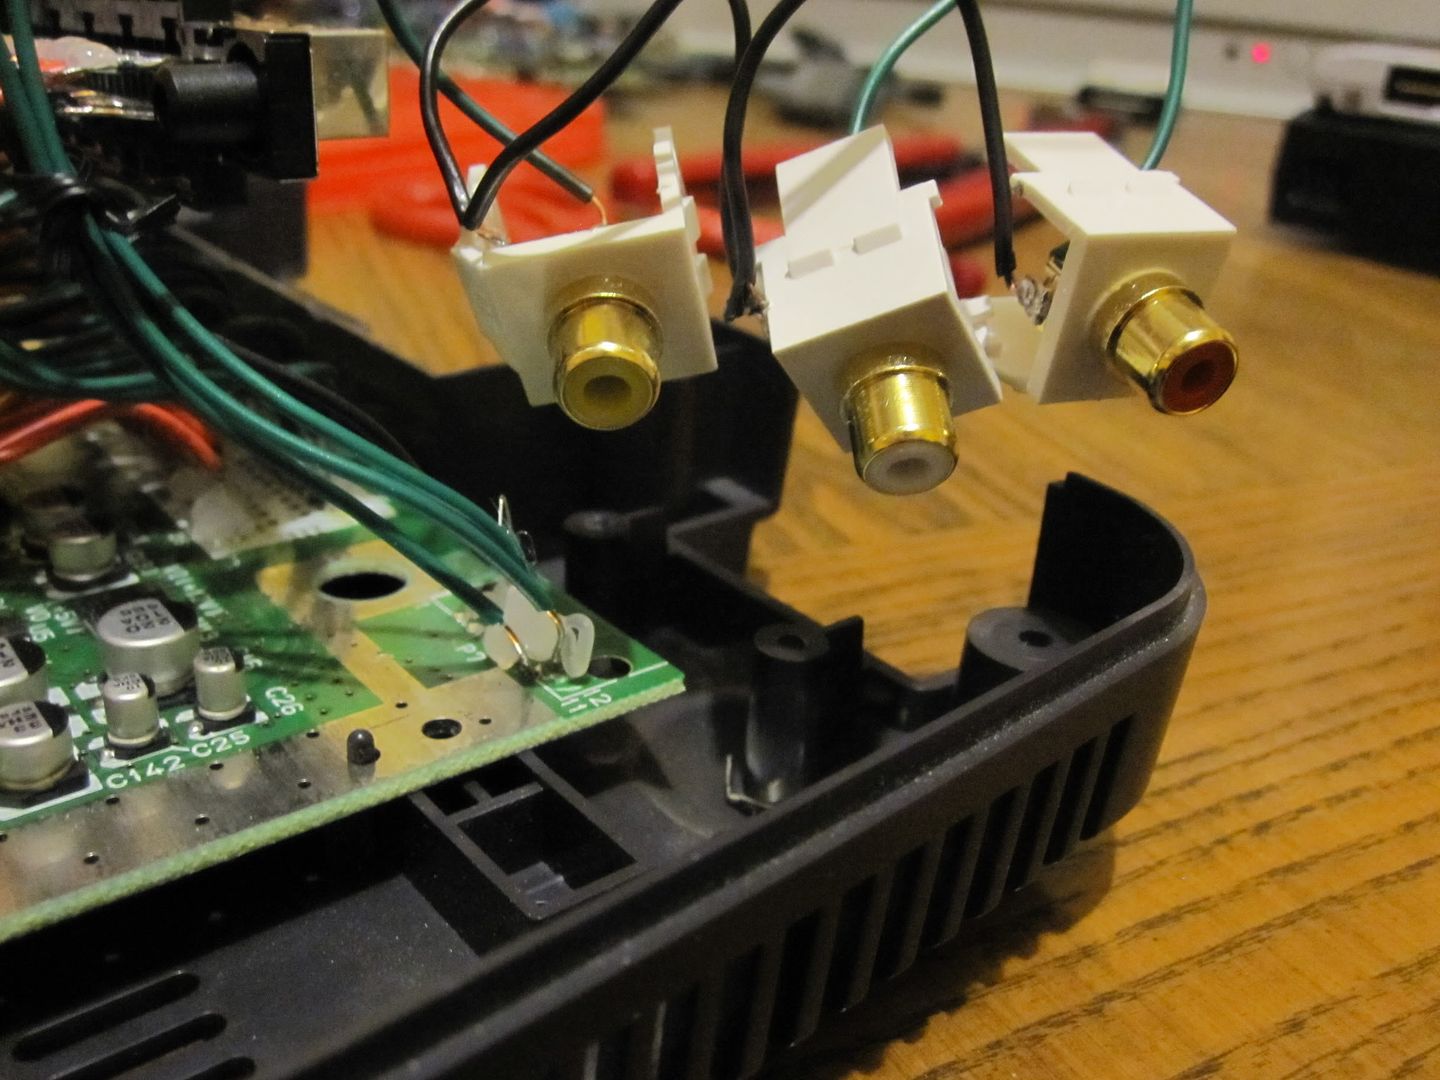
I will be using RCA ports instead of the stock Nintendo a/v cables.
http://i45.photobucket.com/albums/f92/s ... er64/9.jpg


Image
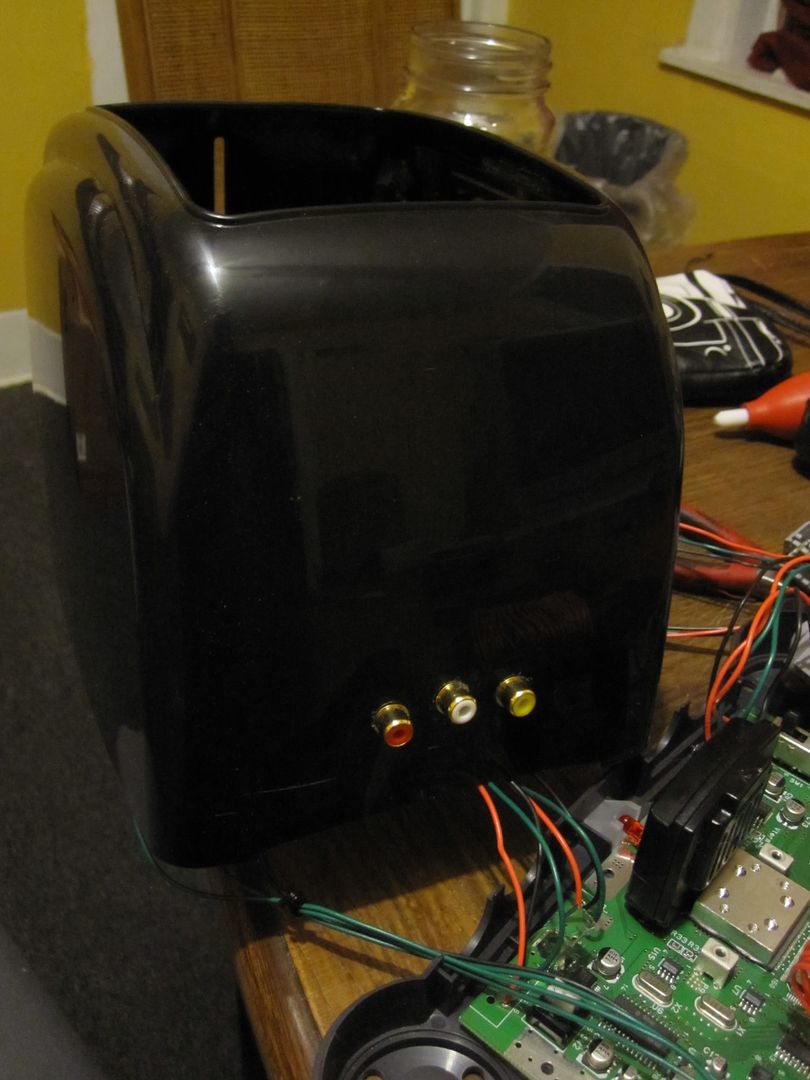
This is the back of the toaster and the mounted RCA ports.
http://i45.photobucket.com/albums/f92/s ... er64/8.jpg


Things left to do:
Figure out how to make the toaster’s lever turn on the system.
Figure out how to mount everything.
Add in those LEDs like vomitsaw’s toasters. They’re such a nice touch.

User avatar
mymixed
Posts:58
Joined:Mon Oct 04, 2010 9:42 pm

Re: Nintoaster 64 - Work in Progress

Post by mymixed » Fri Dec 10, 2010 8:11 pm

WIN! Looks awesome! You should post another worklog on modretro :D.

- mymixed
Image

User avatar
blaze3927
Portablizer
Posts:1114
Joined:Mon Dec 08, 2008 6:14 am
360 GamerTag:notjames
Location:Australia
Contact:

Re: Nintoaster 64 - Work in Progress

Post by blaze3927 » Sat Dec 11, 2010 5:32 pm

mymixed wrote:WIN! Looks awesome! You should post another worklog on modretro :D.

- mymixed
you should not post another worklog on modretro,
everyone (99%) that has an account on modretro first had an account on benheck and everyone (95%) watches/reads up on benheck.
/flaming for dodgy advertising

i'd like to see the original toaster lever/spring as the power button xD
Australian Kaillera server
[url]hhttp://i56.tinypic.com/ncb0wi.gif[/url]

Buck
Posts:6
Joined:Tue Dec 07, 2010 4:03 am

Re: Nintoaster 64 - Work in Progress

Post by Buck » Sun Dec 12, 2010 3:04 pm

A toaster!? But I wanted an n64! Then make some toast and I'll get you an n64 ;)

User avatar
shingfunger
Posts:5
Joined:Tue Nov 30, 2010 2:12 am

Re: Nintoaster 64 - Work in Progress

Post by shingfunger » Tue Dec 14, 2010 12:01 pm

I've hit a standstill. I relocated the controller ports in order to put them into the toaster case. All the sudden, the joystick doesn't work on any player 1 controllers. I've tried using different controllers (that I know work), soldering in different controller ports, changing the wires, and re-soldering the connection to the motherboard. The controllers are fully functional on every other input, just not 1. Unfortunately if I can't solve this the system is sorta worthless. I appreciate any help!

User avatar
Bino Gas
Portablizer
Posts:158
Joined:Sat May 02, 2009 11:04 am
Location:() |-| | ()

Re: Nintoaster 64 - Work in Progress

Post by Bino Gas » Tue Dec 14, 2010 2:58 pm

OK here's what you want to do:
From left to right, the pins of the controller port are +3.3v, data, and ground. What you can do is wire the these pins directly to the chip that handles the controllers. It is labeled "U8".
Image
All you're doing is bypassing some filter capacitors that really aren't necessary to begin with. My guess is that one of the traces to the P1 port is broken, and that's why it isn't working. Let me know if this helps.
Image

User avatar
shingfunger
Posts:5
Joined:Tue Nov 30, 2010 2:12 am

Re: Nintoaster 64 - Work in Progress

Post by shingfunger » Tue Dec 14, 2010 6:16 pm

Bino Gas wrote:OK here's what you want to do:
From left to right, the pins of the controller port are +3.3v, data, and ground. What you can do is wire the these pins directly to the chip that handles the controllers. It is labeled "U8".
All you're doing is bypassing some filter capacitors that really aren't necessary to begin with. My guess is that one of the traces to the P1 port is broken, and that's why it isn't working. Let me know if this helps.
oh...my...god...

I had come to terms with the fact that this project was done for me. Thank you SO much. Needless to say this worked, and I am motivated again.

Here's an update picture
Image
http://i45.photobucket.com/albums/f92/s ... r64/10.jpg

In this picture you can see the top of the toaster with the mounted motherboard, controller ports on the left side, and a/v ports on the right side. The bottom of the toaster has the pot in the front to dim the LEDs, the red button which will enable powering up using the toaster lever, and the stock n64 adapter.

There have been a lot of issues but the project is now looking realistic

Post Reply