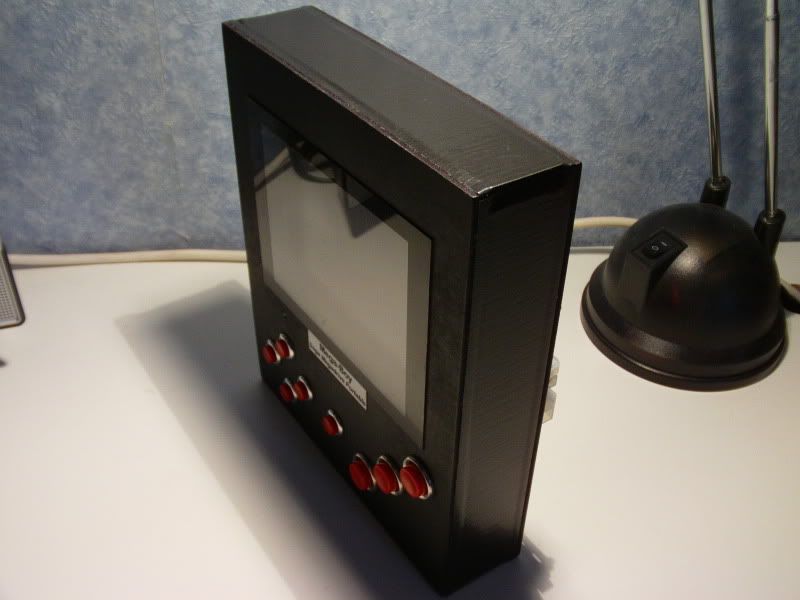
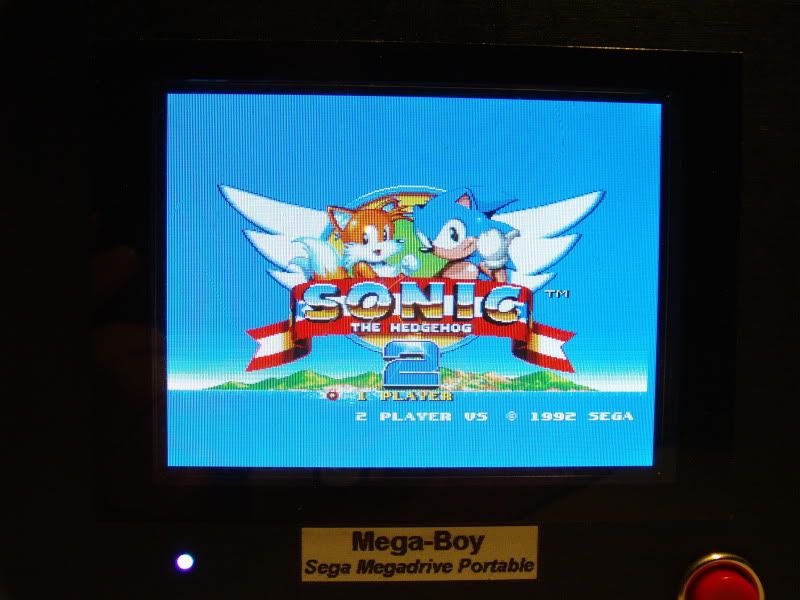
Sam's Megadrive Portable

Includes but not limited to: SNES, Genesis, Sega CD, PlayStation 1, Nintendo 64, Dreamcast, Game Gear and I guess the Virtual Boy.

Moderator:Moderators

Post Reply
User avatar
sam_thornley
Posts:137
Joined:Sat Mar 10, 2007 7:32 pm
Location:Derbyshire, UK
Contact:
Sam's Megadrive Portable

Post by sam_thornley » Tue Jul 06, 2010 9:43 am

Hey People, So I've started work on a Megadrive (Genesis) portable about 2 weeks ago.

Proposed Specs:

5" PSone Screen - Anti-glare removed
Sega Genesis 3 PCB
Cart Slot at rear of unit
6x 1.2v 2600mAh NiMh Batteries (7.2v)

Mspaint Mock-up:
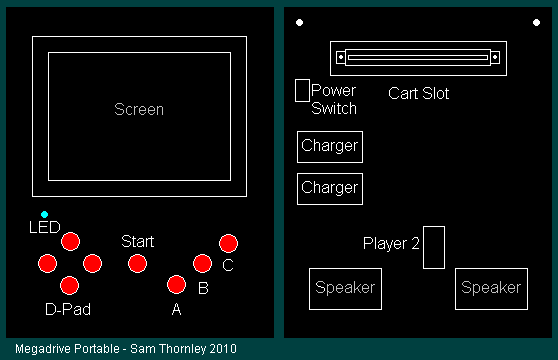
Image

I managed to pick up a Genesis 3 off ebay back in march. Had it shipped to me all the way from the US to the UK. Didnt cost that much :D As you may or may not know the Sega Genesis 3 was never released here in the UK. There are alternatives but they are no good for what i want, like RGB video and a cart slot.

Megadrive 2 and a Genesis 3 size comparison:
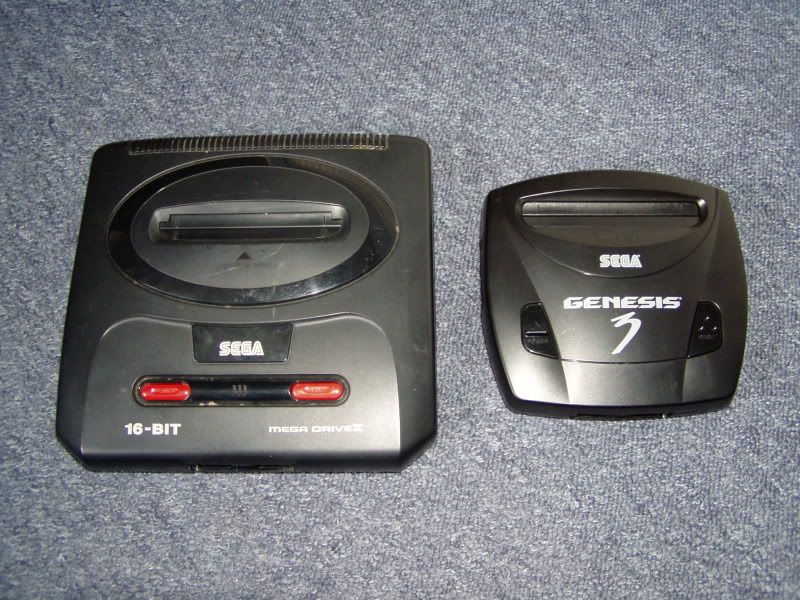
Image

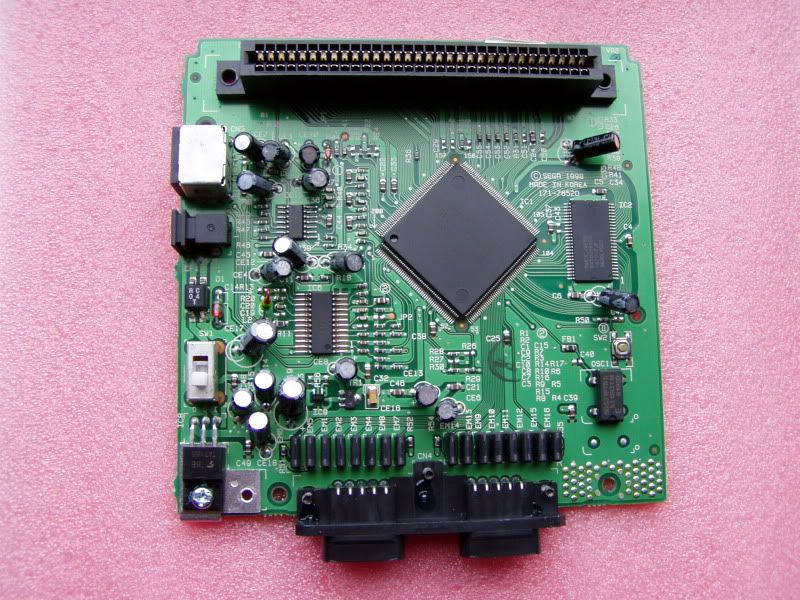
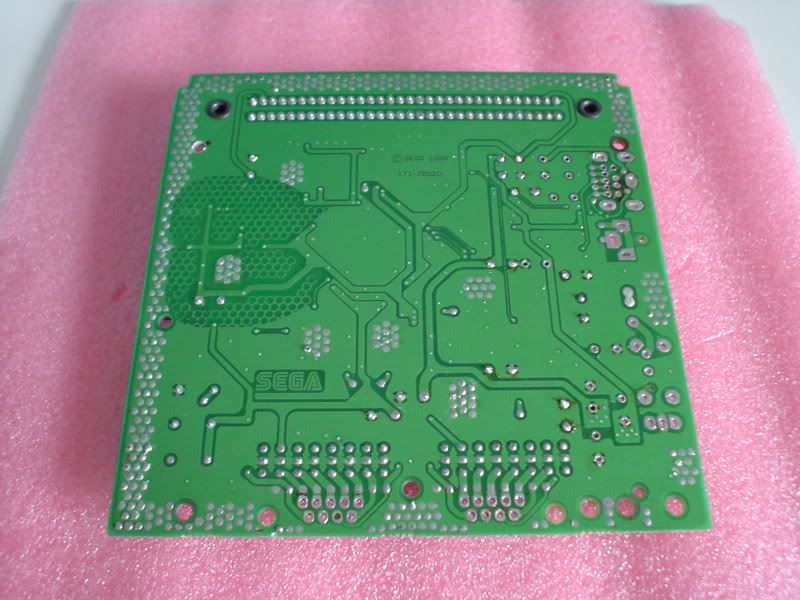
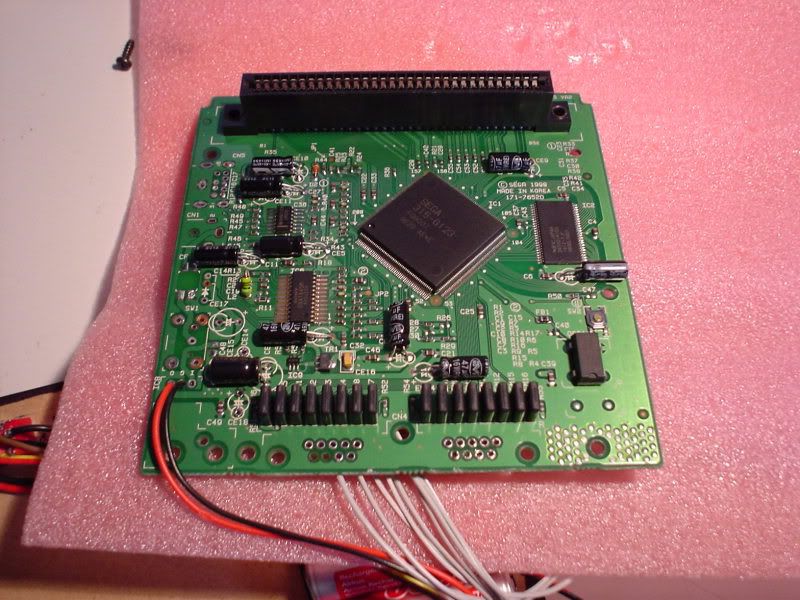
The Genesis 3 Board:

Image

As you can see its the one with the heart shaped traces near the RAM chip. This particular board has RGB wired up to the av port like a megadrive 2. I've heard the other genesis 3 revision with 2 memory chips does'nt, but RGB is still easy to do. You can wire up RGB from a genesis to a PSone screen really easily. No video amps are needed, just add 3 75ohm resistors in series on each of the RGB lines. This will give you a crystal clear picture on the PSone screen. It will still work without the resistors but the outputs slightly overdrive the PSone screen. I will do a diagram in mspaint later if anyones interested.

Heres my prototype system from a few months back:
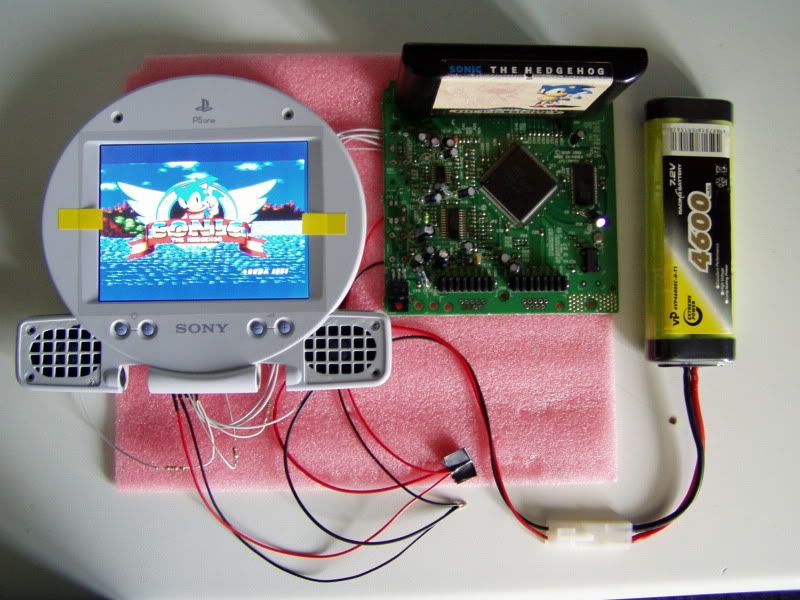
Image

You can see my 75ohm resistors below the screen. Desolderd the ports of the geny board. I've also region modded the board so its runs at 50hz pal. (Info on how to do this here: http://vgmods.webs.com/segagenesismodificaitons.htm" onclick="window.open(this.href);return false; Scroll down) I'm not using the battery in the picture, its just one i had spare.

So here's how far i've got as of now:

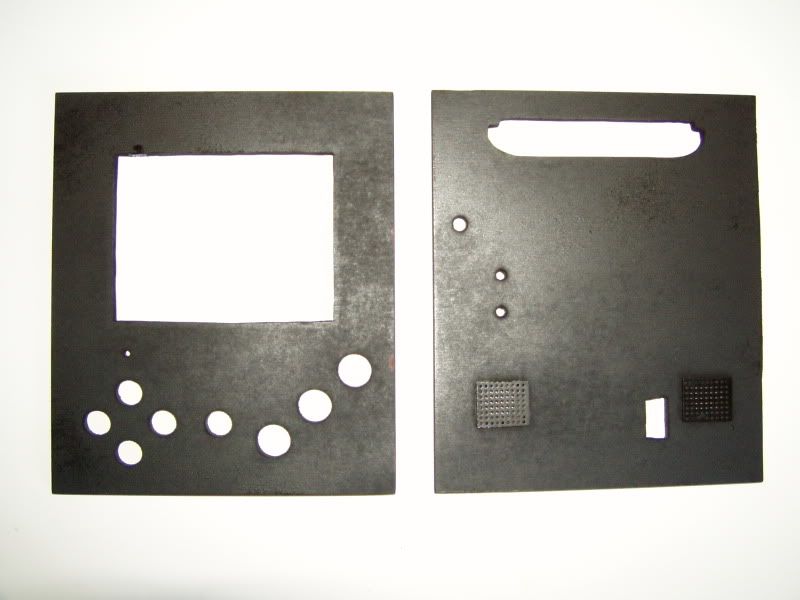
I've started work on my case got the front and back panels cut, drilled, sanded, filed and spray painted. I'm using 6mm thick MDF (as usual!) Dimensions: 165MM X 195MM

Ready to spray paint:
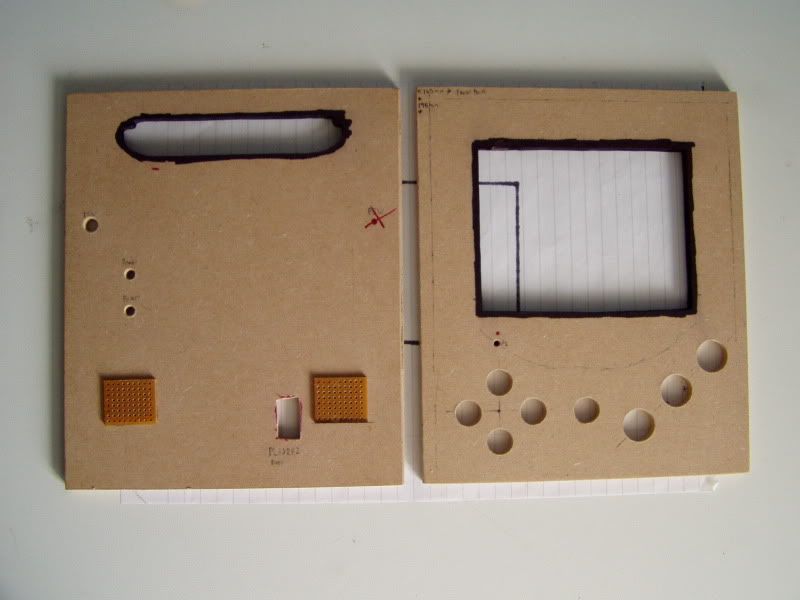
Image

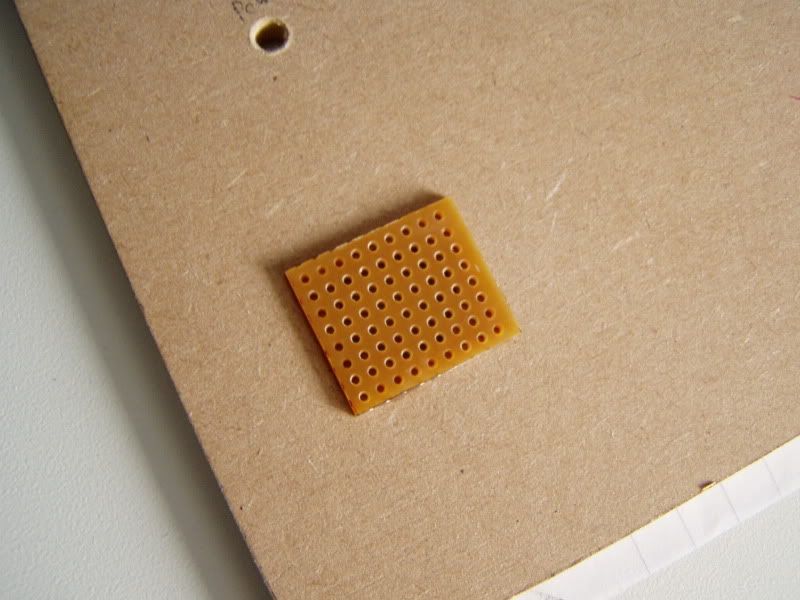
Perf boards for speaker grills:

Image

Painted with 3 coats of mat black:

Image

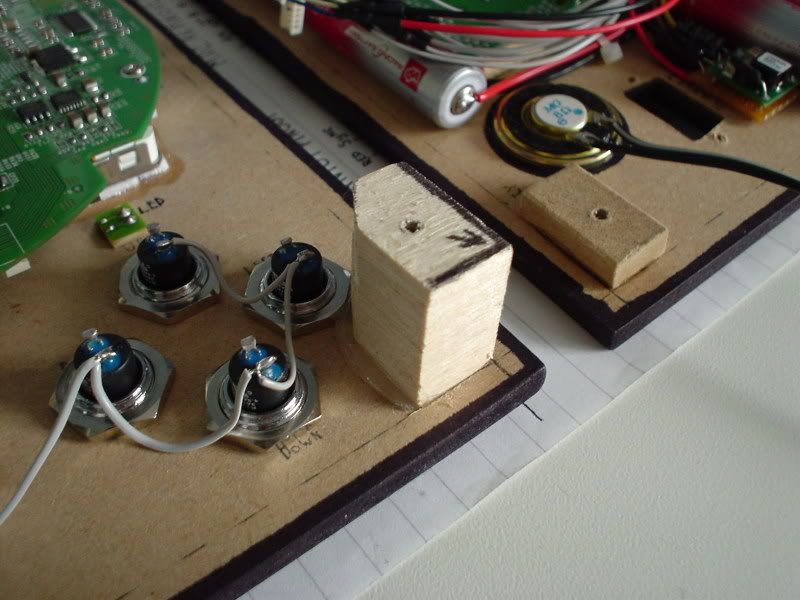
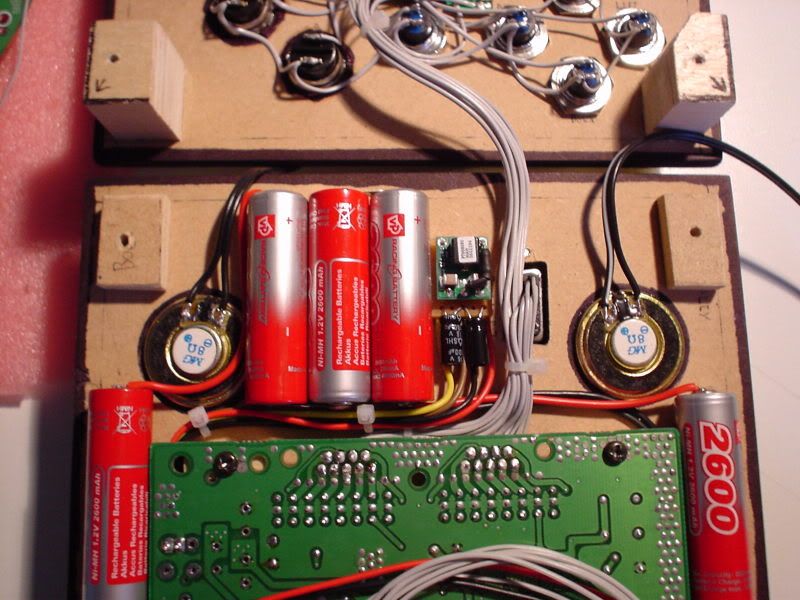
Installed the buttons, screen cover, PSone screen LCD and power led to the front panel. Then installed the Power jacks, power switches, Batteries, speakers and mounts for the genesis board on to the back panel. Also wired up the batteries.
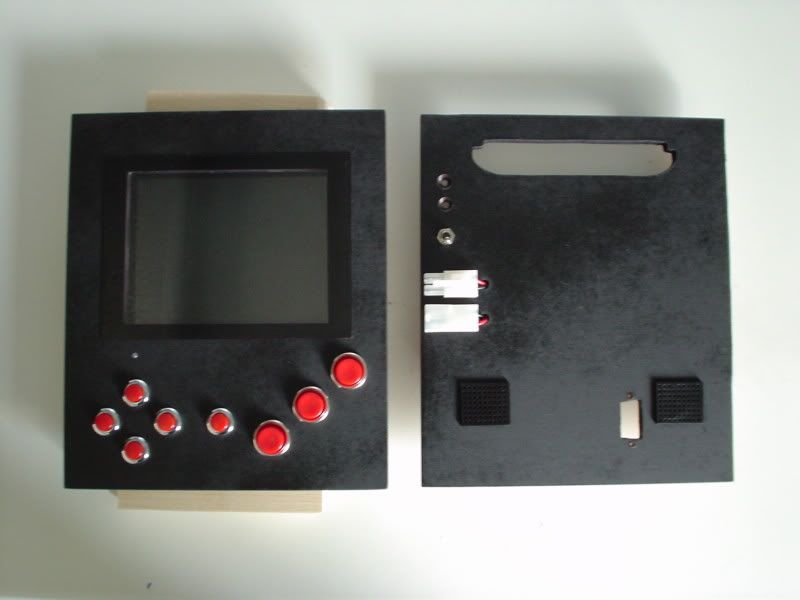
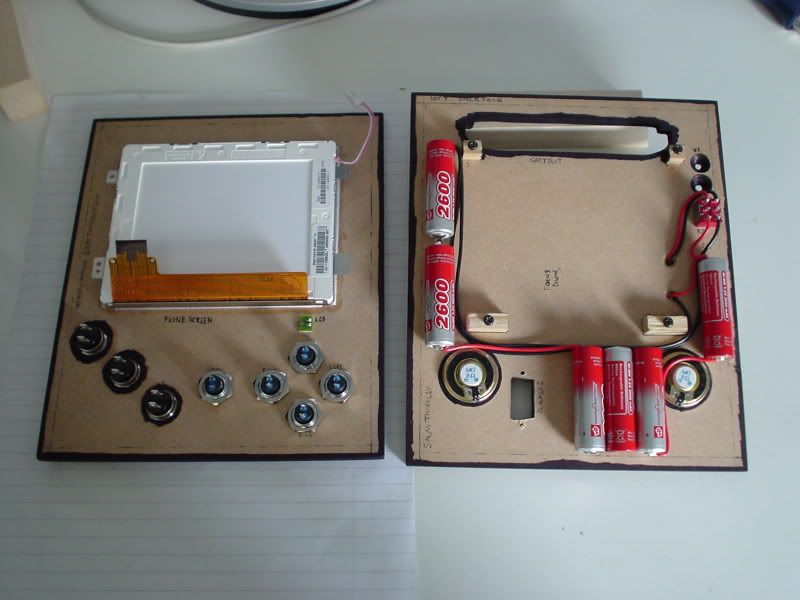
Image

Image

The front panel, i got the screen cover from a crappy game cube screen:
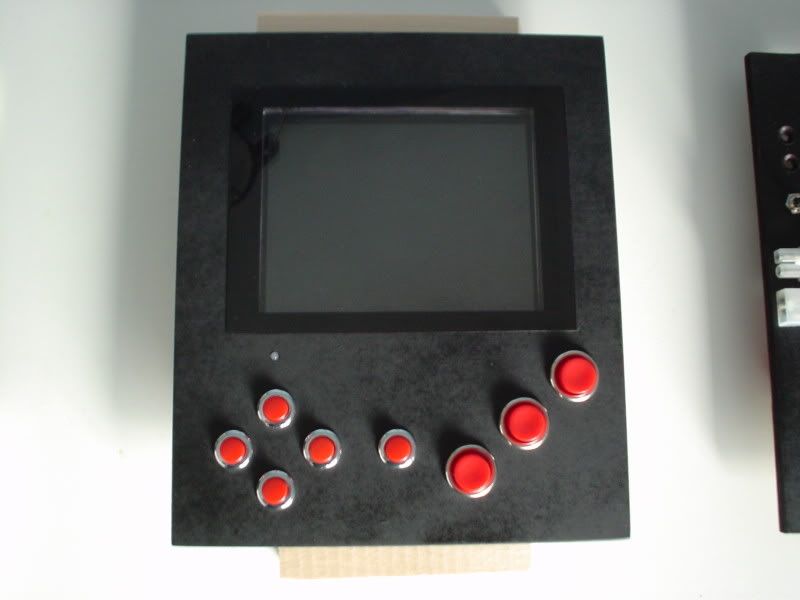
Image

The PSone LCD is held in with double sided sticky foam around the boarder. Then i added some all purpose glue after. The LCD still comes apart from the metal frame, in case one day i want to do an led mod:
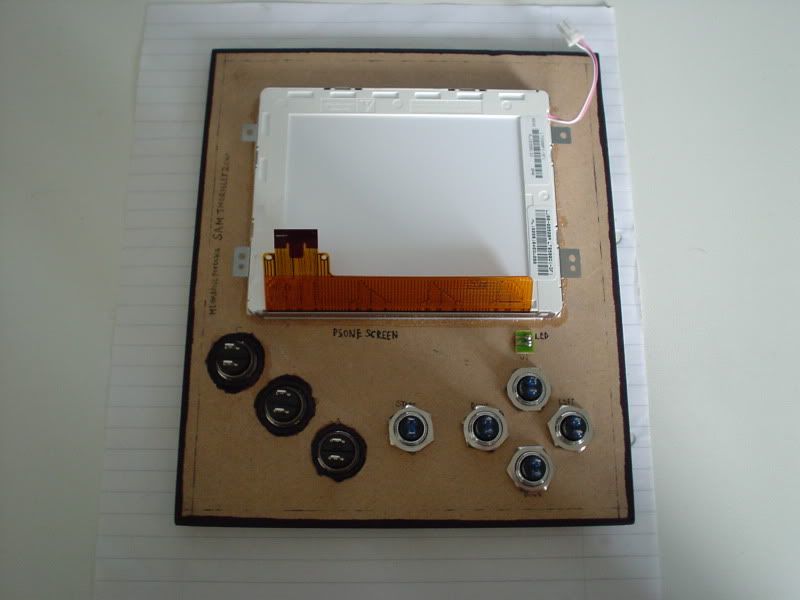
Image

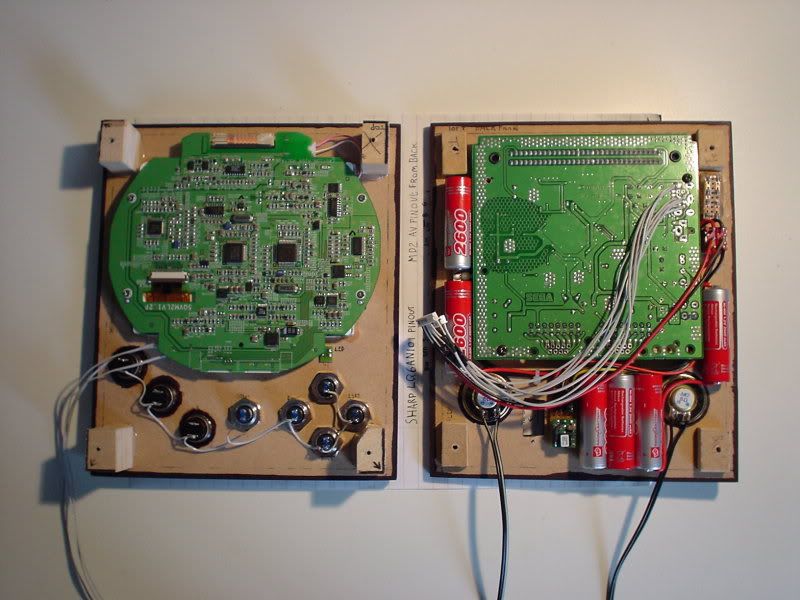
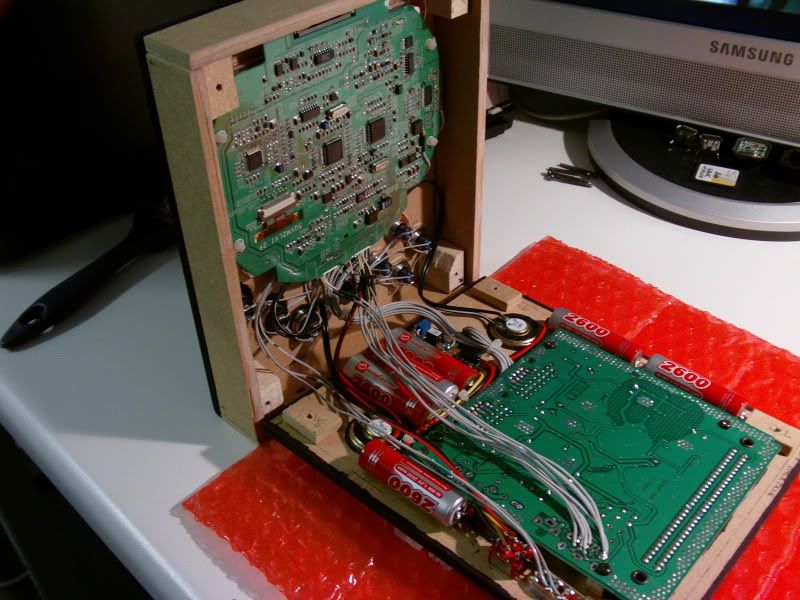
The batteries are all wired up, so is the power switch and DC input jack. The batteries are held in with super glue. You can see where the genesis 3 board is going:
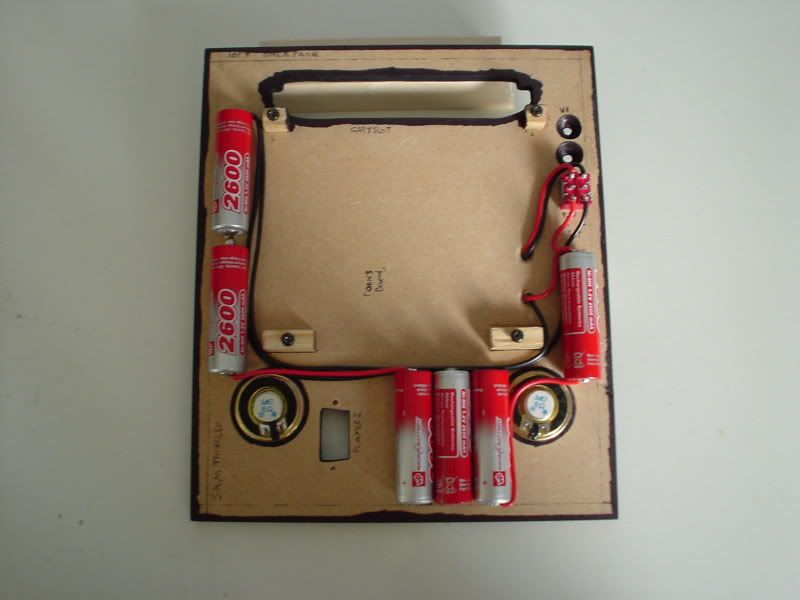
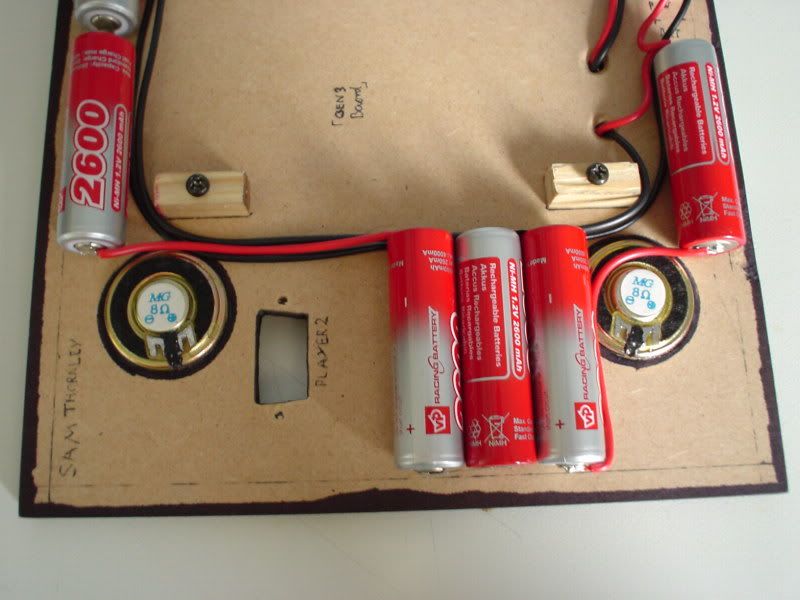
Image

Image

Thats it for now. Expect updates every few days.
Image

User avatar
Metallica Man X
Portablizer Extraordinaire
Posts:1438
Joined:Fri Apr 22, 2005 1:14 pm
Location:A very anti-metal place...WI...
Contact:

Re: Sam's Megadrive Portable

Post by Metallica Man X » Tue Jul 06, 2010 7:45 pm

Lookin' good! ...I'm totally digging that battery arrangement 8)
Image
The answer to 1984 is 1776!
"One of the penalties for refusing to participate in politics is that you end up being governed by your inferiors." - Plato

User avatar
hackmodford
Portablizer Extraordinaire
Posts:651
Joined:Fri Aug 21, 2009 10:44 am
Location:Michigan
Contact:

Re: Sam's Megadrive Portable

Post by hackmodford » Fri Jul 09, 2010 11:16 am

Yes the Genesis3 is awesome! Only problem is no stereo :wtf:
What do you plan on using for the sidewalls?

User avatar
sam_thornley
Posts:137
Joined:Sat Mar 10, 2007 7:32 pm
Location:Derbyshire, UK
Contact:

Re: Sam's Megadrive Portable

Post by sam_thornley » Tue Jul 13, 2010 12:00 pm

Metallica Man X wrote:Lookin' good! ...I'm totally digging that battery arrangement 8)
Thanks, arranging the batteries took some thinking but i got there in the end. 8)
hackmodford wrote:Yes the Genesis3 is awesome! Only problem is no stereo :wtf:
What do you plan on using for the sidewalls?
No stereo sound doesn't really bother me in portables. At least the geny 3 has better audio than the GN twin or the radica. Sonic's jump can be heard :P
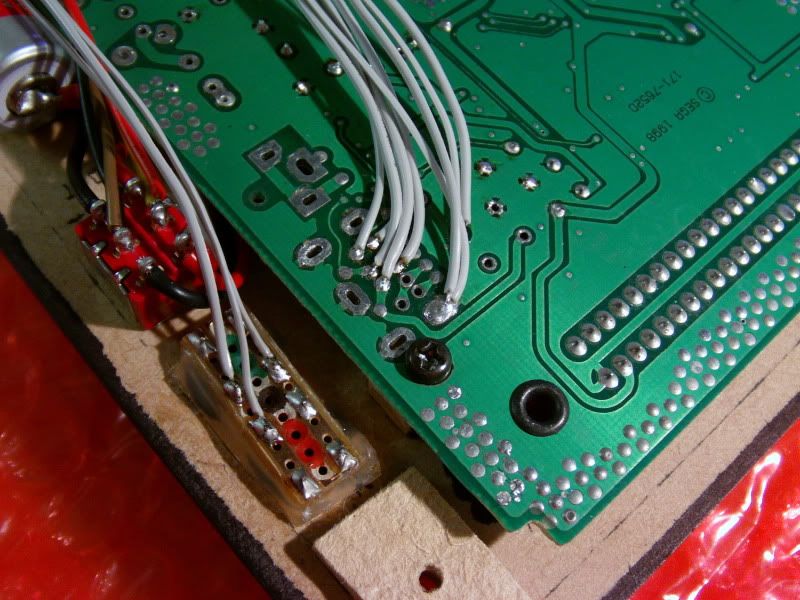
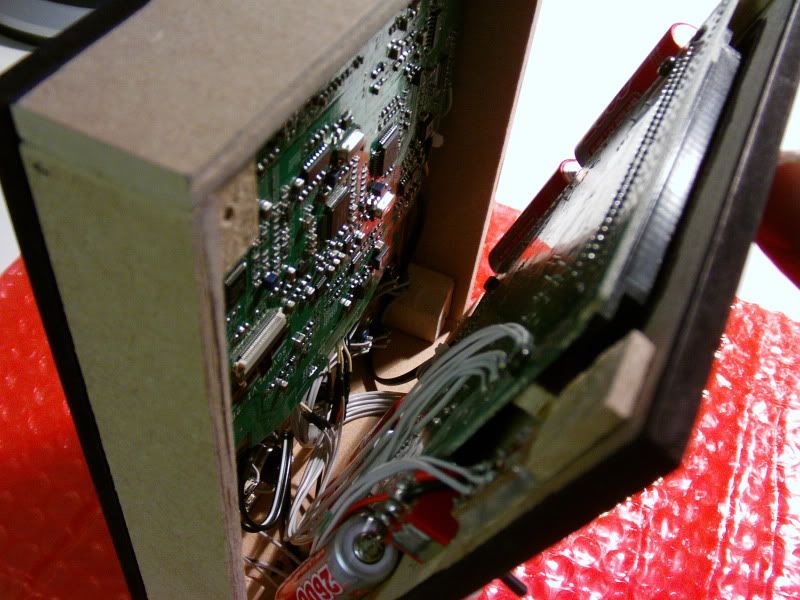
Spent a wile flattening down the capacitors on the genesis board. Also removed a load of unnecessary ones. Also removed the 7805, as i'm using a switching regulator to save power. Pictures on this and more updates...soon!
Image

User avatar
sam_thornley
Posts:137
Joined:Sat Mar 10, 2007 7:32 pm
Location:Derbyshire, UK
Contact:

Re: Sam's Megadrive Portable - The Mega Boy

Post by sam_thornley » Fri Jul 16, 2010 5:29 am

Oh yeah sidewalls i'm not sure yet. Maybe just some more fiber board. 8) Double post!! oops! :wtf:
Image

User avatar
Bino Gas
Portablizer
Posts:158
Joined:Sat May 02, 2009 11:04 am
Location:() |-| | ()

Re: Sam's Megadrive Portable

Post by Bino Gas » Tue Jul 20, 2010 3:07 pm

You can get stereo from the Genny 3. There's a simple guide on Segasonicfan's site. Any progress?
Image

User avatar
sam_thornley
Posts:137
Joined:Sat Mar 10, 2007 7:32 pm
Location:Derbyshire, UK
Contact:

Re: Sam's Megadrive Portable

Post by sam_thornley » Wed Jul 21, 2010 6:06 am

Bino Gas wrote:You can get stereo from the Genny 3. There's a simple guide on Segasonicfan's site. Any progress?
I know, but its not as easy as just pulling stereo from the sega cpu. Another op-amp has to be made then the signals from the board have to be fed in to both amps. Though i think feeding the signals to the "crystal clear" audio mod circuit would work. I may try all of this some day, but i don't mind about stereo sound on a portable. At least sound on the Gen3 is better than a Model 2.

Yes some updates:

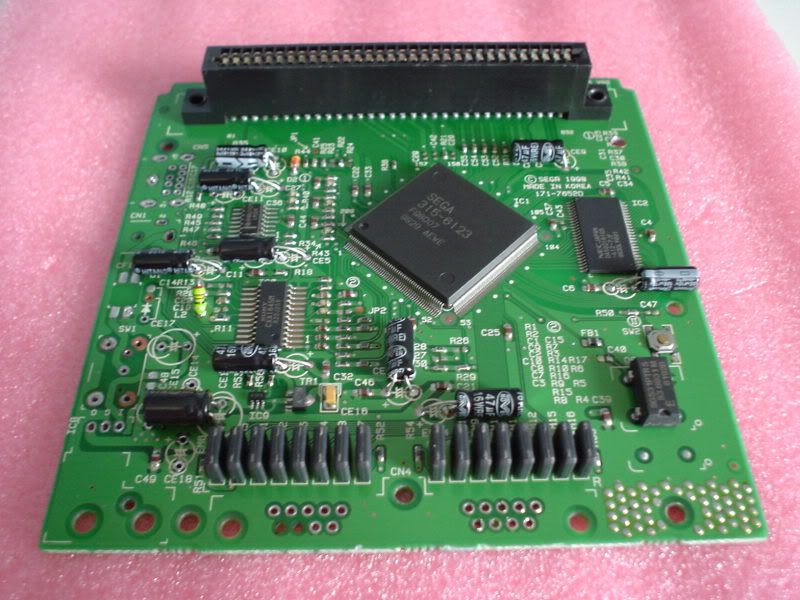
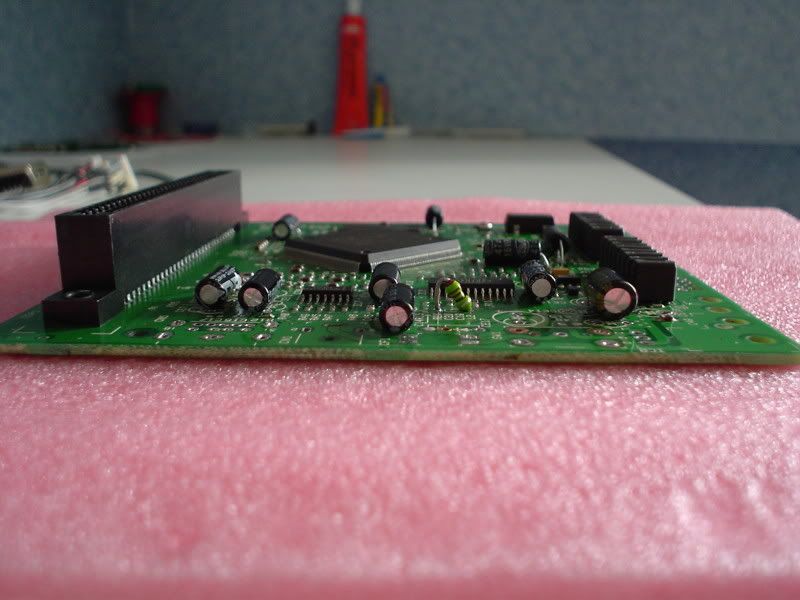
Here's how my Geny 3 board looks now:

Image

Image

Image

Pretty flat now! Rather than relocating the old capacitors with wires. I got hold of a load of new ones then replaced and positoned them all nice and flat. The good thing about new capacitors is that they come with nice long legs so they can be postioned in any direction without the need for wires. Also it is a good idea to replace all the electrolytic caps in older 10 years+ consoles, as they loose their value significantly over the years. That could cause stability issues with some consoles. I've left out a few "buffer" caps on the video/audio lines as they are generally not needed. Plus a few near were the 7805 used to be.

Got a loads of work done over the last week on the case ect.

Image

Added the corner supports that hold the front and back together.

Image

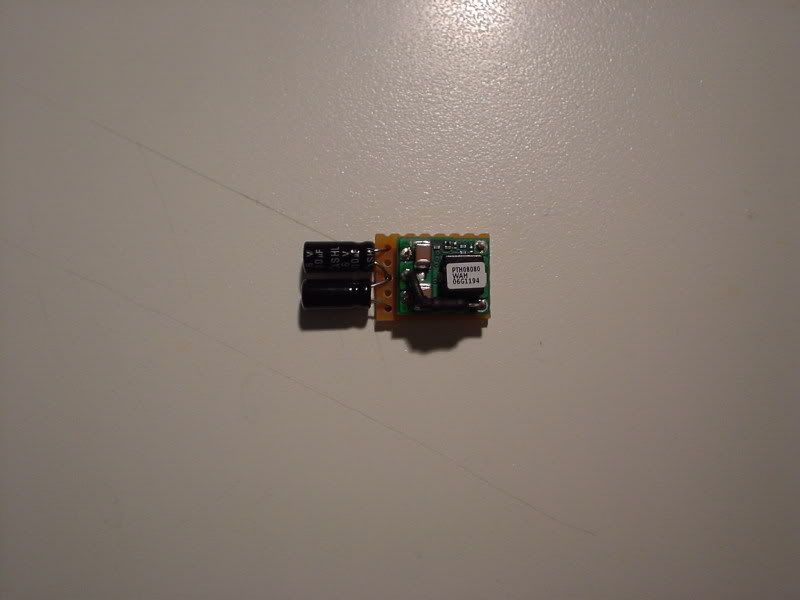
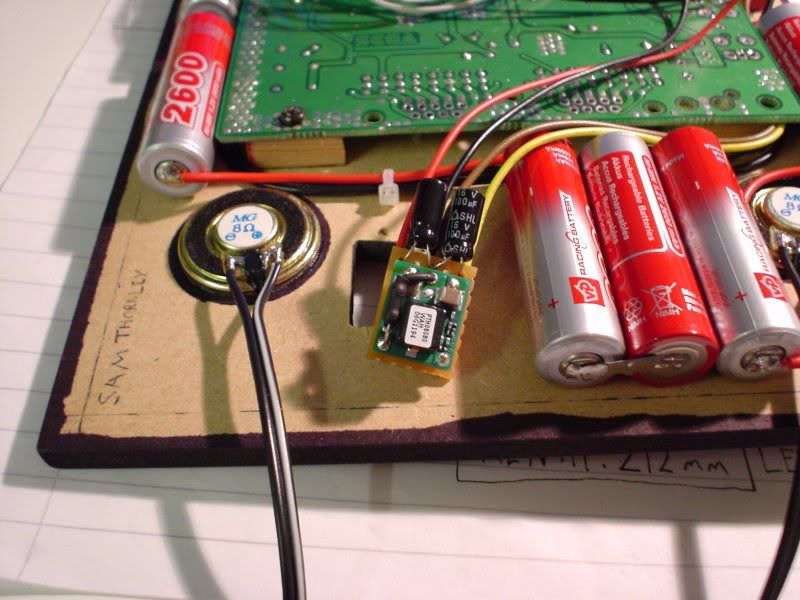
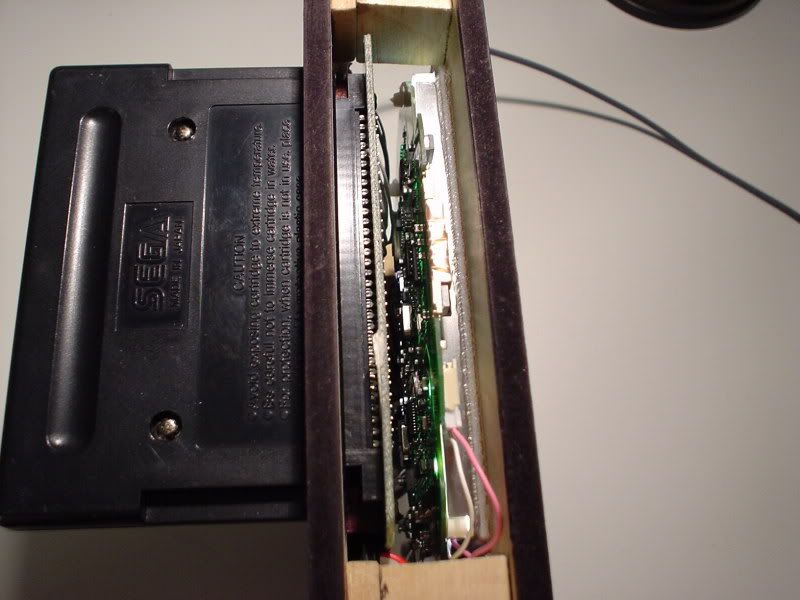
Here my swiching regulator that i'm using to power the genesis. Its a PTH08080 set to 5v with a 300ohm resistor. (under the heatshrink tubing) Gives around 5-5.1v

Image

Image

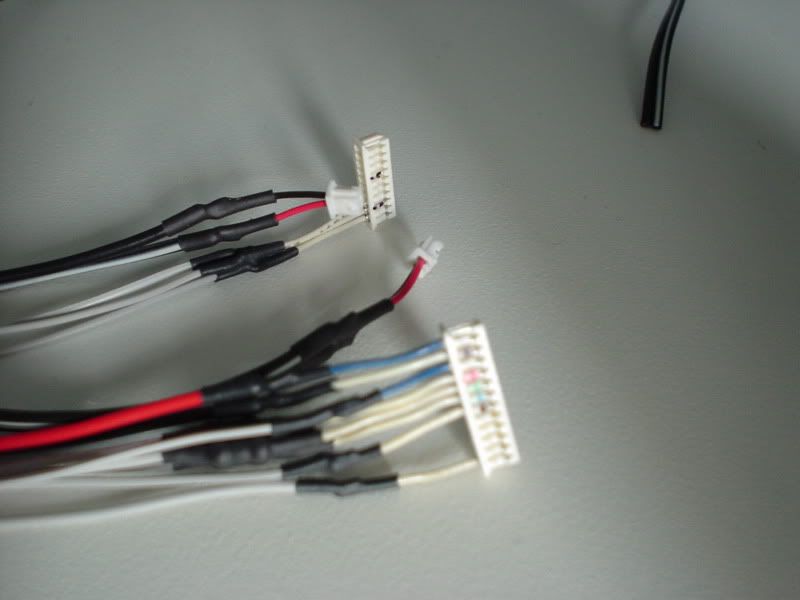
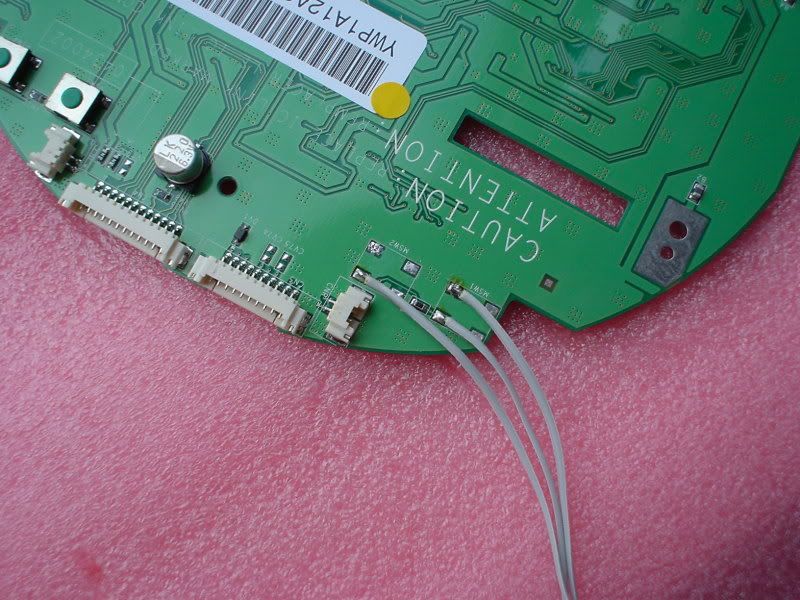
Got my RGB+Sync+Audio wired up to my PSone screen connectors. 75ohm resistors under heatshrink tubing.

Image

Image

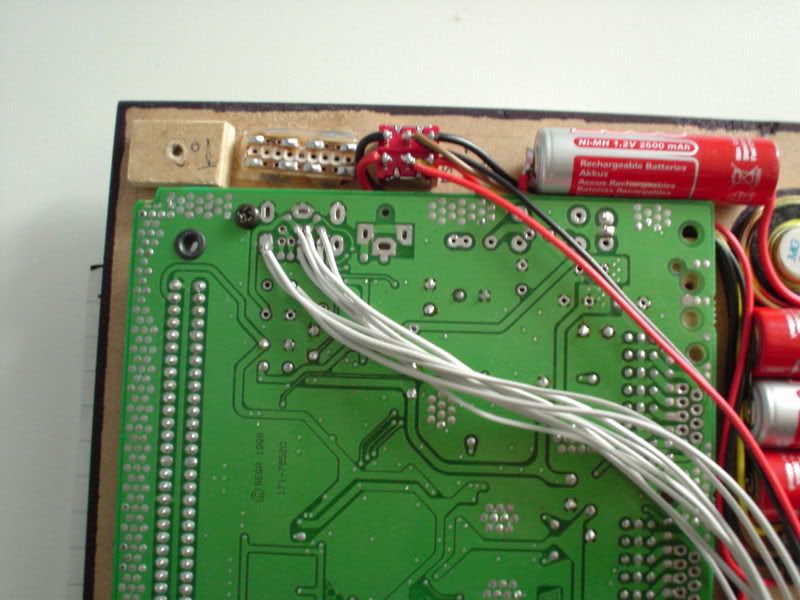
5v wired up to were the 7805 was.

Image

Thats it for now. Next i need to get the controls wired up. I'm going to try and trim up a Megadrive controller PCB, and hopefully get it to fit somewere.

Image

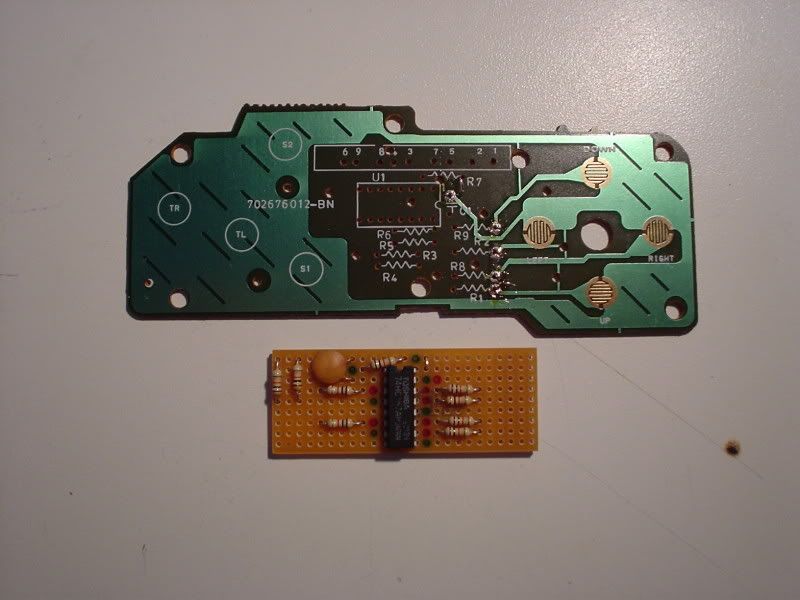
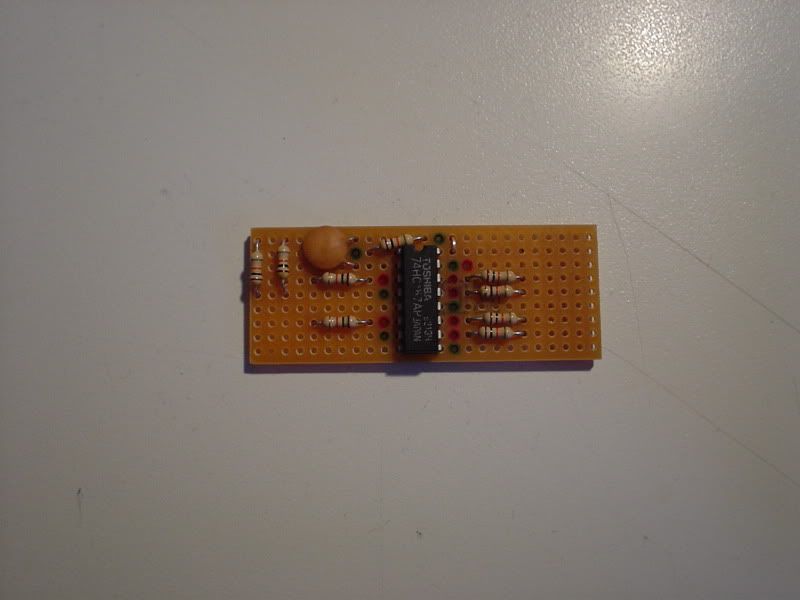
Though i could just re-mount the 74HC157 multiplexer IC on to some bread board to act as the controller. Or even hack up a radica megadrive controller. Anyway more updates soon!
Image

User avatar
Bino Gas
Portablizer
Posts:158
Joined:Sat May 02, 2009 11:04 am
Location:() |-| | ()

Re: Sam's Megadrive Portable

Post by Bino Gas » Wed Jul 21, 2010 9:34 am

Excellent progress! Seems like most of us should be doing capacitor replacements then. :o
sam_thornley wrote:Though i think feeding the signals to the "crystal clear" audio mod circuit would work.
Great idea. I might try that sometime.
Image

User avatar
Metallica Man X
Portablizer Extraordinaire
Posts:1438
Joined:Fri Apr 22, 2005 1:14 pm
Location:A very anti-metal place...WI...
Contact:

Re: Sam's Megadrive Portable

Post by Metallica Man X » Wed Jul 21, 2010 5:43 pm

Yes, very nice! Great job with the heat shrink---looks professional 8)
Image
The answer to 1984 is 1776!
"One of the penalties for refusing to participate in politics is that you end up being governed by your inferiors." - Plato

User avatar
sam_thornley
Posts:137
Joined:Sat Mar 10, 2007 7:32 pm
Location:Derbyshire, UK
Contact:

Re: Sam's Megadrive Portable

Post by sam_thornley » Tue Nov 30, 2010 3:42 pm

BACK!!
Yes I am still working on this project! Its just have not updated this post since july!! Been busy with lots of other stuff lately, some portable related some not. Right here's the August update that i posted over on moddedbybacteria forums but not here:

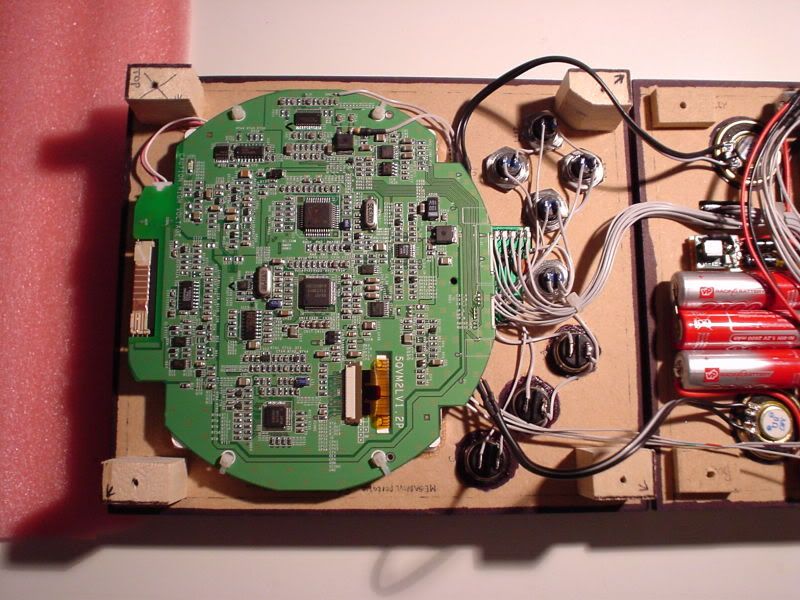
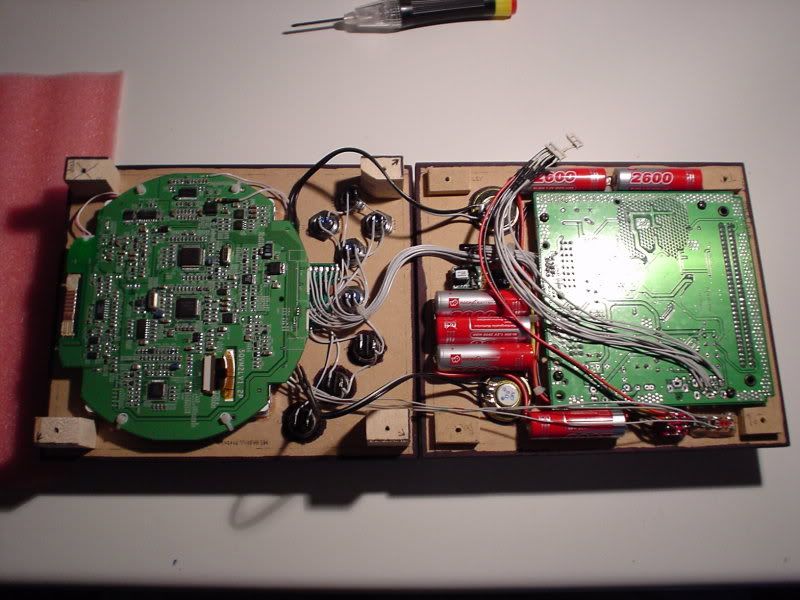
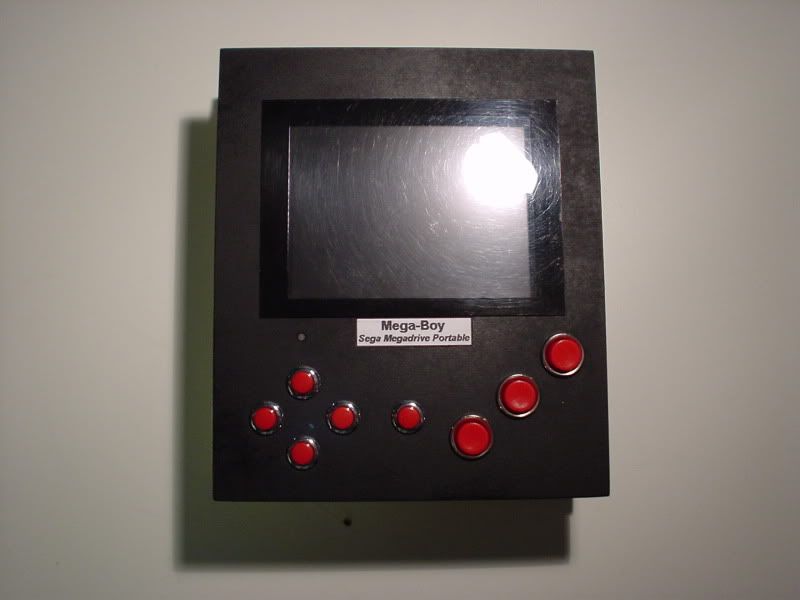
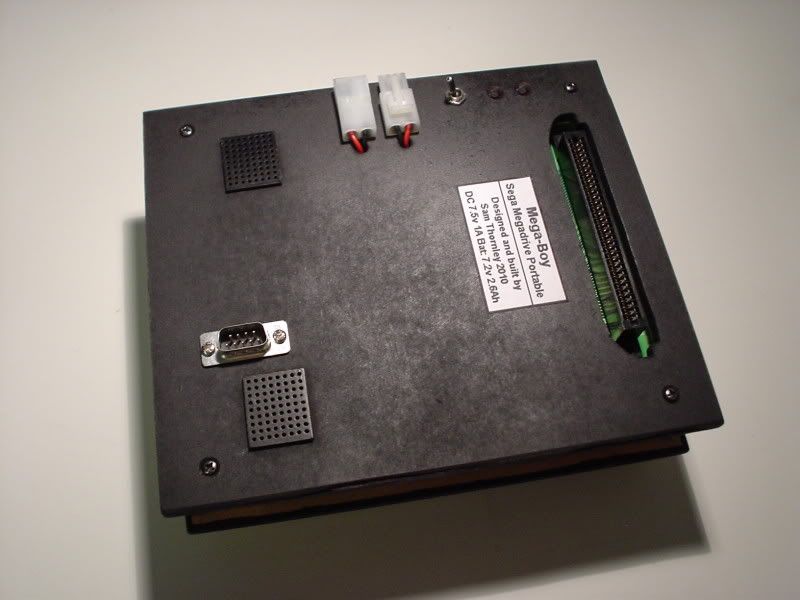
The portable is 90% complete now. :D All the electronics are complete and working. A fully playable system. Its just the side panels that need adding on. I surpose one could call this a "working beta portable" or something :D

What i've done so far

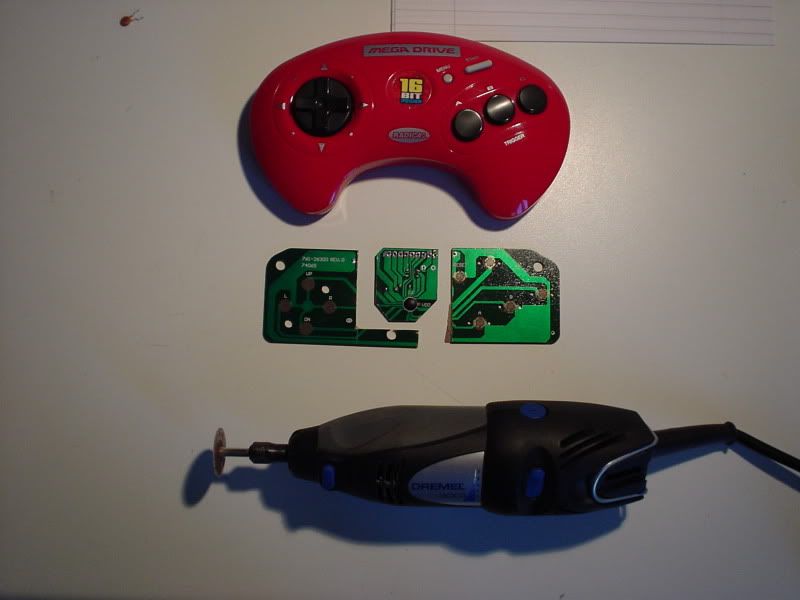
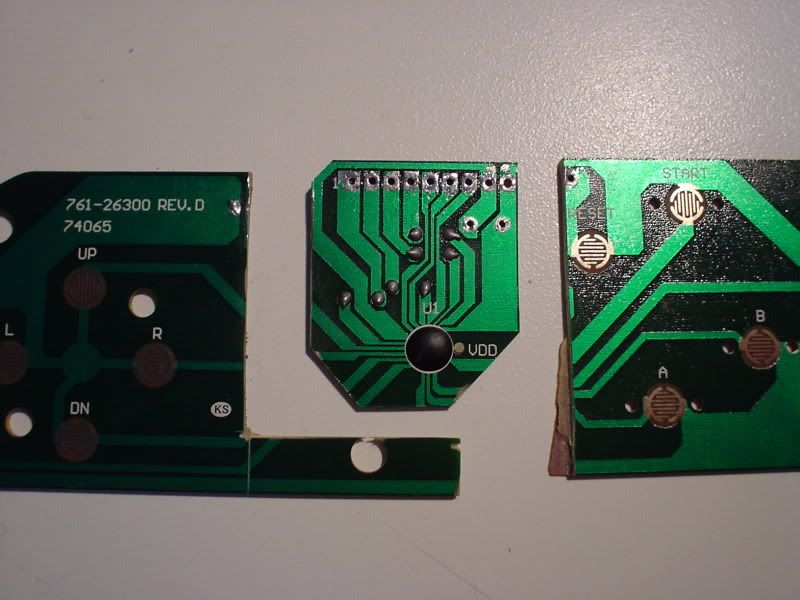
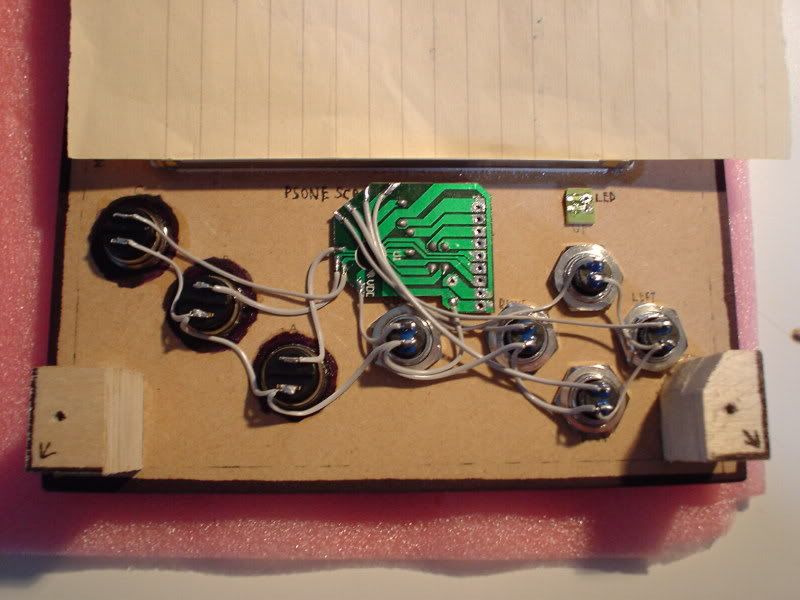
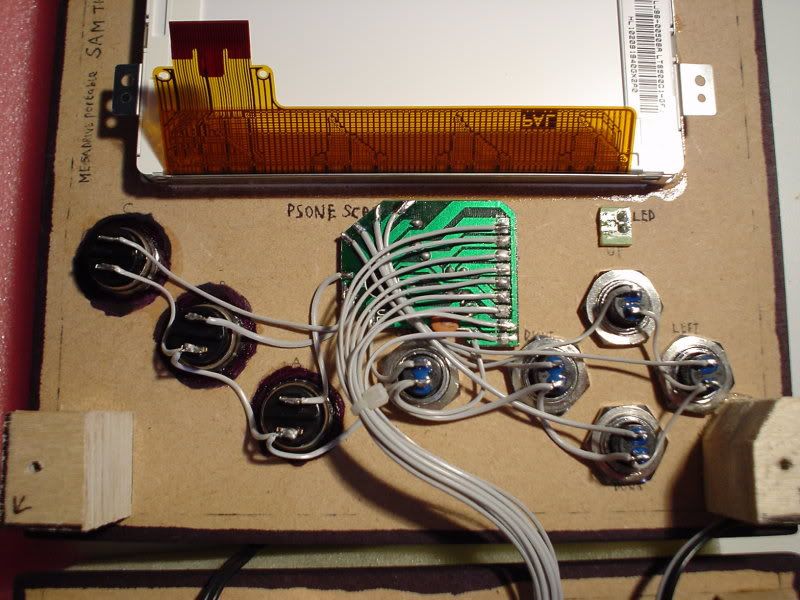
For the controller i ended up hacking up a spare radica 6in1 controller. I came up with a pinout so that it can be used an a real megadrive. Using this page: http://devster.monkeeh.com/sega/radica/#joypad" onclick="window.open(this.href);return false; Usually these run at 3.3v but they don't seem to care running at 5v. Works perfectly.

I cut down the board so that it would fit in to the system:

Image

Image

All wired up:

Image

Image

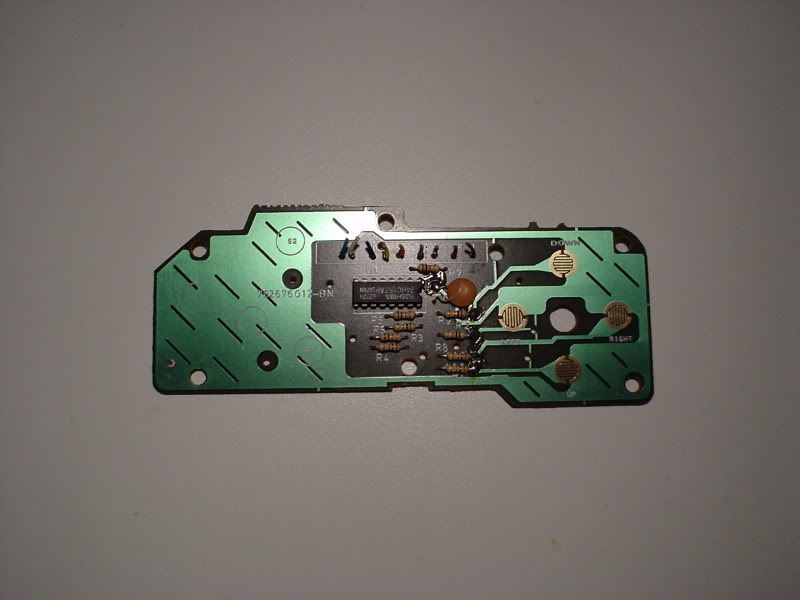
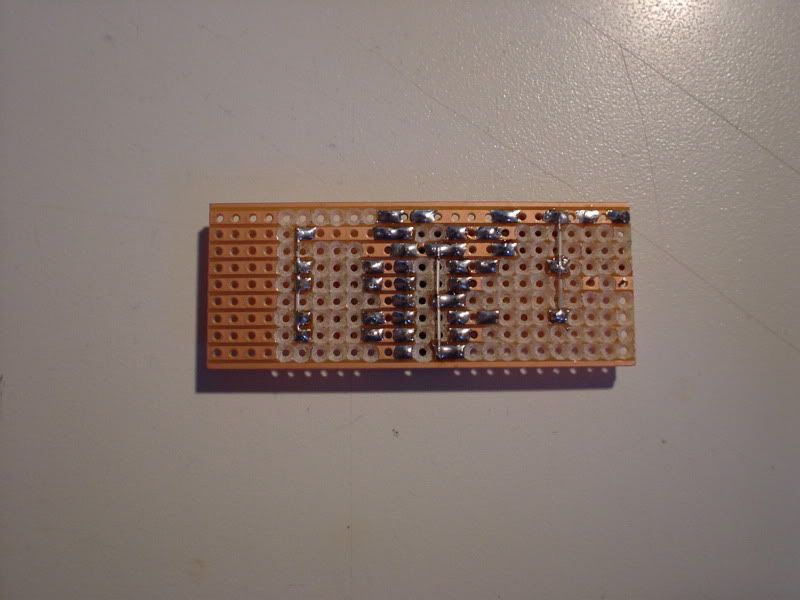
I originally hacked up a real megadrive controller, de-soldered all of the components, did a diagram then mounted everything on to some perf board. But i had trouble getting it to fit under the psone screen board. (Where the radica on is now) So i had to leave it out of this project. :( Will be ideal for future megadrive portable perhaps?. Thats why i went with the radica board in the end. Here's some pictures of it anyway:

Image

Image

Image

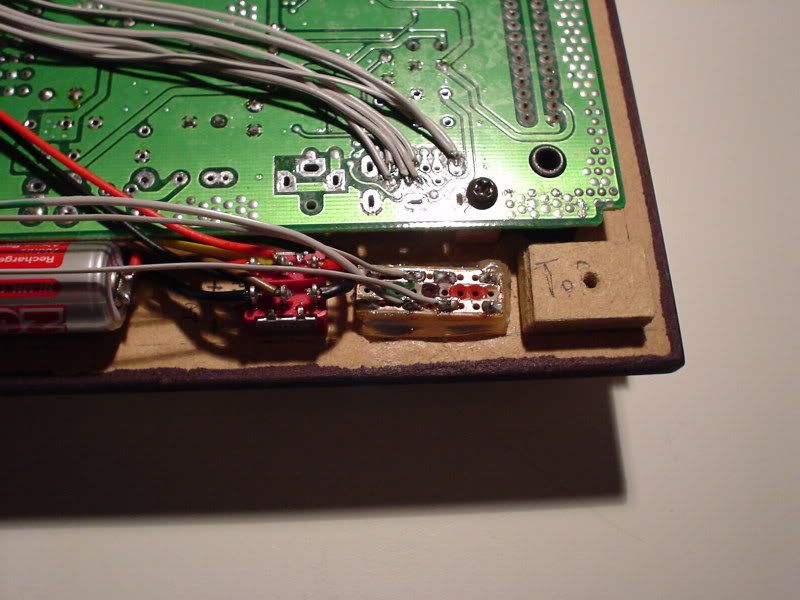
Got the Controller wired up the genesis board, and wired up the player 2 port:

Image

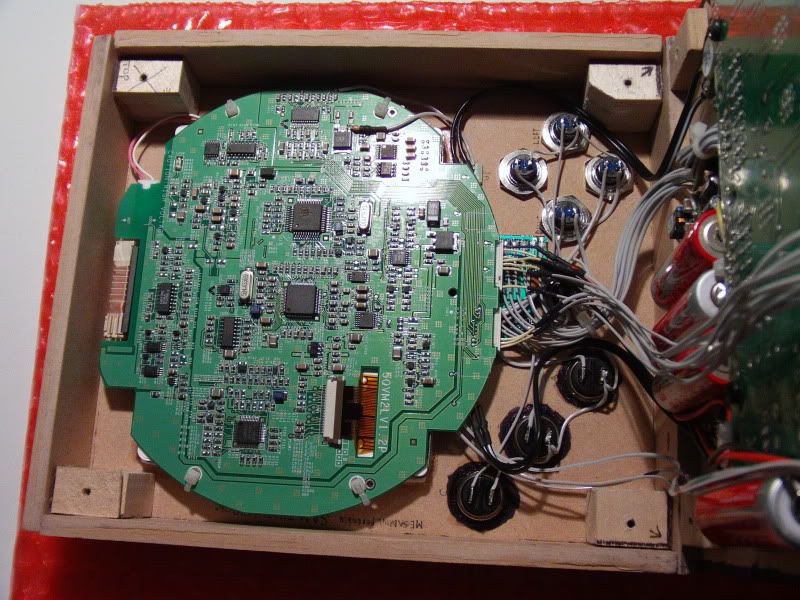
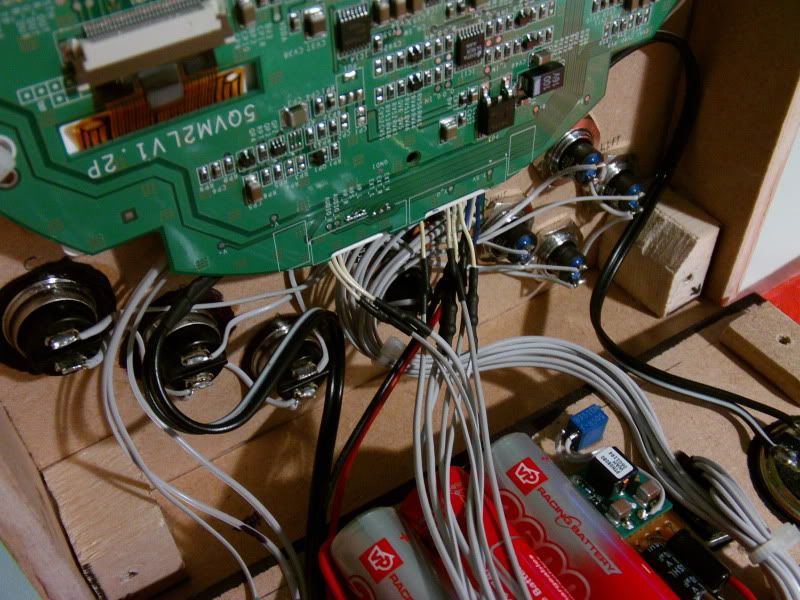
Got the volume controls wired up to the psone screen:

Image

Image

Then installed the psone screen board. Also wired up the front power LED:

Image

Image

Then i put the case halfs together adding the four corner screws afterwards. At this stage PSone screens connectors have to be attached, because they are too short to be connected when the case halfs are held apart.

Some "beta stage" pics of the system as it looks now:

Image

Image

Image

Image

Turned out pretty well so far i think :D The corner supports are abit off in some places but they will be hidden away when i get the side panels added on. :cool: It will be still posible to un-screw the back panel if i need to.

I need to get the side panels cut out and painted. Hope fully before christmas. Stay tuned people i will finish this project!
Image

User avatar
eagle5953
Moderator
Posts:1892
Joined:Mon Jul 07, 2008 5:06 pm
360 GamerTag:eagle5953
Steam ID:eagle5953
Contact:

Re: Sam's Megadrive Portable

Post by eagle5953 » Tue Nov 30, 2010 6:58 pm

Very clean build!

You have one of those weird Gen3 models with the main chip rotated 45 degrees. I think it looks awesome, but mine is normal. :(

Didn't know that the radica controller would work fine with a standard Genny. Good to know.

User avatar
sam_thornley
Posts:137
Joined:Sat Mar 10, 2007 7:32 pm
Location:Derbyshire, UK
Contact:

Re: Sam's Megadrive Portable

Post by sam_thornley » Tue Dec 14, 2010 10:23 am

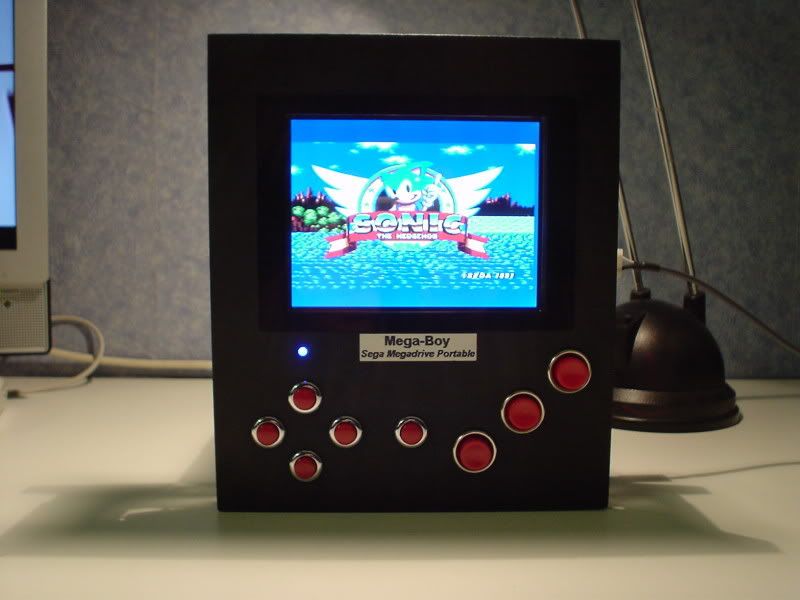
The project is now 100% done!! Yay!! :D Got the side panels added. Then wraped black tape around the edges rather than painting. Turned out quite nice overall.

Some pictures:

Side wall/panels added, hot glued into place:

Image

Image

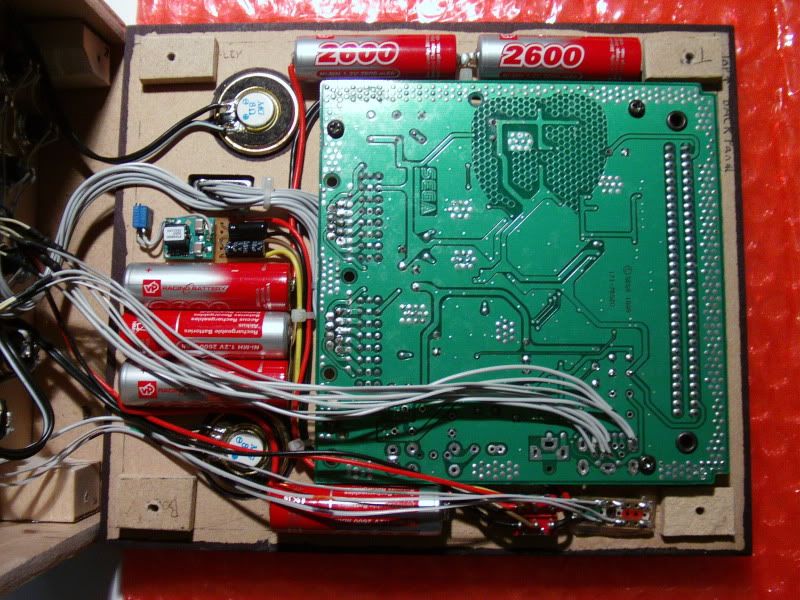
Internal wiring:

Image

Image

Image

One last check inside the system make sure everything is ok, before the case is shut:

Image

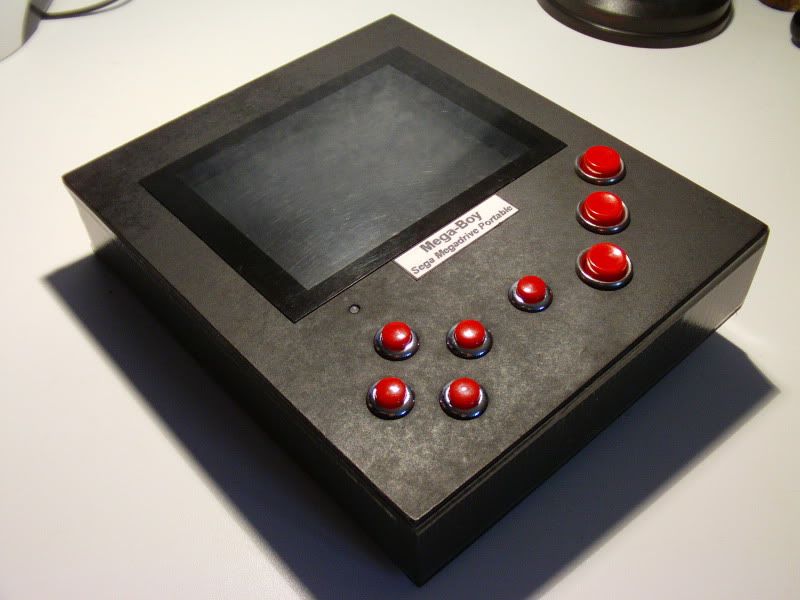
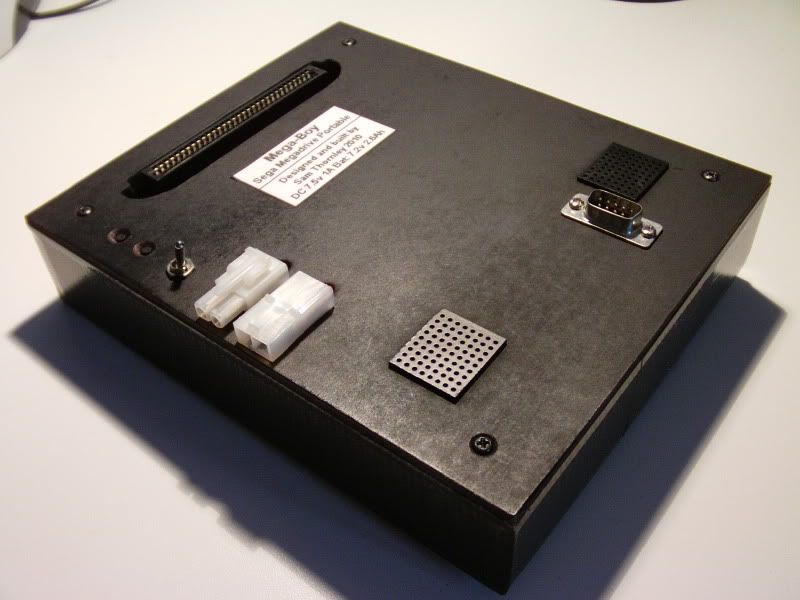
Some final pictures with the tape added:

Image

Image

Image

Image

Thats it people, another portable Sega Genesis/Megadrive finished! Now time for some quality megadrive gaming!!

-Sam
Image

User avatar
jdmlight
Posts:795
Joined:Thu Dec 27, 2007 11:17 pm
Steam ID:jdmlight
Location:A boring suburb of Chicago.

Re: Sam's Megadrive Portable

Post by jdmlight » Tue Dec 14, 2010 4:14 pm

Very, very clean. It also looks like it'd be super-easy to modify something inside if something were to break.

Nice job! :mrgreen:
--John (and please call me John, it's really weird to be called by my username)
Fight MS Paint abominations! If you don't have a camera, go here, and pick something 3 megapixels or higher.

Post Reply