As I had previously posted, I'm a long time visitor of this site but just recently decided to join. I've always had a love for gaming and this just naturally seems to be an extension of that love. I wanted to start off with something simple but also keep me interested enough to want to see it completed. So I figured why not be the system that I spent my young childhood years with? That would be the SNES.
After spending hours upon hours upon hours and hours and hours and even more hours, and then some more hours just taking in as much info as I could I then read some more. I had never really done anything of this type before. I mean I did own a few soldering irons from when I put mod chips into my Sega Saturn and original X-box, and opening these consoles up helped me learn about console components, pinouts and such. And in the begining the only thing I was really stressing about was the case construction as I had never worked with any sort of bondo or putty or any of that. It all seemed pretty intimidating at first but doing all that reading helped assuage those fears. So, after all this I compiled my parts.
1. SNES mini, once I got it in I didn't have it in me to tear it apart (at least not yet
2. Two 3.7v 4700mah li-poly batteries with pcb and smart charger (thanks for the battery guide hailrazer)
3. A ZN-40, I purchased other cases for future projects as well. Original? No, but since this is my first portable I wanted something that wouldn't give me too much grief.
4. One Interact SuperPad controller (colorful buttons)
5. One Zenith X-box screen.
6. These are the main things, I haven't mentioned all the other small supplies that goes with this that I didn't own when starting.
On to pictures!
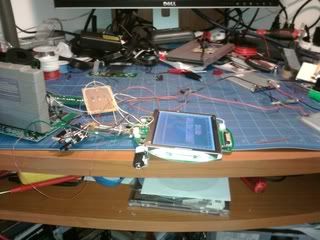
First photo is of the console and screen running of battery power.
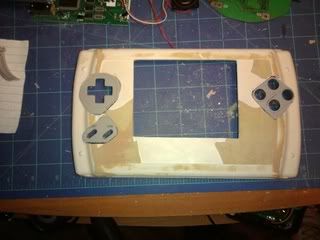
Second, I've cut out parts of the controller and attached them to the console. My dumb butt
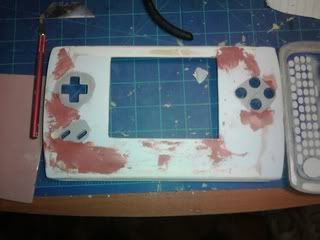
Third, finished (for the most part) sanding the putty from the sides and center. Then applied spot putty.
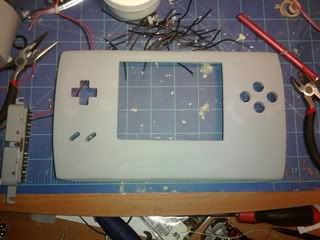
Fourth, result after putting down the primer
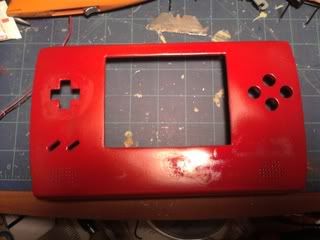
Fifth, after a lot of sanding and primer I decided to put on some paint. The regression on the dpad area was giving me problems so I just decided to fill it.
Overall I'm still far from being finished with the case, there's a lot of niggling imperfections that I want to take care of. From the electronics standpoint I'm good, just waiting to finish the case. I don't want to get rid of the backlight so I just need to think of a way to cover it up. I have gone ahead and ordered some led's though. But can anybody tell me the difference between these and these? I know the second item is flat topped but aside from that I just don't know aside from the price.
But I'm real excited about this. Hopefully I should be completed with this by the end of the week. After this I've got plans with a Radica Genesis. Thanks for looking.