Cocktail arcade cabinet buildlog

Hacking a [insert console name here] but don't see a "[insert console name here] Hacking" forum? Come on in and post your [insert console name here] questions and build logs!

Moderator:Moderators

User avatar
evilteddy
Portablizer
Posts:423
Joined:Tue Mar 25, 2008 2:11 am
360 GamerTag:Kirren of Smeg
Steam ID:kizzinator
Location:Newcastle, Australia
Cocktail arcade cabinet buildlog

Post by evilteddy » Fri Dec 19, 2008 6:10 pm

Well seeing as the holidays are here and I have six weeks I thought I would start a post for the cocktail cabinet I've been gathering materials for. There is no rush to finish this and I have a lot of time so it might be a pretty slow project but I'm sure it will get done. That said I could get fanatically into it and finish it before halfway through the holidays.

The first thing I did upon deciding that I wanted to make an arcade cabinet was to design a rough model in Rhino which can be seen in my signature. From that I am able to make templates for cutting and get sizes of the materials I need.

For my 16th birthday in June my parents gave me $300 AUD to go towards whatever project I wanted to do next. A lot of this money went to buying the controls, keyboard encoder and coin mechanism for the arcade machine.

Image

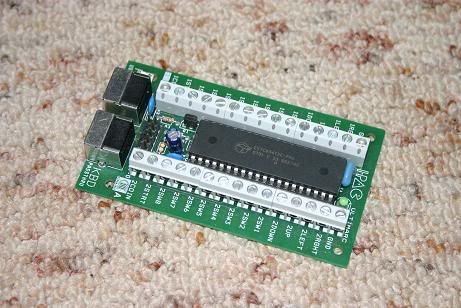
The keyboard encoder can accept 10 digital inputs (high/low) and another 4 for a joystick. The two joysticks will go in parrallel.

Image

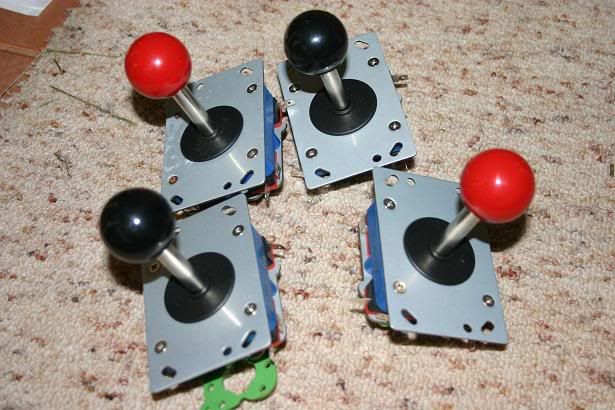
The joysticks. Reds are 4 way, blacks are 8 way.

Image

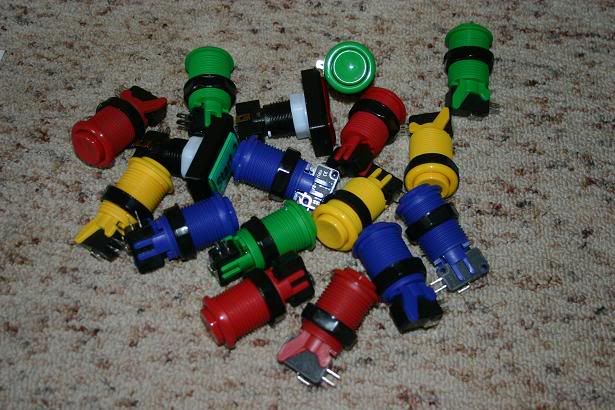
Buttons. 8 for each player so you can have two for pinball (on the sides of the control box) and six for general playing as well as a labelled P1 start or P2 start (both different colours) that have an LED to illuminate them.

Image

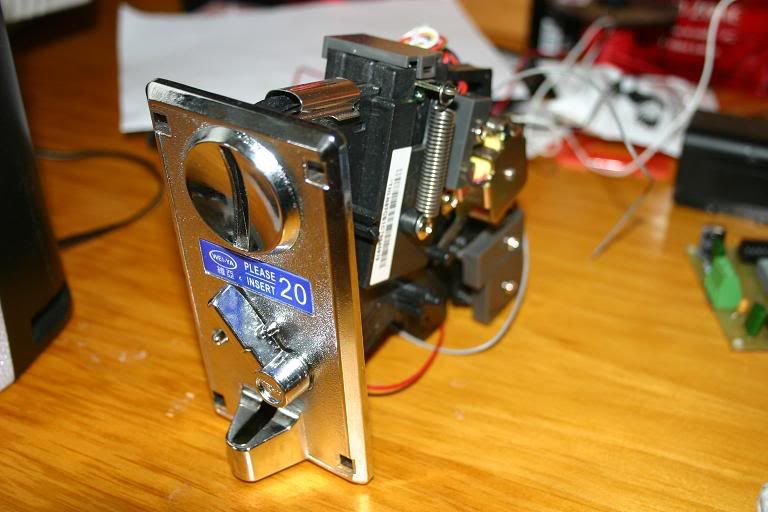
My electronic coin mechanism uses the hall effect to only let the right sized coins through. In this case Australian 20 cent coins.

All of the above was bought from a great online store called ozstick.com.au.

Now here's something I'm very proud of. Recently I got to do a bit of work experience at the end of year 10. I was fortunate enough to find a place at the university of newcastle electrical engineering department. I even had my own work bench with a variable power supply with 4 channels, a nice CRO, a computer with two monitors (big ones), a weller soldering station and lots of bench space.

My mentor was a great guy and he told me that I'd better bring a project to work on. I decided to do something similar to what Ben did with his arcade cabinet and make a counter for the coins using two 4033 ICs. These are decade counters with seven segment display drivers built in. With a lot of my help from my mentor and a program called altium designer 6 I ended up with the board pictured below.

Image

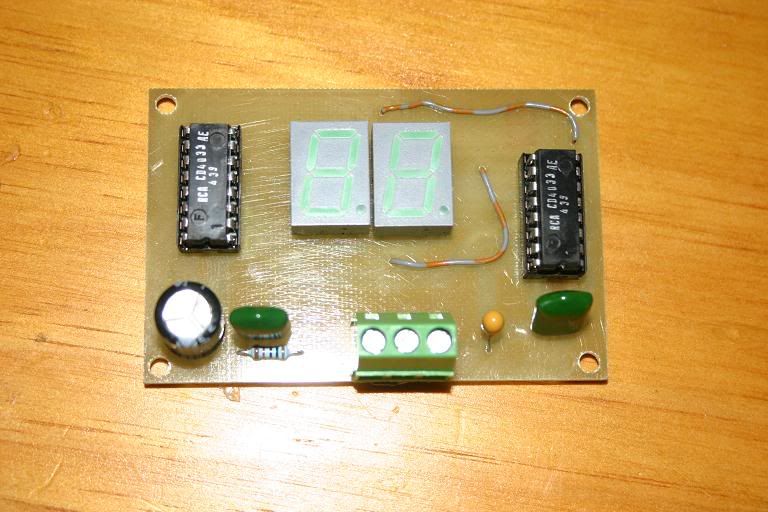
Every time a coin passes through the coin mechanism the 7 segment displays will show that one has been added to the count. If a display is showing a leading zero then it turns off eg 07 becomes just 7.

It was a lot of fun watching the milling machine rout my board down to 30 thou traces right in front of my eyes. I tried a 15 thou trace board but a couple of traces came off :roll:.

It works nicely even after you accidentaly put 12V in the wrong way after someone switched the wall power adapter at home to negative tip positive sleeve. 8)

On the software side of things I have gotten MAME running with MALA as a front end. I have gotten some nice themes for MALA for each system. I have also set up MALA so it can call ZSNES, project 64 and many other emulators via command line so this arcade machine will play many different systems.

I still have to install virutal pinball and wincab, though if anyone knows a better jukebox software that is free tell me.

I have some nice marine grade 5 ml plywood that my Dad left over from building his previous boat so I have some good wood to build the arcade cabinet with. I will be using his shed (tunnel tent but a very good one), which has a lot of room. He won't be in it for a while so for the moment it is all mine Mwa ha ha ha haa.

Just one more thing. The PC running the arcade software is a four year old school computer (props to mum for grabbing two for me when she saw them being given away) and is actually pretty good. It doesn't have a graphics card or anything fancy but its good enough for project 64 and thats probably the most graphics intensive application I'll be running.

Anyway I'll start work tomorrow.

EDIT: Oh something I bought recently for my N64p and for my upcoming playstation portable.

Image

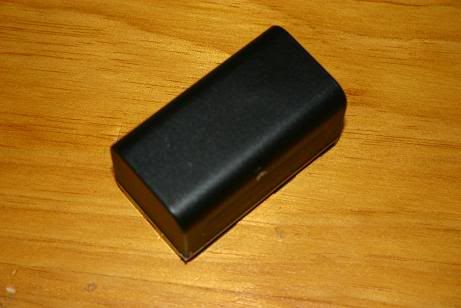
7.2V 4400mAh. Oooh yeah.

User avatar
bacteria
Portablizer Extraordinaire
Posts:3984
Joined:Fri Apr 20, 2007 12:14 am
Location:Hampshire, UK
Contact:

Post by bacteria » Sat Dec 20, 2008 1:26 am

Looks good so far.

The battery for "your upcoming Playstation portable" looks like a Canon BP-911 (or one of various other compatibilities) full height (40mm) Li-ion - am I right?

Are you able to launch the games purely via GUI or do you have to sue command line for ZSNES as you mention - not ideal to have to bring out a keyboard; GUI only is better. Shortcut macros??
Image

Kyo
Senior Member
Posts:2470
Joined:Tue Jan 02, 2007 11:59 am
Location:Germany
Contact:

Post by Kyo » Sat Dec 20, 2008 2:16 am

wait, you have access to a circuit board designer?

*jealousy*

User avatar
evilteddy
Portablizer
Posts:423
Joined:Tue Mar 25, 2008 2:11 am
360 GamerTag:Kirren of Smeg
Steam ID:kizzinator
Location:Newcastle, Australia

Post by evilteddy » Sat Dec 20, 2008 7:13 am

Yeah it is a BP-911 replacement. Good spotting. The importance of command line is that MAME runs from command line. Therefore every frontend designed to work with it has you scroll through the games and when you select one it calls mame with the game via command line. If I want to include SNES games on another list you can access by pressing left or right to switch categories the frontend needs to be able to call Zsnes and the game via command line the same as MAME. It would be annoying if I had to actually type to start a game.

@kyo - The circuit designer was Altium designer 6. Very good with the PCB designer on one screen and the schematic on the other. Unfortunately I only could use the milling machine and software as well as the other electronics stuff while I was doing work experience. It was excellent stuff though. I can't wait to go to uni.

User avatar
HotDog-Cart
Portablizer
Posts:3804
Joined:Sat Jul 16, 2005 12:07 pm
PSN Username:Lythinca
Steam ID:scythe_king
Location:Your IP Address, Connecting...
Contact:

Post by HotDog-Cart » Sun Dec 21, 2008 9:43 am

wtfux. Please insert 20 cents? So, if I put in a quarter, it will give me 5 cents back?
Image

tom61
Senior Member
Posts:1517
Joined:Fri Mar 25, 2005 6:51 pm

Post by tom61 » Sun Dec 21, 2008 1:07 pm

HotDog-Cart wrote:wtfux. Please insert 20 cents? So, if I put in a quarter, it will give me 5 cents back?
LOL. Each country used whatever coin was considered an appropriate size as the coin the mechanism accepted, in this case the Australian 20 cent piece.

User avatar
khaag
Senior Member
Posts:2261
Joined:Sat Mar 18, 2006 7:54 pm
Location:C eh N eh D eh
Contact:

Post by khaag » Sun Dec 21, 2008 6:36 pm

Yeah, Australian money is crazy... I can't get over how big the freaking coins are! The 50 cent piece is like 40 lbs!
[url=http://thekevbot.com]Portfolio[/url]
[url=http://twitter.com/thekevbot]Twitter[/url]
[url=http://blog.thekevbot.com]Blog[/url]

User avatar
evilteddy
Portablizer
Posts:423
Joined:Tue Mar 25, 2008 2:11 am
360 GamerTag:Kirren of Smeg
Steam ID:kizzinator
Location:Newcastle, Australia

Post by evilteddy » Mon Dec 22, 2008 12:22 am

Our 2 dollar coin is also much smaller than our 1 dollar coin and the 50c coin is decagonal. Anything up to 50c is interchangeable with New Zealand. Also our notes are plastic so they can't be forged as easily with small plastic windows and colours like royal blue, purple, green and orange and these are vibrant colours. They also have microwriting that you need a binocular microscope to read. the ten dollar note has the poem "the man from snowy river" on it but because it is so small most people think the text is cross hatching. Our money is awesome like that. 8) Correct me if I'm wrong but I think a few of you guys are still on boring old paper money which can crease, get soggy and burn.

As for the coin mechanism it came with a bunch of stickers and I just chose the one to put on. Most Australian arcade machines take $1 or $2 but I decided that I'd make mine a bit cheaper. Plus people would try and steal dollar coins but wouldn't make the effort for 20c and as I'm probably going to have a ice cream container of 20c coins for most occasions when I don't want to exploit my friends 20c is cheaper for me.

On another note my dad is out of his shed and its all mine. He's a Science teacher so he got six big old benches with lots of shelf space inside that his school was chucking out and put them in his shed. It's a great set up with four around the edges and two in the middle back to back for a central work space. Anyway, I'm off to rule lines (measurements already decided in 3d model), and use power tools. Talk to you later.

User avatar
Rekarp
Portablizer Extraordinaire
Posts:2163
Joined:Thu Dec 28, 2006 1:52 am
PSN Username:Lnghrn_
Steam ID:rekarp
Location:Austin, Tx
Contact:

Post by Rekarp » Mon Dec 22, 2008 5:20 am

slick project. what screen are you going to use?

I have a Upright cab designed for a 19" monitor that I will be building after the holidays.
The wood master

Image

"I was under the impression Mac owners don't actually USE their machines, they just parade them around trying to evangelize the masses."

User avatar
evilteddy
Portablizer
Posts:423
Joined:Tue Mar 25, 2008 2:11 am
360 GamerTag:Kirren of Smeg
Steam ID:kizzinator
Location:Newcastle, Australia

Post by evilteddy » Tue Dec 23, 2008 11:30 pm

The screen is a 17" CRT. Dad said he'd shout me an LCD for the project if I made it a cocktail but the I realised that if it was a cocktail cabinet you'd need a CRT for the viewing angles anyway.

Just a quick update. I have cut out the table top which was the hardest cutting part as you might be able to see in the 3d model in my sig. It is the only part of the arcade cabinet that has curves but the curves ended up being really smooth and regular. Instead of plywood I ended up using some spare duflex we had on the verandah. It is much stiffer and just as light but it still needs a covering around the edge because its a honeycomb core material which is mostly hollow. As a result the edges are exposing the inner structure. If its hard to picture I'm sorry mable I'll edit this post later with pictures.

Anyway I have also measured and marked two panels for the box thing on the bottom underneath the table. I am using marine grade 5 ml plywood for that. It is great wood and we usually have some spare considering the boat building my Dad does. On a tangent he has built a 12m catamaran we lived aboard for a few years, a 6 metre folding catamaran of his own design and is building a 7 metre folding catamaran again of his own design all on a teacher's salary. Anyway the upshot is that we always have plenty of epoxy, ply and tools around the place which is great for what I'm building.

I'm helping dad on the 12m catamaran a bit during the holiday which is why I didn't do much yesterday on the cabinet. Then of course there's Christmas! I made an ice cream cake with vanilla on the outside mixed with glace cherries and nuts, fruit, spices and chocolate ice cream in the centre. It looks like a christmas pudding. Back on topic I'll probably be able to continue working on it whenever I get the chance so keep an eye out for more develpoments.

User avatar
evilteddy
Portablizer
Posts:423
Joined:Tue Mar 25, 2008 2:11 am
360 GamerTag:Kirren of Smeg
Steam ID:kizzinator
Location:Newcastle, Australia

Post by evilteddy » Sat Dec 27, 2008 2:18 pm

Just a quick update. I have nearly finished cutting out all the things I need to. Out of 16 pieces I have cut 14. The control boxes on each side came out really well too. I think I'll start measuring where the buttons will go and cutting out holes for them with a holesaw.

squid
Posts:3
Joined:Sun Dec 28, 2008 10:35 am

Post by squid » Sun Dec 28, 2008 10:42 am

Just thought I'd share a Sketchup model I've been working on that I'm sharing with anyone that's interested. I've made a few more changes and have not yet updated the model, but I've started cutting the designs out and will upload some pictures as it progresses. I suppose I should probably start my own thread instead of usurping this one :). Anyhow, here's the link to the model:

http://sketchup.google.com/3dwarehouse/ ... 47904a696c

User avatar
evilteddy
Portablizer
Posts:423
Joined:Tue Mar 25, 2008 2:11 am
360 GamerTag:Kirren of Smeg
Steam ID:kizzinator
Location:Newcastle, Australia

Post by evilteddy » Sun Dec 28, 2008 2:53 pm

I'd almost forgotten sketchup existed. I remember my brother once made our own house in sketchup. He bought an ultrasonic tape measure to do it.

In other news I have messed around and finally found a button configuration that pleases me. I have measured out where all the buttons and joysticks need to go and I just need to find an allan key small enough to put new drill bits in my dad's holesaws. I'll post updates as they happen.

User avatar
jjhammerstein
Senior Member
Posts:1562
Joined:Tue Nov 18, 2008 7:15 pm
Location:Southern CT
Contact:

Post by jjhammerstein » Sun Dec 28, 2008 3:51 pm

evilteddy wrote:I'd almost forgotten sketchup existed. I remember my brother once made our own house in sketchup. He bought an ultrasonic tape measure to do it.

In other news I have messed around and finally found a button configuration that pleases me. I have measured out where all the buttons and joysticks need to go and I just need to find an allan key small enough to put new drill bits in my dad's holesaws. I'll post updates as they happen.
Find an existing arcade system that uses 8 buttons, and just look at their layout.

They do it right, because they get paid to.
GET FREE WOW GOLD SEX VISIT MODRETRO


squid
Posts:3
Joined:Sun Dec 28, 2008 10:35 am

Post by squid » Tue Dec 30, 2008 8:37 am

What I did on a prototype panel I built, and what I'm doing on the cocktail cabinet I'm building now is making the panel modular. The part of the actual panel that the buttons go into is 3/4". I found the "perfect" connector for hooking up panels to the IPAC. Each player has a maximum of 8 buttons, 4 joystick directions, 1 coin, 1 start and 1 ground (i.e. 15 connections). I found a DB15 connector (not the compact type) here: http://www.winfordeng.com/products/con15.php. These connectors mount PERFECTLY on the edge of a 3/4" board. I designed the player panels so that they can simply lift out of the system and be unplugged from the cable (Winford also sells DB15 cables, btw). This will allow multiple panels to be designed based upon the game being played. I'll try to snap some pictures of my prototype later to make it clearer, but the system worked exceedingly well. I also was able to print out on photo paper the panels I wanted, and then laminate the exact printouts onto the panel. I tried several different methods for this: laminate, clear contact paper, and urethene. I'll try to also post pictures of those prototypes if possible.

Post Reply