I don't suppose one of those Analog Devices chips was a AD9889B, but if so, I'm interested in it.bicostp wrote: Parts harvested so far: a few EEPROMs, an EPROM, some microcontrollers, Analog Devices D/A converters, assorted surface mount components, assorted through-hole discrete components, and a couple dozen DIP sockets (only a couple of which I've completely ruined).
Total brain cells lost: both of them
The Afternoon projects thread.
Moderator:Moderators
-
lifeisbetterwithketchup

- Senior Member
- Posts:2180
- Joined:Fri Jul 21, 2006 12:08 pm
- Steam ID:lifeisbetterwithketchup
- Location:Illinois. Whee.
- Contact:
Rekarp wrote:Cause I am Abe F#!@ing Lincoln.mako321 wrote:What makes you head ninja, anyways?
-
humakabula1

- Posts:728
- Joined:Sun May 30, 2010 3:11 am
- 360 GamerTag:H1writer
- Location:Diggi Down Under
Re: The Afternoon projects thread.
i jammed a nh-d14 into my desktop a couple of days ago.
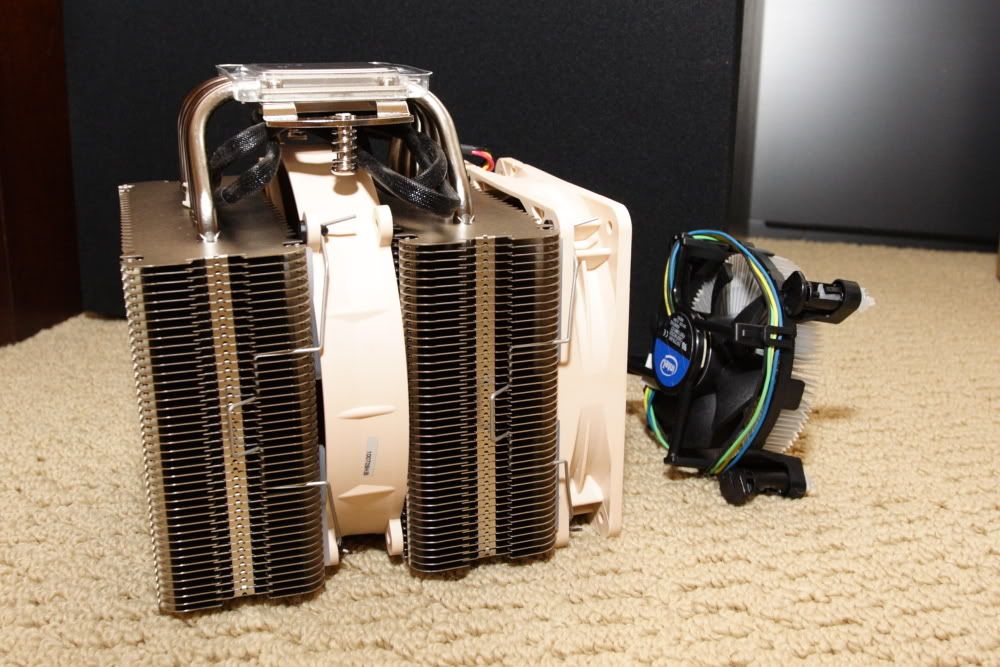
The new one is on the left, my old one is on the right (not my pic, same parts though)
The new one is on the left, my old one is on the right (not my pic, same parts though)
Wedgix (custom linux distro): 20% complete
-
Chezwik

- Posts:45
- Joined:Sat Mar 13, 2010 6:23 pm
- PSN Username:Itsumofataride
- 360 GamerTag:Chezwik74
- Location:The True Mountain state, Colorado
Re: The Afternoon projects thread.
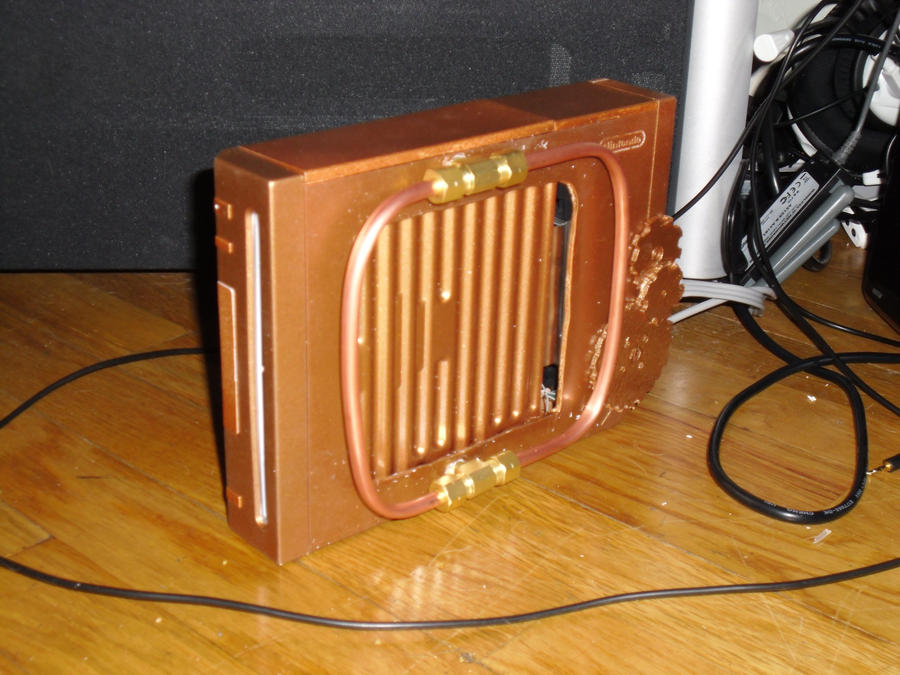
Did a steampunk style mod to my wii. trying to figure out if i want to put any light or gauges in it, just for giggles. not that big into steampunk, but after seeing that bronze paint and a quick internet search, it just seamed right. It looks better then the picture leads it to be. really bad lighting in my house
He who does things in wrong order
If i can't RROD my Xbox once a week, I'm doing it wrong
Current Projects -
Cheztendo64 - In design Phase
If i can't RROD my Xbox once a week, I'm doing it wrong
Current Projects -
Cheztendo64 - In design Phase
Spoiler:
Re: The Afternoon projects thread.
Put an gauge /w RC circuit on the drive active light.
-
Chezwik
- Posts:45
- Joined:Sat Mar 13, 2010 6:23 pm
- PSN Username:Itsumofataride
- 360 GamerTag:Chezwik74
- Location:The True Mountain state, Colorado
Re: The Afternoon projects thread.
That could be cool. and shouldn't be to terribly difficult
He who does things in wrong order
If i can't RROD my Xbox once a week, I'm doing it wrong
Current Projects -
Cheztendo64 - In design Phase
If i can't RROD my Xbox once a week, I'm doing it wrong
Current Projects -
Cheztendo64 - In design Phase
Spoiler:

Re: The Afternoon projects thread.
I say: Put some sort of gold or green-colored LED work on the case for a nice extra touch if you're brave enough.Chezwik wrote:That could be cool. and shouldn't be to terribly difficult
-
humakabula1
- Posts:728
- Joined:Sun May 30, 2010 3:11 am
- 360 GamerTag:H1writer
- Location:Diggi Down Under
just made this
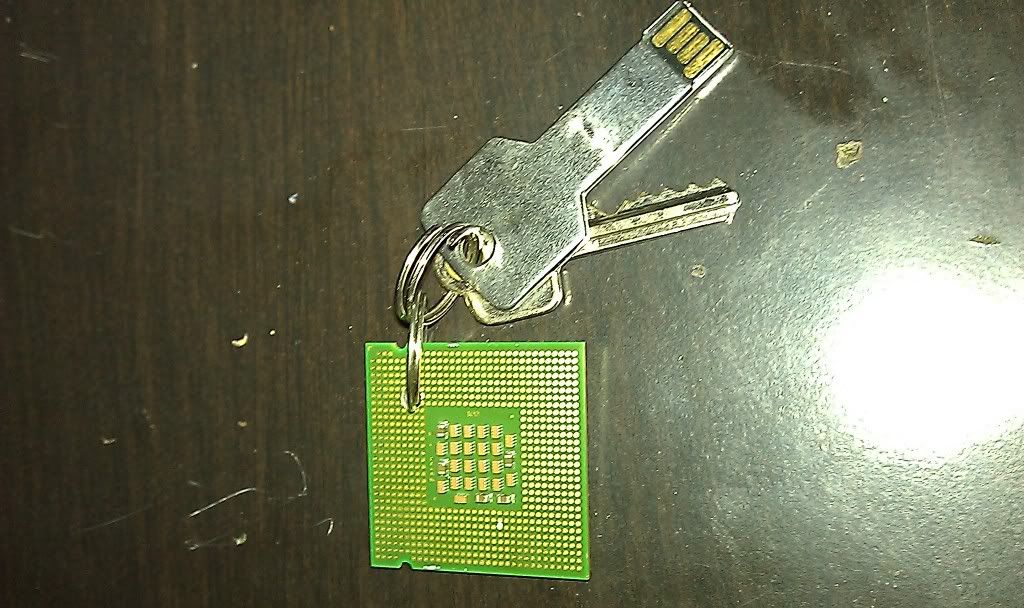
the keyring that is
MOD EDIT: Merged with afternoon projects thread, thats why its here
Wedgix (custom linux distro): 20% complete
-
marshallh

- Moderator
- Posts:2986
- Joined:Sat Sep 10, 2005 2:17 pm
- 360 GamerTag:marshallh
- Location:here and there
- Contact:
Re: The Afternoon projects thread.
finished a project today, drill press vice
poured aluminum and did all the machining myself on WW2-era tools

poured aluminum and did all the machining myself on WW2-era tools

Re: The Afternoon projects thread.
Wow, that's really nice.
Okay, maybe some of you remember my weed whacker-powered bike. It's biggest flaw was that there was no clutch. Well, after the brackets holding the motor on the bike started to get loose to the point where it'd no longer work, I had a good excuse to rebuild the mounts with a clutch.
What I did was have one side pivot with a bungee cord to pull the motor up. I re-attached the pedals, cut the main sprocket in half, and attached one half to the pedals and the other to the motor. I then cut the original chain I had saved from it and used that to connect the two sprocket halves. Check out the pictures, it'll make much more sense.

One half of the sprocket, with the chain attached:

The other half on the motor. When the pedal is pushed down, the chain pulls the motor down onto the tire.


Also, since I get so much leverage with this setup, the peg gets much more grip. I can start it by rolling down a small hill and tapping the motor onto the tire.
Okay, maybe some of you remember my weed whacker-powered bike. It's biggest flaw was that there was no clutch. Well, after the brackets holding the motor on the bike started to get loose to the point where it'd no longer work, I had a good excuse to rebuild the mounts with a clutch.
What I did was have one side pivot with a bungee cord to pull the motor up. I re-attached the pedals, cut the main sprocket in half, and attached one half to the pedals and the other to the motor. I then cut the original chain I had saved from it and used that to connect the two sprocket halves. Check out the pictures, it'll make much more sense.
One half of the sprocket, with the chain attached:
The other half on the motor. When the pedal is pushed down, the chain pulls the motor down onto the tire.
Also, since I get so much leverage with this setup, the peg gets much more grip. I can start it by rolling down a small hill and tapping the motor onto the tire.

-
Triton

- Moderator
- Posts:7397
- Joined:Mon May 24, 2004 12:33 pm
- 360 GamerTag:triton199
- Steam ID:triton199
- Location:Iowa
- Contact:
Re: The Afternoon projects thread.
very nice effective solution on a limited budget! if you ever want to do it up proper you can get clutches from northern tool for under 50$ shipped, i've got a similar project planned, using bicycle parts and a 3hp tecumseh 2 cycle snowblower engine. its going to be built in the style of teens and twenties era boardtrack racers much like this indian 

Visit us at Portablesofdoom.org
-
Triton
- Moderator
- Posts:7397
- Joined:Mon May 24, 2004 12:33 pm
- 360 GamerTag:triton199
- Steam ID:triton199
- Location:Iowa
- Contact:
Re: The Afternoon projects thread.
Today since i was working on my car (and had it up on jackstands with the wheels off etc) anyway i decided to get a project i have had planned out of the way. I decided to build a control arm brace for the front suspension. it is VERY easy to do on this car, and cheap too! you need:
1" EMT conduit (10' for ~8$)
2 grade 8 1/2" washers (~50 cents each)
a saw (i used our sawsall)
a large hammer
a bench vice
some sand
ducktape
spray paint
and this is the result of maybe half an hours work and a grand total of about 9 dollars

and installed on the car it looks like this

1" EMT conduit (10' for ~8$)
2 grade 8 1/2" washers (~50 cents each)
a saw (i used our sawsall)
a large hammer
a bench vice
some sand
ducktape
spray paint
and this is the result of maybe half an hours work and a grand total of about 9 dollars
and installed on the car it looks like this
Visit us at Portablesofdoom.org
-
rikitheshadow

- Posts:315
- Joined:Fri May 09, 2008 12:15 am
Re: The Afternoon projects thread.
Been a while since I posted anything. This isn't really an afternoon project I did because I was at work, but sometimes I spend my nights like afternoons catching up on all the work on projects I haven't been able to get to. So I got two 25" CRT tubes sitting in my room........with the rest of my junk....crowding my path ways
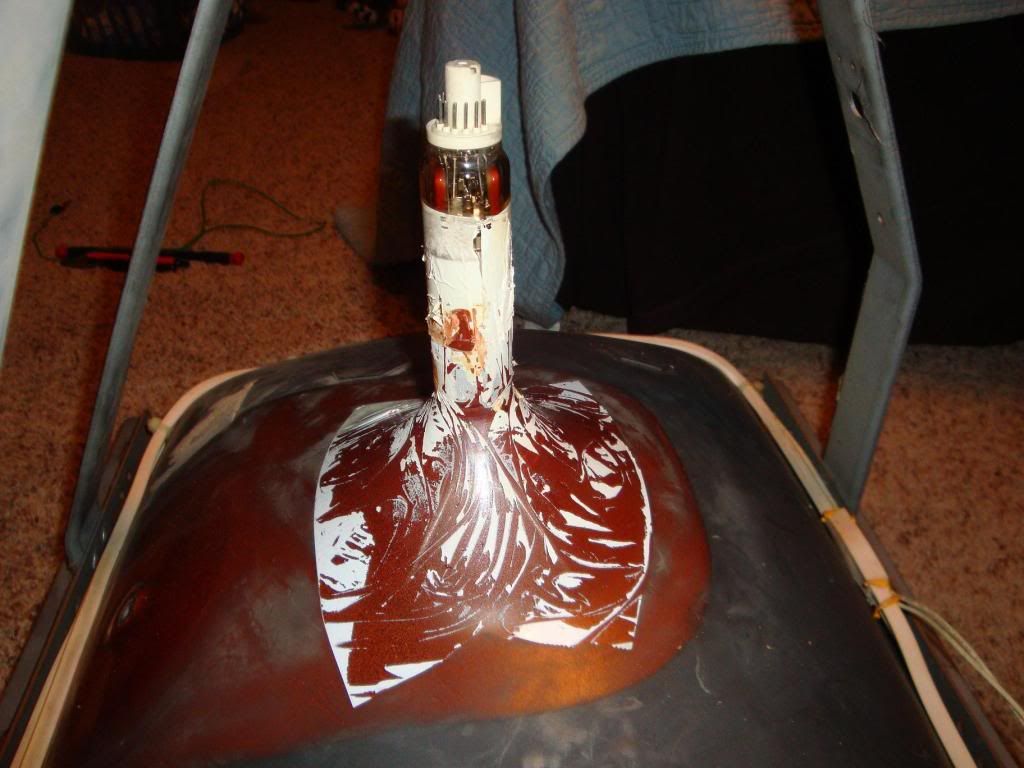
My project consisted of removing a bonded yoke from a 25" CRT (tube), which I attempted with a 12v battery charger for a car set at 2 amps for 15 min across the Horizontal Winding.....It didn't really much help at all......ended up just breaking the Yoke off, poor thing. Oh wells, me and a couple of experts at KLOV couldn't match it to anything so it was a mystery yoke and tube. Tube is ok though I got to plan out a new yoke and chassis...........................
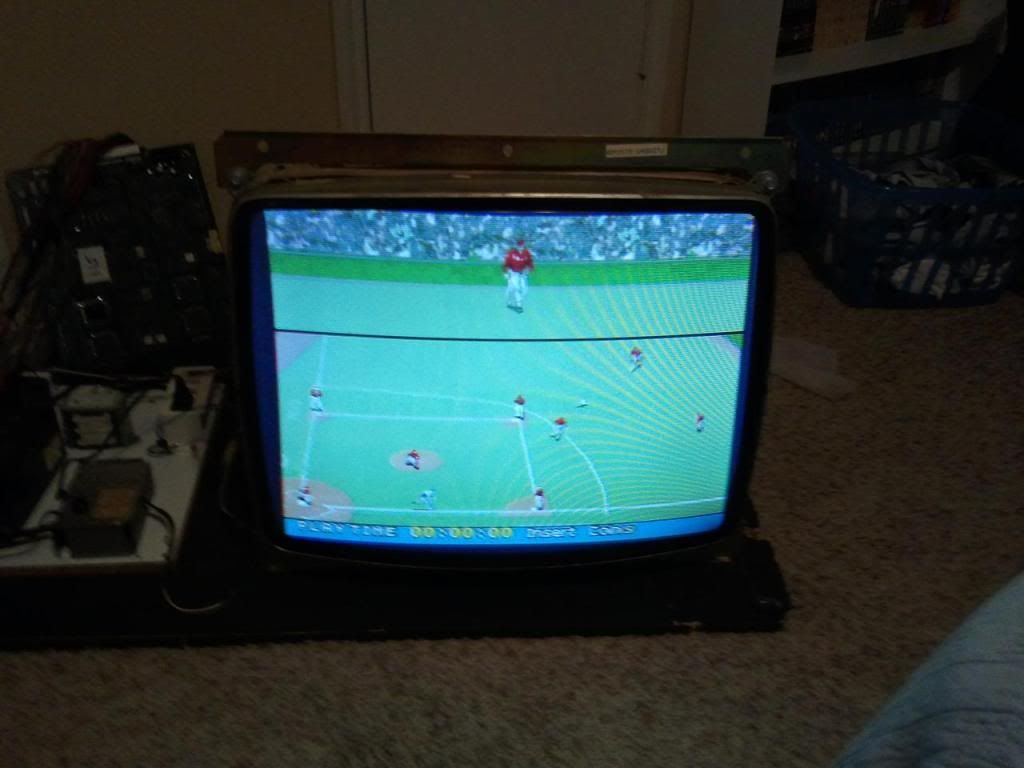
Along side that I pulled one of my 25" CRT (tube, chassis, and all) from this Virtua Fighter cab I got off craigslist for $100, the previous owner said he used to repair the things, but he was burnt out on stuff like that so someone else had repaired this. Well it turns out the old monitor up and died, and for some reason they chunked it and replaced it with a standard resolution chassis and yoke.............Idiots, Virtua Fighter alone is a Medium Resolution game but they didn't even bother hooking up an isolation transformer. Well I debugged this odd chassis and it turned out to be a 25K7000 Wells Gardner, it only blew a fuse thank god. Would of destroyed more components if it hadn't of done that without it's ISO.
Bonded Yoke Removal BEFORE
Bonded Yoke Removal AFTER
25K7000 Wells Gardner Up and Running (taken with phone)
My project consisted of removing a bonded yoke from a 25" CRT (tube), which I attempted with a 12v battery charger for a car set at 2 amps for 15 min across the Horizontal Winding.....It didn't really much help at all......ended up just breaking the Yoke off, poor thing. Oh wells, me and a couple of experts at KLOV couldn't match it to anything so it was a mystery yoke and tube. Tube is ok though I got to plan out a new yoke and chassis...........................
Along side that I pulled one of my 25" CRT (tube, chassis, and all) from this Virtua Fighter cab I got off craigslist for $100, the previous owner said he used to repair the things, but he was burnt out on stuff like that so someone else had repaired this. Well it turns out the old monitor up and died, and for some reason they chunked it and replaced it with a standard resolution chassis and yoke.............Idiots, Virtua Fighter alone is a Medium Resolution game but they didn't even bother hooking up an isolation transformer. Well I debugged this odd chassis and it turned out to be a 25K7000 Wells Gardner, it only blew a fuse thank god. Would of destroyed more components if it hadn't of done that without it's ISO.
Bonded Yoke Removal BEFORE
Bonded Yoke Removal AFTER
25K7000 Wells Gardner Up and Running (taken with phone)
Re: The Afternoon projects thread.
^ ^ ^ ^ Another screen is saved!
Re: The Afternoon projects thread.
There was this cover to an exit sign leaning against a white board in one of my classes at school. I told my friend I wanted it, so he went up and took it like a boss.  I used a laptop diffuser panel, LEDs, and some diffusion sheets to make it light up.
I was going to make it just red, but my red LED's aren't that bright. So I made it rainbow. :awesome:
The sign cover:

Diffuser panel with a reflective sheet behind it:

LED's all glued on with resistors:


And hanging over my door:

My camera kinda sucks, so the colors look washed out. They're pretty vibrant, though.
I was going to make it just red, but my red LED's aren't that bright. So I made it rainbow. :awesome:
The sign cover:
Diffuser panel with a reflective sheet behind it:
LED's all glued on with resistors:
And hanging over my door:
My camera kinda sucks, so the colors look washed out. They're pretty vibrant, though.