
Well, you have the 5" Composite LCD Screen, im sure you can get a nice winamp visual plugin (Geiss is one of my favs) and set a button on the Com-Control to run the Visualization Plugin. You can bet it will look a hell'uva lot better then a 4-tone greyscale, piss yellow LCD screen (which you can get from www.crystalfontz.com).
The LCD E/Q will use the LPT port, so that means you cant use the LPT (LPT is an old skool term for Printer Port) for the controller interface.
Here is some help for the controller. If you want to use multiple controllers on 1 port, you have to use controllers with the same hardware in the controller itself. The way the data is handled between different controllers between companies are different. NES, SNES, and Virtual Boy are all the same thing. I have hooked a NES controller to the computer and used the SNES setting. You just dont have 4 of the SNES buttons. You can hook them backwards, like VBoy using the NES settings, but the buttons might need to be remaped. I accidentally plugged in my Vboy controller and forgot to take the software off of the NES settings and i spent 2 hours trying to figure out why my controller didnt work.
Almost complete...PC PROJECT
Moderator:Moderators
www.bsodtv.org - Hacking is NOT a crime!
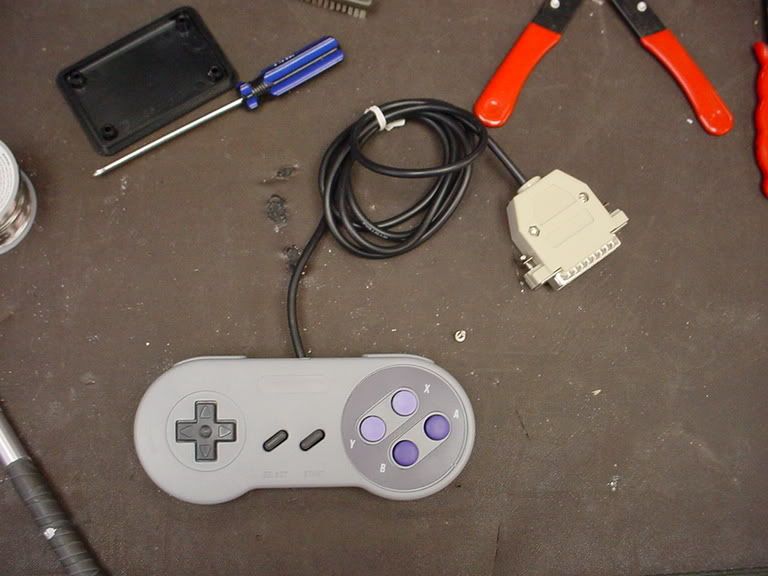
Not that anyone really cares, but here is my SNES Controller. Its a generic brand "Super Controller" from back in the day, and off the shelf Radio Shack parts.

I had a really kick ass controller that had 3 custom programable buttons, 12 memory banks, LCD screen, and clear acrylic case (back then clear cases werent everyday things). I think it was called the SN ProgramPad. After 5 years of SNES use, and 5 years of PC use, it finally died.
Yup, here it is http://www.gamersgraveyard.com/reposito ... rampad.jpg
If you dont want to cut your controller apart, I can tell you how to make a ghetto SNES plug for the controller. Just ask and ill post the details.
www.bsodtv.org - Hacking is NOT a crime!
-
xriverfalconx

- Posts:481
- Joined:Tue Jul 19, 2005 12:57 pm
- Location:Vana'Diel - Titan Server
- Contact:
If the LCD is going through the printer port, then I'll make the gaming pads usb. All I need is a simple usb hub, and The controllers will just be connected that way. =)
I'll look at the site and see if i can find a good lcd for what i want. Out of curiosity...is it possible to use the gba screen for this?It is color which is great, but is there a possible way to manipulate the signal to be shown on that screen through the printer port?
Also, which screen would you recommend that'll fit in the 3.5 bay?
Nevermind...found one that'll work for me =)
http://www.crystalfontz.com/products/631/index.html
<a href="http://www.gmrealm.us">http://www.gmrealm.us</a>
-PC Modification Project- (special thanks to Foxx373) - Complete-
-WIP- mT16P (Portable Turbo Grafx 16)
-PC Modification Project- (special thanks to Foxx373) - Complete-
-WIP- mT16P (Portable Turbo Grafx 16)
I would just use the 5" color screen you allready have. The Character LCD will look like crap in comparison.
www.bsodtv.org - Hacking is NOT a crime!
-
xriverfalconx
- Posts:481
- Joined:Tue Jul 19, 2005 12:57 pm
- Location:Vana'Diel - Titan Server
- Contact:
I'll probably get it, just to see how it looks inside the casing with everything together.
Second video card has been ordered and will be on its way to my home soon. Once it gets here, I can finish the buttons on the system and have just about the whole project complete. =D
Still need another 2-3 fans to keep the sysem cooled properly and work on the controllers. Oh...forgot about the wheels. Will be needing that as well. Not gonna put a window on the side of the casing because of what I recently added to the pc. Too many wires floating around and its not a pretty picture inside this thing.
<a href="http://www.gmrealm.us">http://www.gmrealm.us</a>
-PC Modification Project- (special thanks to Foxx373) - Complete-
-WIP- mT16P (Portable Turbo Grafx 16)
-PC Modification Project- (special thanks to Foxx373) - Complete-
-WIP- mT16P (Portable Turbo Grafx 16)
I took a look at the prices for the RetroUsb controller mod... WTF!! Thats a ripoff (in my opinion). Lets do some quick figuring, im rounding everything to the nearest dollar:
50 pak diode = $3
DB-25 Hood = $3
DB-25M Connector = $2
Total = $8
For any controller you will use at most 5 diodes. So thats enough for 10 controllers. Lets adjust the costs for hoods and connectors.
10 hoods = $30
10 DB-25M = $30
Diodes = $3
for $65 you can make 10 intefaces. Of course you can opt out for the cheap biege hood thats a lot less $$, and a lot of the things i added $0.50 or more to its cost to do the rough figures.
One RetroUSB NES controller interface is $25 and you have to send them the controller. The controller will never be useable on a NES again. Sacrifising a NES controller like that is like taking a crap on a national monument, or desicrating the USA flag! It will be less $$ to built the LPT interface, and the controller can be mated back to the original connector (or you can just make the right controller spocket).
www.bsodtv.org - Hacking is NOT a crime!
-
xriverfalconx
- Posts:481
- Joined:Tue Jul 19, 2005 12:57 pm
- Location:Vana'Diel - Titan Server
- Contact:
Wow...I wouldn't go THAT far.One RetroUSB NES controller interface is $25 and you have to send them the controller. The controller will never be useable on a NES again. Sacrifising a NES controller like that is like taking a crap on a national monument, or desicrating the USA flag! It will be less $$ to built the LPT interface, and the controller can be mated back to the original connector (or you can just make the right controller spocket).
Okay! I wanna try this with an SNES controller (being that's all I have with me at the present time).
Can you give me a list of just about everything I'll need to do this? Just wanna make a box that'll support one controller (testing purposes) to see how it works and how I should be connecting this. Thanks!
EDIT::: Nevermind...I found what I need. Gonna get to work now!!!
Another thing, I looked at the Retrogame controller thingy, and they have 2 options. One, send it to them and they'll do it for a price, OR you can purchase the kit and do it yourself for $17. Just wanted to point that out...I'm still going to make it via the printer port. =) Gotta wait for Radioshack to open now.
<a href="http://www.gmrealm.us">http://www.gmrealm.us</a>
-PC Modification Project- (special thanks to Foxx373) - Complete-
-WIP- mT16P (Portable Turbo Grafx 16)
-PC Modification Project- (special thanks to Foxx373) - Complete-
-WIP- mT16P (Portable Turbo Grafx 16)
-
xriverfalconx
- Posts:481
- Joined:Tue Jul 19, 2005 12:57 pm
- Location:Vana'Diel - Titan Server
- Contact:
Damn!!! I wanna test this out but can't because of stupid restrictions at work and I cannot download the plugin to test this crap out...=( gotta wait til tomorrow.
<a href="http://www.gmrealm.us">http://www.gmrealm.us</a>
-PC Modification Project- (special thanks to Foxx373) - Complete-
-WIP- mT16P (Portable Turbo Grafx 16)
-PC Modification Project- (special thanks to Foxx373) - Complete-
-WIP- mT16P (Portable Turbo Grafx 16)
here is a ghetto-tastic way of making a controller port... this doesnt work for ALL consoles, like PSX. (This is more of a Nintendo specific thing, since other consoles use standard DB Connectors)
Parts:
Paper Clips (all metal)
Hot Glue, or Epoxy, or JB-weld, or play-doh, or Putty Epoxy
Some wire
usual interface parts
Soldering Iron
Solder
Wire Cutters (to cut paperclips)
Needle Nose Pliers
Straighten some paper clips. Insert them into controller. Cut some excess of, leave about 1 inch or so. Make little loops at the ends of the paper-clips. Remove them fromt he controller, and solder them (tinning works fine, or run some wires). Put the paper-clips back in, and use your glue to make a solid chunk to hold them all in place.
Nuff' said. Its gay, its ghetto, but it works. Use Epoxy Putty and smooth it out with a wet finger, and it looks decent.
I didnt get asfar enough into the page to see the $17 interface, i was too disgusted when I saw the costs. To tell you the trouth, they are probabbly using a PIC MCU that has USB support, which costs about $6. You just need to know how to code it (not that hard for any season'd programmer)
www.bsodtv.org - Hacking is NOT a crime!

-
xriverfalconx
- Posts:481
- Joined:Tue Jul 19, 2005 12:57 pm
- Location:Vana'Diel - Titan Server
- Contact:
Before I left work, I found a PC that allowed me to get the files i needed. I plugged it all in and the stupid thing WORKED!!! WAHOO!!! I just need to get some form of sticker like thing over it and I'm done with that part. Tomorrow, I'm gonna make the controller port for the SNES only being thats the only controller I have. 
I'm kinda doing a half ass job on a lot of this ONLY because I want to get a new case. Once I have the new case, I'll redo some of this stuff and make it look more professional. I just need to run through xoxide.com and pick the one I like most for this project. Almost done though...ALLLMOST done!
EDIT:::
@ Madcow: after you build the interface connection, yeah, you can just plug it in and play away! I'm going to build it tomorrow, so if you wanna hold off a bit, I can get back to you and anyone else on how to properly accomplish this.
<a href="http://www.gmrealm.us">http://www.gmrealm.us</a>
-PC Modification Project- (special thanks to Foxx373) - Complete-
-WIP- mT16P (Portable Turbo Grafx 16)
-PC Modification Project- (special thanks to Foxx373) - Complete-
-WIP- mT16P (Portable Turbo Grafx 16)
Yeah MadCow, its really simple. About $5 of parts from radio shack, or $0 if you scrap them from something. All you really need is 5 small signal or switching diodes, a printer port connector and hood. If you dont want to cut your controller, you will need to build or buy the mating connector. Most NON-Nintendo connectors are dtandard D-Subs which can be scrapped from computers or purchased from RatShack. Nintendo connectors can be made from paper-clips and hot glue.
Install the drivers, plug the interfaced controller in and you are good to go. Almost any classic console controller right there on your PC.
If you cant build this interface, you shouldnt be here... its THAT simple! The hardest thing about this is how to "design" the interface, but everything can fit into a hood. If you make an actual adapter, thats where design questions come in...
www.bsodtv.org - Hacking is NOT a crime!
-
xriverfalconx
- Posts:481
- Joined:Tue Jul 19, 2005 12:57 pm
- Location:Vana'Diel - Titan Server
- Contact:
Okie dokie!!! Here we go!!!
SNES CONTROLLER:::
That was pretty easy to do...about one hour, tops mainly cause I kept getting pulled aside to help others at work.
PC::: Everything is ALMOST complete...like I explained before, it's a half-ass job ONLY because I wanna do this on another case that's better looking and not banged up like this one.
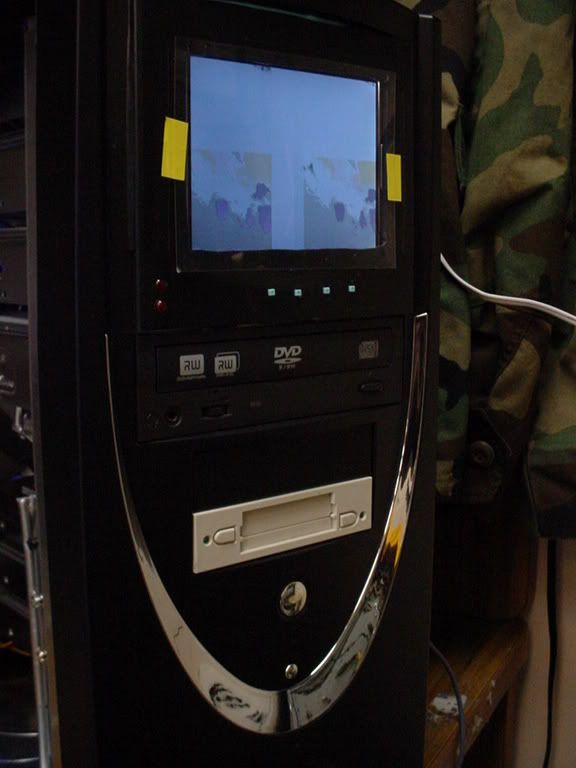
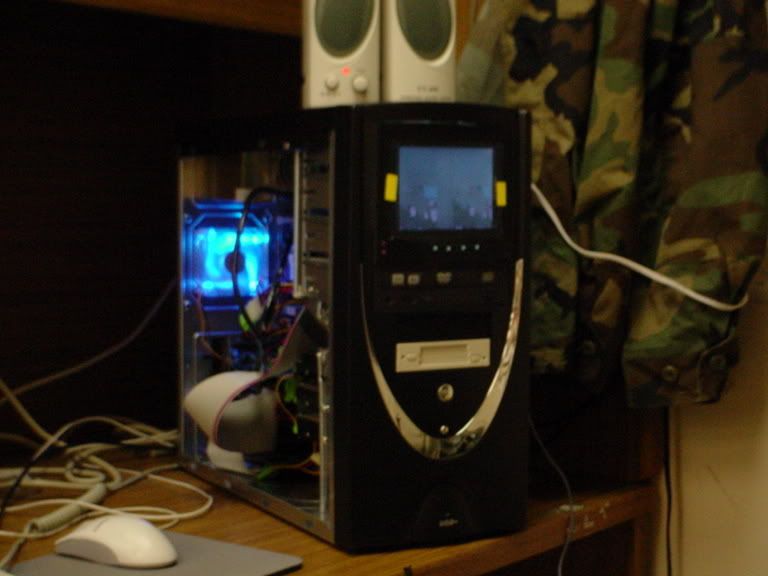

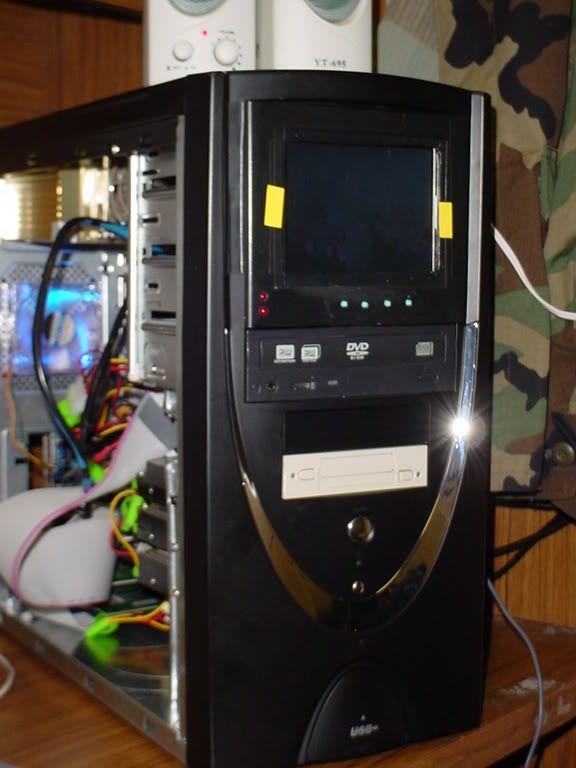
Oh...don't ask about the screen. I know the problem, and I'm fixing it up right now. Just wanted to show what's done.
COMMENTS OR MORE IDEAS????
SNES CONTROLLER:::
That was pretty easy to do...about one hour, tops mainly cause I kept getting pulled aside to help others at work.
PC::: Everything is ALMOST complete...like I explained before, it's a half-ass job ONLY because I wanna do this on another case that's better looking and not banged up like this one.
Oh...don't ask about the screen. I know the problem, and I'm fixing it up right now. Just wanted to show what's done.
COMMENTS OR MORE IDEAS????
<a href="http://www.gmrealm.us">http://www.gmrealm.us</a>
-PC Modification Project- (special thanks to Foxx373) - Complete-
-WIP- mT16P (Portable Turbo Grafx 16)
-PC Modification Project- (special thanks to Foxx373) - Complete-
-WIP- mT16P (Portable Turbo Grafx 16)
Lookin' GOOD! Are you adding in the Winamp Control (is that what the 4 light blue square buttons for)? and whats the beige thing... tape drive? And how about onboard speakers (built into the case)?
www.bsodtv.org - Hacking is NOT a crime!