Laptop style N64

Includes but not limited to: SNES, Genesis, Sega CD, PlayStation 1, Nintendo 64, Dreamcast, Game Gear and I guess the Virtual Boy.

Moderator: Moderators

evilteddy
Portablizer
Posts: 423
Joined: Tue Mar 25, 2008 2:11 am
360 GamerTag: Kirren of Smeg
Steam ID: kizzinator
Location: Newcastle, Australia

Laptop style N64

Post by evilteddy »

I've been looking around the N64 scene for a while now and just recently saved enough money to start a portable. So far my screen is on the way and I have relocated the cart slot and hooked the power and the video out to the motherboard.

Image

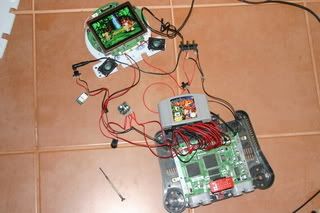
I seem to remember Bacteria asking a while back if you can use the dimension engineering 3.3V voltage regulators. These are the ones I am using and they work very well. They are accurate to .01 of a volt either side of what you set however I had to use two in parallel because I am using the expansion pack.

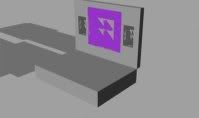
A possible design I've come up with is this-

ImageImageImage

I want to have a laptop because I think it will be more comfortable to have a portable that sits on your knees while you play it when you are on public transport or in the car, the case is square and consequently easy to make and make look good (hinges disregarded) finally I want it to look slightly like a big DS.

Just a couple of questions-

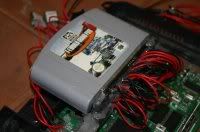
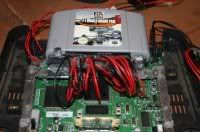
1. Can you run the expansion pack without its case on to shrink the height of the board or is the whole design integral to cooling the thing.

2.Can you spray paint acrylic. I have a big sheet of perspex/acrylic but it is scratched and what with hot glue and spaghetti central I do not want it to stay clear and see through.

3.Will a dremel tool cut long cuts in acryllic. I know Bacteria did the button holes on his portable with a dremel tool but are they up to cutting sheets for the case out or should I just use a jigsaw.

4.I was planning on using 7 D nimh 1000 mAh batteries. I think this will give me about 13 hours of game play but I've probably miscalculated. Is 7 D batteries overkill or a nice amount and how much power does the psone screen without the LED mods.

Finally thanks to everyone who has added to the wealth of knowledge on the forums particularly Bacteria, the sticky is great.
Tibia
Posts: 1319
Joined: Thu Feb 28, 2008 2:02 pm
PSN Username: Tibia1013
Steam ID: Mulder101361
Location: Istanbul, not Constantinople
Contact:

Post by Tibia »

I'll answer what I can...

2. Acrylic can be spray painted. I would strongly recommend Krylon's Fusion spraypaint. I've used it on all types of plastic, acrylic included, and I've gotten some amazing results. I have no complaints with it at all.

3. It is possible to do long cuts in acrylic, but to get them straight, you need to have a very steady hand. It's easier on a jigsaw, I think. I don't know what method Bacteria uses. I would recommend running a line of tape along the cut and using a very fine blade to reduce chipping and cracking as much as possible. Take it slow.


Good luck!
bacteria
Portablizer Extraordinaire
Posts: 3984
Joined: Fri Apr 20, 2007 12:14 am
Location: Hampshire, UK
Contact:

Post by bacteria »

evilteddy - Great to see you are having a go.

What are the voltage regulators you refer to (link?), what amperage are they?

1) Yes you can, but you need to put heatsinks on the chip, you can't trim much off the expansion pack board, but you could try to relocate it.

2) You can spray paint the reverse side of the plastic if you like, protects the paint - I did this on my Nintendo 64 Advance project. Or better still, use the stuff Tibia suggests (I haven't used it before).

3) Yes, I sometimes score lines in perspex and crack it lightly, however it often splits where it shouldn't, so I use a double method to cut straight lines - firstly run a drill near the edge you want, then secondly use a sanding attachment (12mm ideal) on a Dremel to trim it down to a straight line. I use this method a lot.

4) No chance - use 6 cells, you need far far more than 1000mAh; you will be lucky to get more than a few minutes with those! Go for Li-ions, or Li-po batteries; if you must use NiMH, use two sets of 6 x 2700mAh in parallel - you might get about 3 hours maybe. In my project I am using two camcorder Li-ions, 4400mAh each, in parallel (7.4v each), total 8800mAh - should give about 5-6 hours use between recharges. NiHM cells lose a lot of charge even when not being used, I have gone off using them now!!

Many thanks for your kind comments BTW. Follow my current project (I will be stripping apart a new N64 in the next days).


Tibia - A jigsaw is rather brutal and is likely to damage the perspex by splintering it at the edges. My method? as above! I get very straight cuts with my method.
Image
Tibia
Posts: 1319
Joined: Thu Feb 28, 2008 2:02 pm
PSN Username: Tibia1013
Steam ID: Mulder101361
Location: Istanbul, not Constantinople
Contact:

Post by Tibia »

Bacteria-

I'll have to try your method. May I ask what type of blade you've used on a jigsaw? I use as fine a tooth as I can get (carbide works great!) and as fast a speed as I can manage. I mark my cuts with tape, and I more or less "melt" through the stuff.

I really want to try your method now. It sounds a lot like the commercial wall-mounted rigs. I used to have access to one when I worked in a hardware store. Those things were wonderful!
evilteddy
Portablizer
Posts: 423
Joined: Tue Mar 25, 2008 2:11 am
360 GamerTag: Kirren of Smeg
Steam ID: kizzinator
Location: Newcastle, Australia

Post by evilteddy »

Sorry I made a mistake on the batteries. They are actually 10 000mAh nimh rather than 1000mAh. Why would I use 6(1.2 * 6 = 7.2V) rather than 7(1.2 * 7 = 8.4). Can the psone screen run off 7.2 volts? If im correct-

8800 * 7.4 = 65W

1.2 * 7 * 10 000 = 84W.

So going by what you say I should get about five hours. As for the lithium batteries. I don't really feel confident enough about them but I'll check them out before I buy nimh.

Thanks for all your help.
evilteddy
Portablizer
Posts: 423
Joined: Tue Mar 25, 2008 2:11 am
360 GamerTag: Kirren of Smeg
Steam ID: kizzinator
Location: Newcastle, Australia

Post by evilteddy »

Sorry I made a mistake on the batteries. They are actually 10 000mAh nimh rather than 1000mAh. Why would I use 6(1.2 * 6 = 7.2V) rather than 7(1.2 * 7 = 8.4). Can the psone screen run off 7.2 volts? If im correct-

8800 * 7.4 = 65W

1.2 * 7 * 10 000 = 84W.

So going by what you say I should get about five hours. As for the lithium batteries. I don't really feel confident enough about them but I'll check them out before I buy nimh.

By the way the voltage regulators are dimension engineering de Sw033s and they provide 1 amp each. two in parrallel gives me two amps.
They are foundhere

The topic you asked about them is here

Thanks for all your help.
bacteria
Portablizer Extraordinaire
Posts: 3984
Joined: Fri Apr 20, 2007 12:14 am
Location: Hampshire, UK
Contact:

Post by bacteria »

Tibia - I don't use a jigsaw, as I mentioned I use a standard drill bit (this also ments the plastic a bit) and also a sanding attachment on the Dremel. No jigsaw.


evilteddy - 10000mAh is great! Yes, the PSone screen runs happily off 7.2v, under 6.9v and the screen dies.

Problem with NiMH cells are:

1) Yes they say 1.2v, however they recharge to about 1.4v so 7 x 1.4v = 9.1v, or even 9.3v, which can blow your PSone screen (9v and over can blow the PSone screen, unless you regulate it). That is why 6 is better, as 6 are safer, however they don't last as long as of course 7.

2) NiMH (as I discovered), lose voltage soon after recharge, in fact, after a few days, they can lose about 30% of their charge even if not used. This is a pain. You don't know how long they will last for playtime when you are using them.

3) NiMH will try to recharge the other cells all the time, so worse batteries will make the better ones under perform. You can use diodes, but this reduces the voltage.

4) Weight and size (if using sets in parallel).


I am a new convert to Li-ions, but have got fed up with NiMH batteries (apart from low drain appliances). Li-ions do not lose charge and maintain high voltage until they run out of juice, then the voltage drops (that's what I am advised anyway).

If you look for Li-ions, you can get them from a company like this (I bought from them recently) URL here and you can get batteries with high mAh, especially if you put two in parallel. I'm not recommending that company, but you can see the dimensions of batteries and do your own Google for suppliers if you like.

I have only run my Li-ions for minutes at the moment, so they still have virtually full charge, it will be interesting how long my two in parallel last when driving my PSone screen, expansion pack and N64 together (8800mAh in total).
Image
Kyo
Senior Member
Posts: 2470
Joined: Tue Jan 02, 2007 11:59 am
Location: Germany

Post by Kyo »

putting a switch in there (recharge & use wall/no recharge & use batteries) would gently solve the problem.
evilteddy
Portablizer
Posts: 423
Joined: Tue Mar 25, 2008 2:11 am
360 GamerTag: Kirren of Smeg
Steam ID: kizzinator
Location: Newcastle, Australia

Screen has arrived

Post by evilteddy »

Well my psone screen arrived yesterday and the first thing I did was open it up. It all looked good so I soldered on the connections to it and turned it on. The backlight didn't work. After an hour I realised the regulator was set to 7.2V and that was the reason why it wasn't working. Works perfectly now.

Image

I still have to short the headphone leads and wire the video's ground to it but it is working pretty well at the moment. Big News- My parents just bought me a Dremel tool today as a present today (which is nice of them) so I can start marking the case and cutting out soon.

Kyo- The way I've designed it you will be able to-
-Charge while playing off the wall
-Not charge while playing off the wall.
-Play off batteries.
There is also a switch to switch between the playstation screen and composite out.

BacteriaPurchasing batteries is still about a couple of weeks off but I'll make sure to have a look at lithium batteries when I do go shopping for them. Those ones in the link look very light for their power.

Finally how much power will doing an LED mod save me because at the moment I'd estimate the whole thing is doing about 8W but I can't be too sure.

Thanks for all your help
evilteddy
Portablizer
Posts: 423
Joined: Tue Mar 25, 2008 2:11 am
360 GamerTag: Kirren of Smeg
Steam ID: kizzinator
Location: Newcastle, Australia

Case Upcoming

Post by evilteddy »

Well I had to get a replacement dremel tool because the first one carked it but as soon as I got home with my new one I used bacteria's method of opening the expansion pack and lo and behold it is tiny inside.
With that improvement I will try building the majority of the case on the weekend and pulling apart a controller to go in the main body of the thing though I might delay this if I can't get my hand on a controller.

I've decided that I will switch around my DE-SWADJ regulator so that I can put any number of batteries I like in from 8 volts up. This will be at the cost of about 10% of my battery life but will allow me to play from literally any battery. I will just squeeze a couple of more batteries in to make up for loss in battery life.

Just one question today. Do I need a fan to draw air across heatsinks or should I just go for a passive approach?
evilteddy
Portablizer
Posts: 423
Joined: Tue Mar 25, 2008 2:11 am
360 GamerTag: Kirren of Smeg
Steam ID: kizzinator
Location: Newcastle, Australia

cart slot relocation

Post by evilteddy »

I thought this deserved a new post.

I have finally mounted my relocated cart slot. The Dremel tool slices through metal like a hot knife through butter. I made sure I kept my hands out of the way. It's pretty sturdy and rigid. I tried to build in as much support as I could.
Image Image

I think I might put off the case until tommorrow.
Life of Brian
Moderator
Posts: 2867
Joined: Wed Aug 03, 2005 5:55 pm
Location: Oklahoma
Contact:

Post by Life of Brian »

Cool! Looks like you're moving right along.
dragonhead wrote:sweet. ive spent a third of my life on benheck!
Image
evilteddy
Portablizer
Posts: 423
Joined: Tue Mar 25, 2008 2:11 am
360 GamerTag: Kirren of Smeg
Steam ID: kizzinator
Location: Newcastle, Australia

Case

Post by evilteddy »

Because I am making my portable into ds style laptop it will have two rectangular cases. One for the top and one for the bottom. The top will contain the screen and speakers and I haven't started work on the case yet. I have started making the bottom which will contain the rest of the guts of the portable and will have a controller built into it. Pictures of the bottom half-
Image 
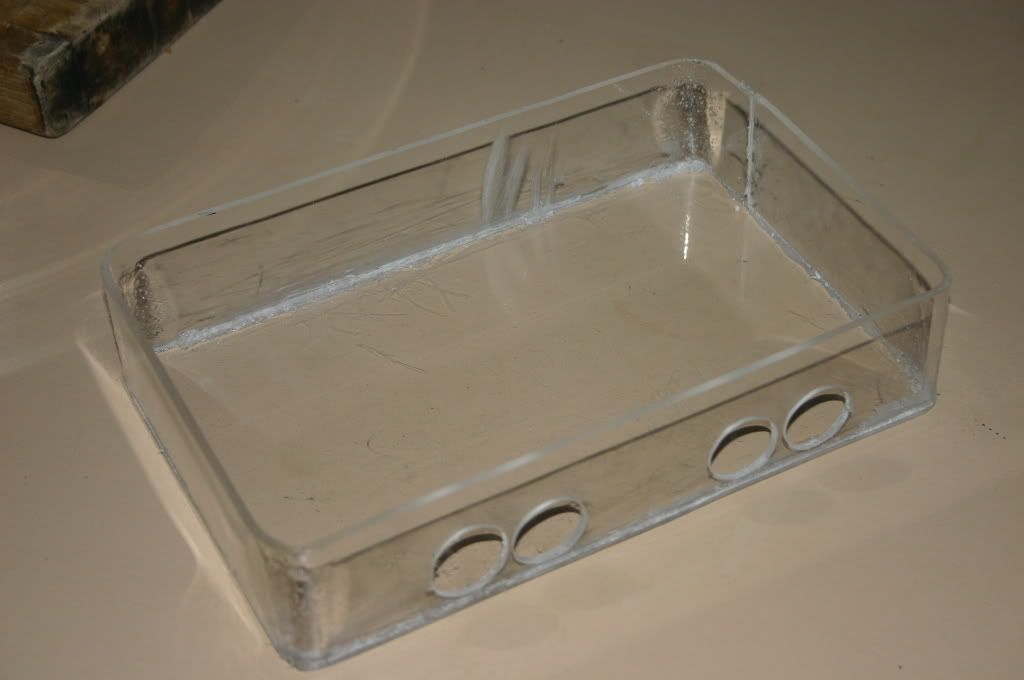
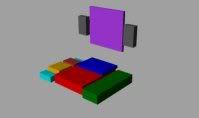
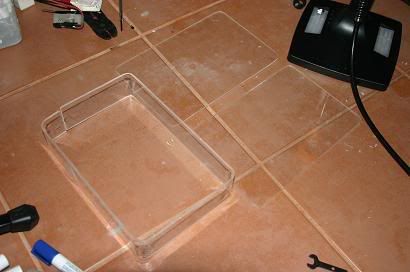
This is the panels of the case ready to go together.
ImageImage
And what I did with the rest of the afternoon. Still quite a lot to go but I think I've had a good start on the case today. I cut out the acryilic with a jigsaw and a fine blade and the controller ports were done with my Dremel. The case was glued together with hot glue. I may leave it clear so you can see the innards.

Life Of BrianThanks I'm trying to finish before all my school assignements are due so I don't inevitably neglect my studies.
Life of Brian
Moderator
Posts: 2867
Joined: Wed Aug 03, 2005 5:55 pm
Location: Oklahoma
Contact:

Post by Life of Brian »

Hey that's starting to look pretty cool! I like it.
dragonhead wrote:sweet. ive spent a third of my life on benheck!
Image
Post Reply