PlayMad finished! (page 7)
Moderator:Moderators


-
CronoTriggerfan

- Moderator
- Posts:4131
- Joined:Fri Jan 27, 2006 3:07 pm
- Location:University of Michigan - Ann Arbor
- Contact:


It's held on with three metal screws. I don't see that going anywhere soon. And the drive itself isn't really fragile. The laser is, but a lid isn't going to help that really. In order to keep this as small as possible, I couldn't put a lid on. Plus, the whole CD-spinning-in-front-of-your-face deal is pretty awesome to see! Why manufactures try to hide the CD behind non-see-through plastic I never understood. If there were a clear plastic CD player made, I'd buy it in a second.
Onto yet another late night update.
As you guys already figured out, the glossy paint sucked bad. Even after wet sanding and another coat, there were still scratches showing up and the textured plastic was also showing up in various places. Enter semi-flat krylon spray paint. I sanded the case with 400 grit wet-sand sandpaper and did a few coats. It looked MUCH better! But there were still a few places that slight cracks were showing, so after a few episodes of sanding, painting, sanding, painting, I did one last coat and it was done.
Overall there are 3-4 coats of primer on here, all sanded after each coat. And 5 coats of paint with sanding after each one, but two of those were sanded down (the glossy black coats). I never added up how much time I spent on the paint, but I'm sure it was a lot.
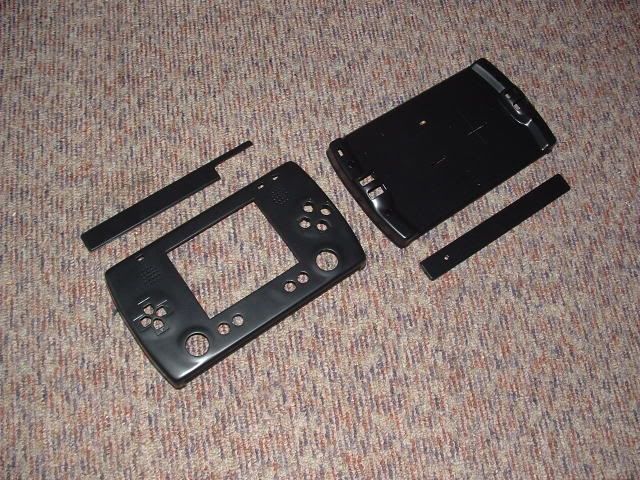
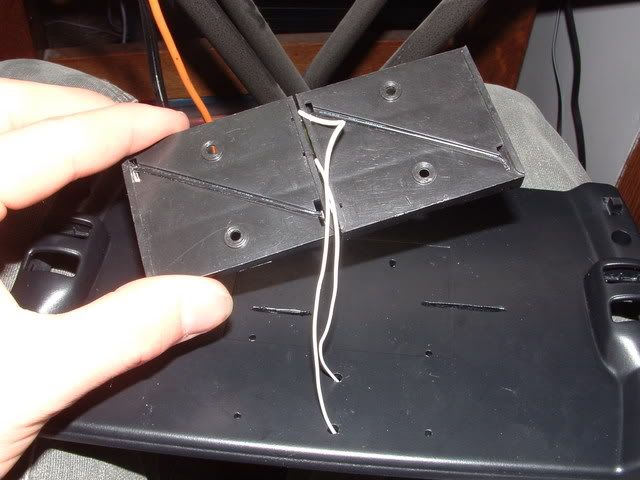
The two pieces in there are the top and bottom side pieces. The one with the hole in it is the bottom on, and the hole is for the hand strap I will be adding. The other is obviously the top, and the part cut out there is for the player 2 port.

This is just a loose mock-up with the buttons in, and upside down to keep them from falling out (like my ceiling?)
I lost the analog button, so I need to go get another controller tomorrow at the game store. Then I'll find something to do with the rest of the controller later, so it won't be a total waste of $5. I hate losing things, and it was already a rough day, so that put me into a mood where I didn't think I should get into soldering anything.
I've written out and traced everything I need to cut on the controller, so it should be a breeze to wire this thing up. Hoping to be done by tomorrow evening, then it will just be test playing to see if anything falls apart
Onto yet another late night update.
As you guys already figured out, the glossy paint sucked bad. Even after wet sanding and another coat, there were still scratches showing up and the textured plastic was also showing up in various places. Enter semi-flat krylon spray paint. I sanded the case with 400 grit wet-sand sandpaper and did a few coats. It looked MUCH better! But there were still a few places that slight cracks were showing, so after a few episodes of sanding, painting, sanding, painting, I did one last coat and it was done.
Overall there are 3-4 coats of primer on here, all sanded after each coat. And 5 coats of paint with sanding after each one, but two of those were sanded down (the glossy black coats). I never added up how much time I spent on the paint, but I'm sure it was a lot.
The two pieces in there are the top and bottom side pieces. The one with the hole in it is the bottom on, and the hole is for the hand strap I will be adding. The other is obviously the top, and the part cut out there is for the player 2 port.
This is just a loose mock-up with the buttons in, and upside down to keep them from falling out (like my ceiling?)
I lost the analog button, so I need to go get another controller tomorrow at the game store. Then I'll find something to do with the rest of the controller later, so it won't be a total waste of $5. I hate losing things, and it was already a rough day, so that put me into a mood where I didn't think I should get into soldering anything.
I've written out and traced everything I need to cut on the controller, so it should be a breeze to wire this thing up. Hoping to be done by tomorrow evening, then it will just be test playing to see if anything falls apart


wow glad you changed the paint it looks waaaaay better now and the mockup looks awesome though i dont particularly like the use of ps2 buttons for the screen, but im stupid and im not the one buying this thing anyway. so could you tell me again, in total for how much money would you make me one of these with a modchip in it?
Kurt_ wrote: I would use tact switches but I want the mushy feel. Mushy = God. (I typed that correctly).

-
CronoTriggerfan
- Moderator
- Posts:4131
- Joined:Fri Jan 27, 2006 3:07 pm
- Location:University of Michigan - Ann Arbor
- Contact:
-
TheOnlyOneHeFears

- Portablizer
- Posts:396
- Joined:Mon Oct 16, 2006 9:53 am
- Location:Here be Dragons!


@Skyone: I'm glad I can pass for a human!
@dudex77: I'm not going to make any more projects for people until the school year is over, sorry. It's just too tricky to fit inbetween everything.
@ ATOMICMAN:The paint switch was definitely a good idea. In retrospect O probably should have tried the paint before using it on the case, but who knew it would be so... downright ugly.
@ ChronoTriggerfan: Fer sure! It'a quite an improvement over my old PS1P. Sorry old chap, but you're crap.
@TheOnlyONeHeFears: Isn't it though! Since I painted over the mold stains I just can't stop looking at how awesome a ceiling it is. I wish it was possible to hug it, but... its not.
@Rellizate: You know, I would man, but that UK shipping cost is killer...
Been wiring for the past two days... Over 8 hours at least of working time so far, most of it just figuring out how I'm going to get this to be able to close
I'll jsut go over a basic list of what I've done so far.
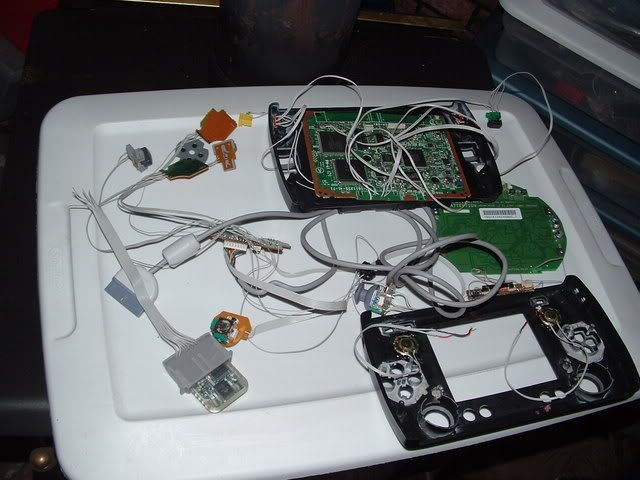
Extened the speaker wires and glued them in. wires need covered in electrical tape still.
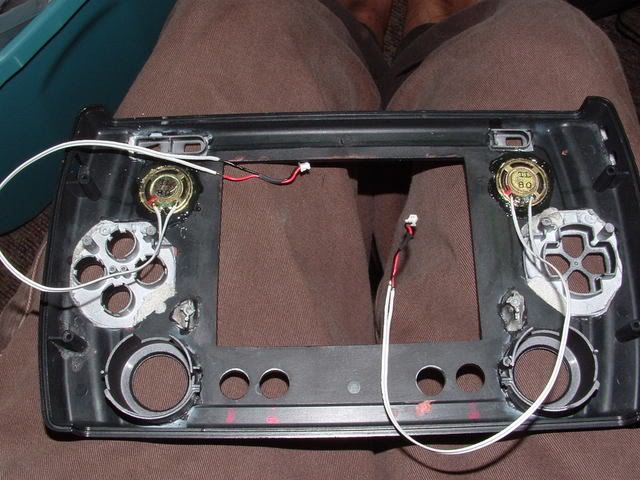
I cut off the analog PCB's from an old PSX controller, and then put the analog sticks on that. Makes it easier to glue them in that way. Then I wired those and the other cut boards and buttons to the controller board. What a pain that was with those tiny contacts and dangly wires.. And I still managed to switch the X and O buttons somehow I kept the controller plug attached for now so that I could test this on another PSone, that way it's easier to move about if I need to fix something.
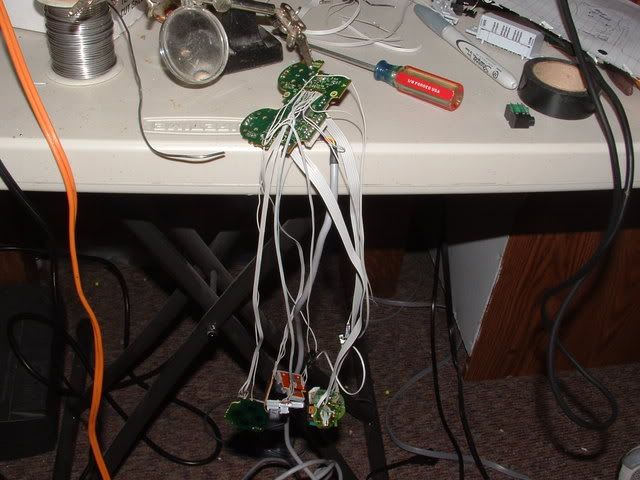
As ben used in the PS2p, I used ATA hard drive solid wire for the button traces, would have been very hard without it since I'd need to buy some solid wire somewhere online and use single strands of wire(more messy). This cable I got for free from a local college that was cleaning out their old PC's. <monster garage>FREEBIE!</monster garage>
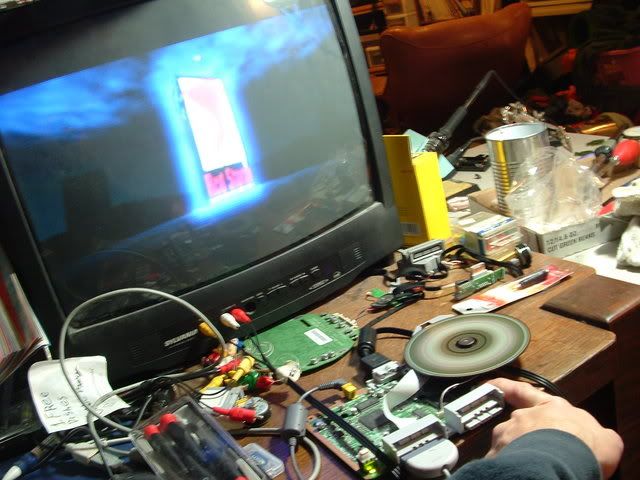
Now this was lucky! I needed a way to extend the laser units cable since it was too short to plug into the motherboard through the plastic case. I didn't want to do it by hand soldering all those wires, as that would be quite hard and risky. So I dug through my pile of crap I keep behind the wood stove, and I find an old busted CD player, and inside it a cable matching the PSone's perfectly! Thank you Sony, for at least once using a normal cable. So I all I did then was line it up with the other cable on the laser, glue the two together with hotglue and piece of plastic as backing, then solder them together.
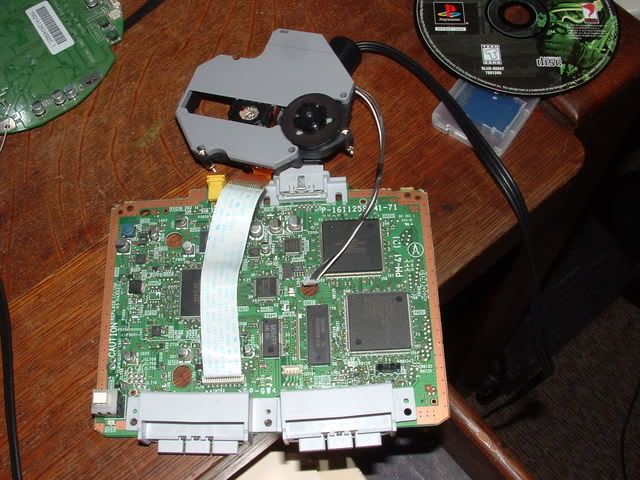
Much to my delight, it worked! (thats the rainbow six startup video. the game played fine too)
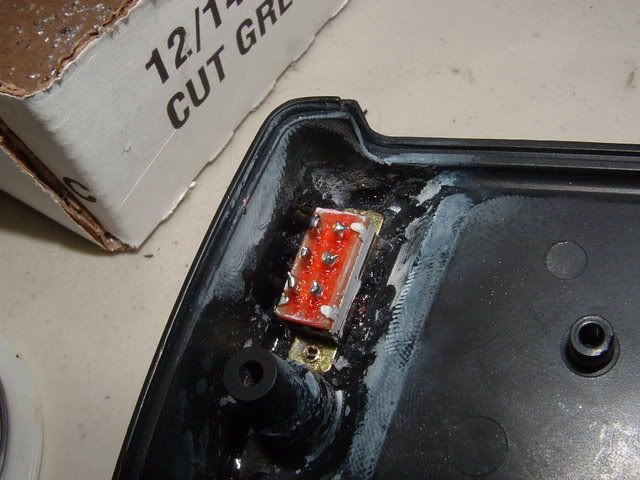
I superglued both switches for power and CD lid switch in. This went badly, as I almost superglued the switch shut from a bit of it running into the switch. I frantically switched it back and forth for minutes straight to keep it from setting and it eventually turned into a half-dry goo that I just pulled out. Works fine still. *phew*
Then I installed the battery holders. After adding a wire to make them go in series, I soldered the other wires on and put them through the previously drilled holes.
Then I put hot glue on the underside of the holders and stuck them on there like you would a sticky grenade, fast! That glue hardens quick I tell ya. Then I just stuck screws through and bolted them on the other side. Nice and sturdy.

Then the rest is just normal wiring. Power, video, sound, controllers, memory card, etc.
Not quite done there, but it's close.
I can't wait to hear that playstation logo show up with that *BROOOOWWOOOONNnnn.....ddddnnnn* music. Thats gotta be the best thing about the playstation, besides Metal Gear Solid. Sweet.
@dudex77: I'm not going to make any more projects for people until the school year is over, sorry. It's just too tricky to fit inbetween everything.
@ ATOMICMAN:The paint switch was definitely a good idea. In retrospect O probably should have tried the paint before using it on the case, but who knew it would be so... downright ugly.
@ ChronoTriggerfan: Fer sure! It'a quite an improvement over my old PS1P. Sorry old chap, but you're crap.
@TheOnlyONeHeFears: Isn't it though! Since I painted over the mold stains I just can't stop looking at how awesome a ceiling it is. I wish it was possible to hug it, but... its not.
@Rellizate: You know, I would man, but that UK shipping cost is killer...
Been wiring for the past two days... Over 8 hours at least of working time so far, most of it just figuring out how I'm going to get this to be able to close
I'll jsut go over a basic list of what I've done so far.
Extened the speaker wires and glued them in. wires need covered in electrical tape still.
I cut off the analog PCB's from an old PSX controller, and then put the analog sticks on that. Makes it easier to glue them in that way. Then I wired those and the other cut boards and buttons to the controller board. What a pain that was with those tiny contacts and dangly wires.. And I still managed to switch the X and O buttons somehow
As ben used in the PS2p, I used ATA hard drive solid wire for the button traces, would have been very hard without it since I'd need to buy some solid wire somewhere online and use single strands of wire(more messy). This cable I got for free from a local college that was cleaning out their old PC's. <monster garage>FREEBIE!</monster garage>
Now this was lucky! I needed a way to extend the laser units cable since it was too short to plug into the motherboard through the plastic case. I didn't want to do it by hand soldering all those wires, as that would be quite hard and risky. So I dug through my pile of crap I keep behind the wood stove, and I find an old busted CD player, and inside it a cable matching the PSone's perfectly! Thank you Sony, for at least once using a normal cable. So I all I did then was line it up with the other cable on the laser, glue the two together with hotglue and piece of plastic as backing, then solder them together.
Much to my delight, it worked! (thats the rainbow six startup video. the game played fine too)
I superglued both switches for power and CD lid switch in. This went badly, as I almost superglued the switch shut from a bit of it running into the switch. I frantically switched it back and forth for minutes straight to keep it from setting and it eventually turned into a half-dry goo that I just pulled out. Works fine still. *phew*
Then I installed the battery holders. After adding a wire to make them go in series, I soldered the other wires on and put them through the previously drilled holes.
Then I put hot glue on the underside of the holders and stuck them on there like you would a sticky grenade, fast! That glue hardens quick I tell ya. Then I just stuck screws through and bolted them on the other side. Nice and sturdy.
Then the rest is just normal wiring. Power, video, sound, controllers, memory card, etc.
Not quite done there, but it's close.
I can't wait to hear that playstation logo show up with that *BROOOOWWOOOONNnnn.....ddddnnnn* music. Thats gotta be the best thing about the playstation, besides Metal Gear Solid. Sweet.
-
blackbox_dev

- Senior Member
- Posts:1906
- Joined:Sun Jan 15, 2006 5:19 pm
- Location:Formerly known as iam7805
Hells yeah!G-force wrote:I can't wait to hear that playstation logo show up with that *BROOOOWWOOOONNnnn.....ddddnnnn* music. Thats gotta be the best thing about the playstation, besides Metal Gear Solid. Sweet.
Btw, it's looking awesome! Your awesome at case work. Nice trick for the ribbon cable, too.
I'd imagine right now you wish you were a cuttlefish...
-
Gamelver

- Moderator
- Posts:3352
- Joined:Sun Apr 04, 2004 9:03 pm
- Location:in my basement, to forever work on portables ;)
- Contact:
Wow....Sony, with all its resources, could not have done better  !
!
You truly are the Bondo King of Benheck. I'm using bondo for my latest portable, and paint and all that, but I still can't get it to look that good!
Of course, I don't have that nice putty Bondo, but still...
I can't wait to see this finished, G-force
You truly are the Bondo King of Benheck. I'm using bondo for my latest portable, and paint and all that, but I still can't get it to look that good!
Of course, I don't have that nice putty Bondo, but still
I can't wait to see this finished, G-force
Without games my life would have no meaning.
Well, I guess it would, but it would be a lot less fun!!!!!!!

Well, I guess it would, but it would be a lot less fun!!!!!!!

Wow thats some awesome work you got there G-force! I actually bought some epoxy putty for myself  Is that the same as bondo putty? I still have yet to find any spot putty, the thing I use is automotive bondo which comes in a big can.
I cant wait to see the finished product! Keep it up.
I cant wait to see the finished product! Keep it up.
Minktendo-Dead
Next portable: who knows
Next portable: who knows